


Are you tired of your bedroom door creaking, or perhaps it doesn’t close properly? A poorly functioning door can be a significant annoyance, but replacing it doesn’t have to drain your wallet! In this guide, you’ll learn how to install a bedroom door efficiently and affordably. By the end, you’ll have a fully functional door that enhances your privacy and style.
This step-by-step tutorial aims to teach you exactly what you need to know to install a new door without hiring a professional. You’ll learn about the tools required, how to measure accurately, and the installation process itself. Even if you’re a complete novice, you’ll find the instructions clear and easy to follow.
Difficulty Level: beginner
Estimated Time: 2-3 hours
Ready to take on this DIY project? Let’s get started and transform your bedroom without breaking the bank!
TL;DR Summary
- Gather materials and tools for the installation.
- Measure the door frame accurately to ensure a proper fit.
- Remove the old door and prepare the new one for installation.
- Install the new door, ensuring it swings correctly and aligns with the frame.
- Finish up with hardware installation and adjustments for a perfect fit.
Prerequisites/Materials Needed
- Tools:
- Measuring tape
- Screwdriver
- Drill
- Level
- Hinge template (optional)
- Materials:
- New door (36×80 inches standard size)
- Door hinges (3)
- Door knob/handle
- Wood screws
- Wood filler (if necessary)
Skill Level & Time Estimate
Skill Level: beginner
Total Time Estimate: 2-3 hours
Breakdown of time:
- Gathering materials: 15-30 minutes
- Measuring and cutting: 30-45 minutes
- Installation: 1-2 hours
Step 1: Measure the Door Frame
Begin by measuring the door frame to ensure the new door fits perfectly. Follow these steps:
- Use a measuring tape to measure the width and height of the door frame.
- Note the measurements down on a piece of paper.
- Double-check your measurements for accuracy.
Warning: Incorrect measurements can lead to an improperly fitting door, which may require additional time and cost to correct.
Why this matters: Accurate measurements are crucial for a smooth installation process. A door that doesn’t fit properly can lead to gaps, drafts, or difficulty in opening and closing.
Time estimate: 15-20 minutes
Step 2: Select the Right Door
Choosing the right door is essential for both aesthetics and functionality. Consider the following:
- Decide on the material (solid wood, hollow core, or fiberglass).
- Select a style that matches your interior design (full panel, half panel, or with glass).
- Check the door’s dimensions to fit your frame.
Pro Tip: If you’re unsure about the style, take a photo of your room and consult with staff at a home improvement store for advice.
Why this matters: The right choice affects not only the door’s functionality but also the overall appearance of your bedroom.
Time estimate: 30-45 minutes
Step 3: Remove the Old Door

Once you have your new door, it’s time to remove the old one. Here’s how:
- Open the existing door and support it with a door stop.
- Using a screwdriver, remove the screws from the hinges.
- Carefully lift the door off the hinges and set it aside.
Warning: Be cautious when lifting the door, as it can be heavy and awkward to manage. Ask a friend for help if necessary.
Why this matters: Clearing the old door is essential to make room for the new one and ensure the installation goes smoothly.
Time estimate: 20-30 minutes
Step 4: Prepare the New Door
Before hanging your new door, you need to prepare it. Follow these steps:
- Take the new door out of its packaging and lay it flat.
- Mark the location for the hinges using a pencil based on the old door’s hinge placements.
- Drill holes for the screws and install the hinges loosely first.
Pro Tip: Use a hinge template for precise placement of hinges.
Why this matters: Proper preparation ensures that the door hangs correctly and operates smoothly.
Time estimate: 30-45 minutes
Step 5: Hang the New Door
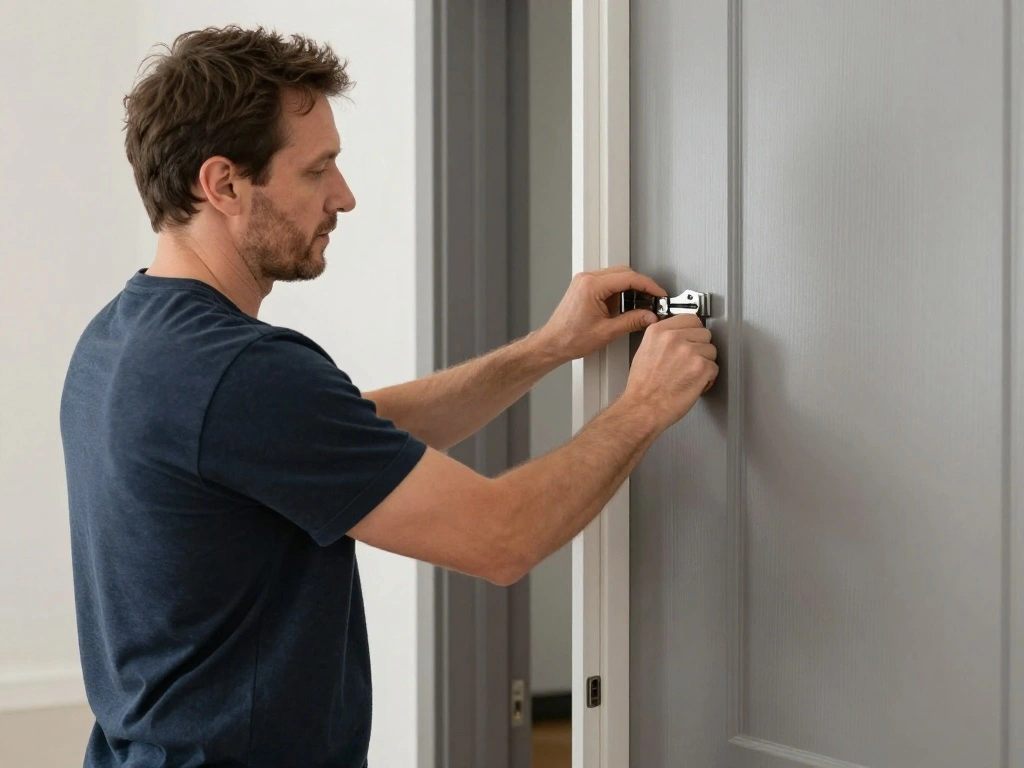
Now it’s time to install the new door. Here’s how:
- Lift the door and align the hinges with the hinge plate on the door frame.
- Insert the screws into the hinges and tighten them securely.
- Check that the door swings open and closes without any obstruction.
Warning: Ensure that the door is level before fully tightening the screws. Use a level to check alignment.
Why this matters: A properly hung door prevents future issues with alignment and functionality.
Time estimate: 30-40 minutes
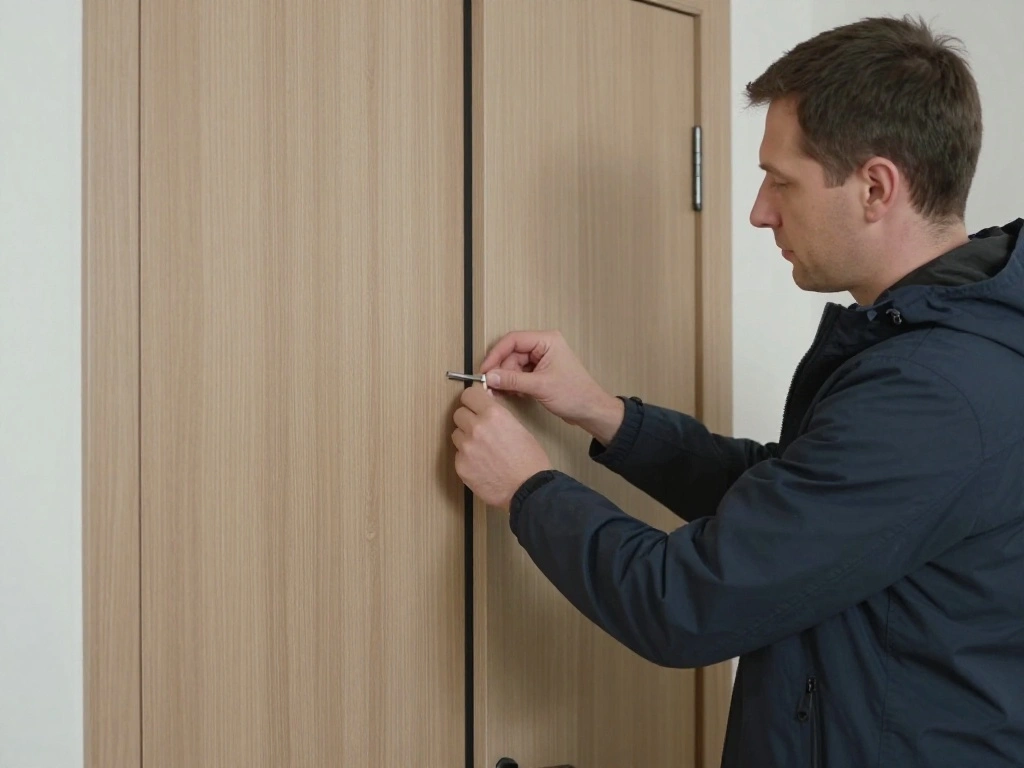
Step 6: Install the Door Knob and Lock
After hanging the door, you’ll need to install the door knob and lock. Follow these steps:
- Measure and mark where the door knob will go, typically about 36 inches from the floor.
- Drill a hole for the knob and a separate hole for the lock, if applicable.
- Install the door knob and lock according to the manufacturer’s instructions.
Pro Tip: Always test the knob and lock to ensure they function correctly before finishing the installation.
Why this matters: Proper installation of hardware ensures your door is secure and operational.
Time estimate: 30 minutes
Step 7: Make Adjustments as Necessary
After installation, you may need to make some adjustments for perfect functionality. Follow these steps:
- Check for gaps between the door and frame; adjust hinges if necessary.
- Use wood filler to fill any gaps or imperfections.
- Sand down any rough spots to ensure smooth operation.
Warning: Don’t over-tighten screws; this can warp the door.
Why this matters: Adjustments ensure the door closes properly and maintains a good seal.
Time estimate: 20-30 minutes
Step 8: Final Touches and Cleanup
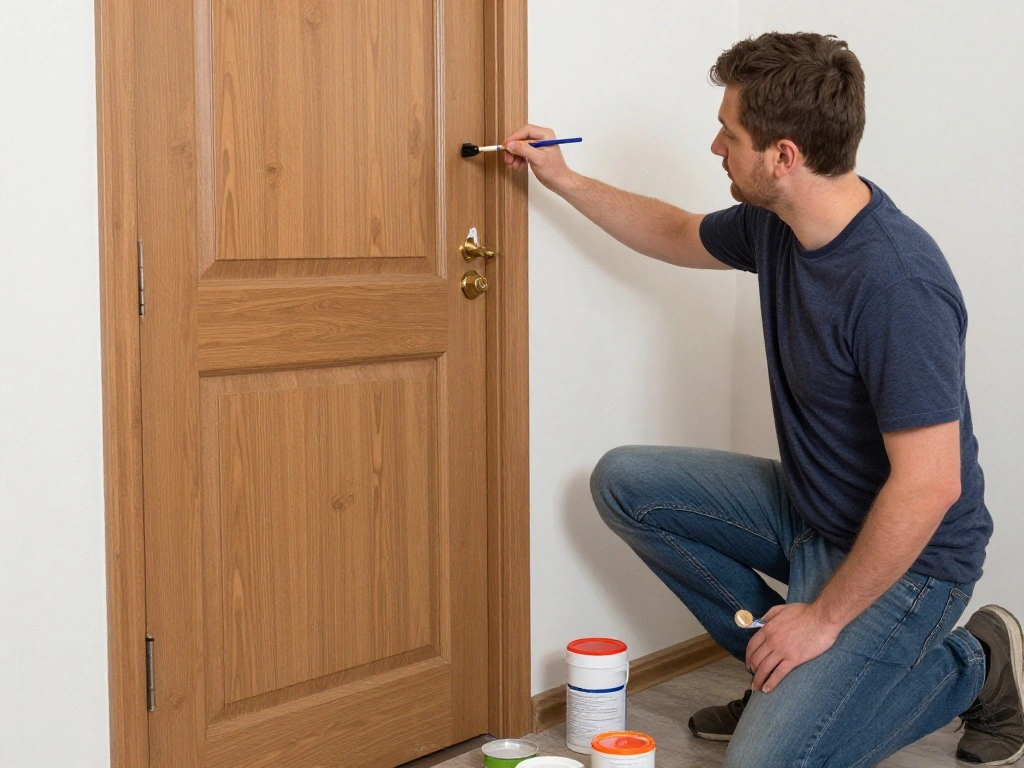
Finish up your project by adding the final touches. Here’s what to do:
- Repaint or stain the door if desired, ensuring it matches your decor.
- Clean up any dust or debris from the installation process.
- Step back and admire your work!
Pro Tip: A fresh coat of paint can transform your door and enhance your room’s aesthetic.
Why this matters: Final touches enhance the overall appearance and ensure your project is complete.
Time estimate: 30-45 minutes
Step 9: Test the Door Functionality
Before considering your project complete, test the door. Follow these steps:
- Open and close the door multiple times to ensure smooth operation.
- Check that the door knob and lock function properly.
- Make any last-minute adjustments if needed.
Warning: Don’t force the door; if it sticks, recheck measurements and alignment.
Why this matters: Testing ensures that everything works as intended and that your installation was successful.
Time estimate: 10-15 minutes
Pro Tips
- Measure Twice, Cut Once: Always double-check your measurements to avoid mistakes.
- Use a Friend: Having an extra pair of hands can make the installation process easier.
- Choose Quality Materials: Invest in good quality hinges and knobs for longevity.
- Keep Tools Handy: Organize your tools beforehand to save time during installation.
- Watch Tutorials: If you’re unsure of any step, there are plenty of online tutorials that can provide visual guidance.
Common Mistakes to Avoid
Warning: Incorrect Measurements: This can lead to gaps or a door that doesn’t fit. Always measure twice and consider a second opinion.
Warning: Forgetting to Check Level: A door that isn’t level will not function properly. Use a level tool to ensure accuracy.
Warning: Rushing the Installation: Take your time to ensure every step is done correctly to avoid future issues. Double-check each step before moving on.
Troubleshooting Section
Problem: The door does not close properly.
Solution: Check the alignment of the hinges and adjust them as necessary.
Problem: The door sticks when opening or closing.
Solution: Ensure that the door is level and check for any obstructions.
Problem: The knob or lock is not functioning.
Solution: Recheck the installation of the knob and ensure that it is correctly aligned.
Variations/Alternative Methods
- Pre-hung Doors: These come with the frame attached, simplifying installation. Best for replacing entire door frames.
- Sliding Doors: Ideal for smaller spaces, providing a different aesthetic and functionality.
- Bi-fold Doors: Great for closets or small areas, offering space-saving solutions.
FAQs
What if I don’t have the right tools? You can rent tools from home improvement stores if you don’t own them.
How long should I expect the installation to take? Expect to spend about 2-3 hours from start to finish.
Is it safe to install a door by myself? Yes, as long as you follow safety guidelines and take your time.
What type of door is best for a bedroom? Solid core doors are best for soundproofing and privacy.
Can I paint the door after installation? Yes, just ensure it’s dry before using the door.
Conclusion

Congratulations! You have successfully installed your new bedroom door without breaking the bank. Take a moment to appreciate your hard work and the transformation you’ve created in your space.
Now that you’ve completed this project, consider other DIY improvements you can make around your home. Whether it’s adding a fresh coat of paint or updating your hardware, there are plenty of ways to enhance your living space.
Keep up the fantastic work, and remember that with patience and practice, you can tackle any home improvement project!