
This season has me thinking about rooms that tell a story. A bedroom should feel like you, not just a place to sleep. Here is why I made this post: I want to help you build a wall that speaks your name. 30 photo wall ideas that tell your story beautifully.
If you care about personal style, small DIYs, or you just want a calmer space, this one is for you. You want a room that feels lived in, not staged, with little moments you can point to and smile at. That’s exactly what this collection aims to spark.
You’ll get ideas that are doable, budget friendly, and flexible for any bedroom. Think a neat grid of uniform frames, an eclectic mix of shapes and sizes, a travel timeline, or a single bold statement piece with a few favorites around it. These ideas work in big rooms and tight nooks, and most can be pulled off with things you already own or can grab on a weekend.
To help you start, consider three simple layouts: a crisp grid for a clean look, a loose gallery wall that breathes, and a vertical line that climbs the wall. Each approach lends its own mood, so you can pick what fits your space and your story. You can mix photos with art, prints, or even fabric swatches for texture.
Here is how you put it into action. Pick a memory or theme you want to highlight, then gather photos and art that fit that thread. Choose a color palette that feels right with your bedding and furniture. Test layouts on the floor or a sheet of paper before you commit to nailing things to the wall. Start with a simple plan and grow the wall over time.
Next steps. Start small and stay flexible. Choose three photos you love and a couple of frames you already have. Measure your wall, map out spacing, and try a temporary arrangement with tape or paper cutouts. If it clicks, hang it with care and adjust as your story grows. Save this post as a handy plan and come back for fresh ideas whenever you want to refresh your space.
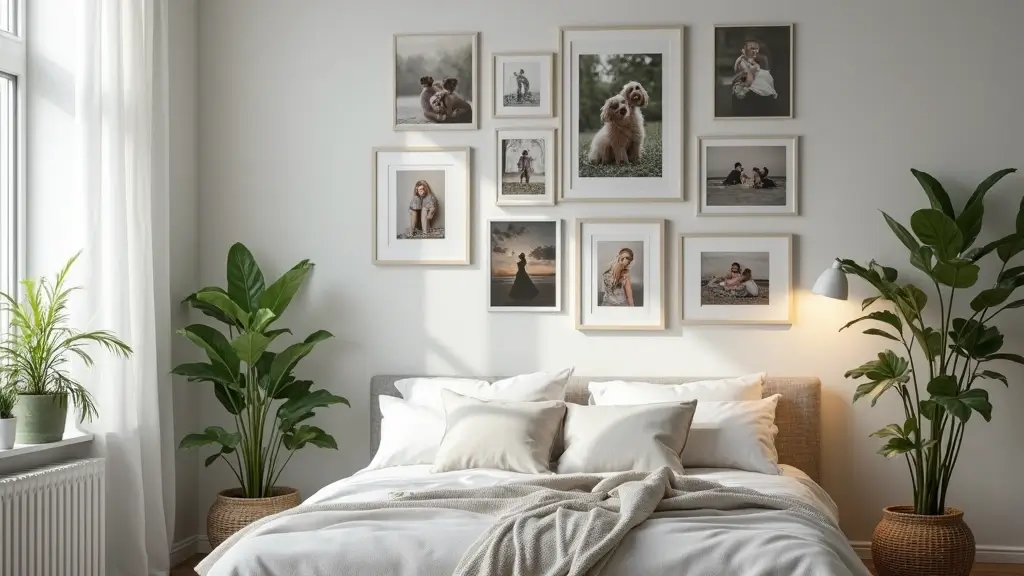
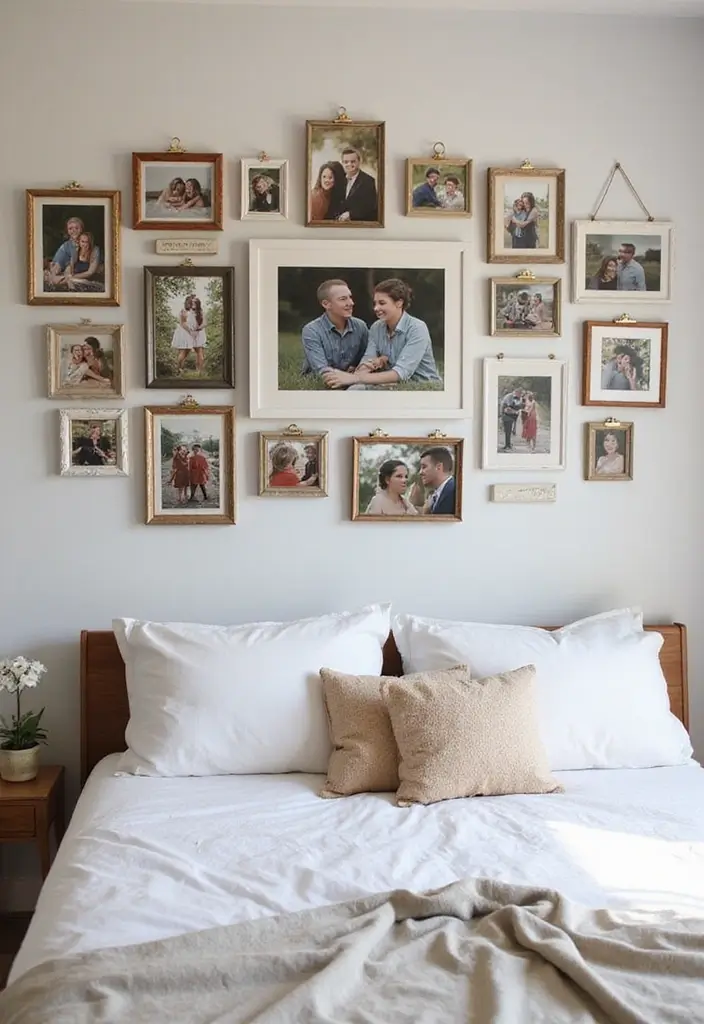
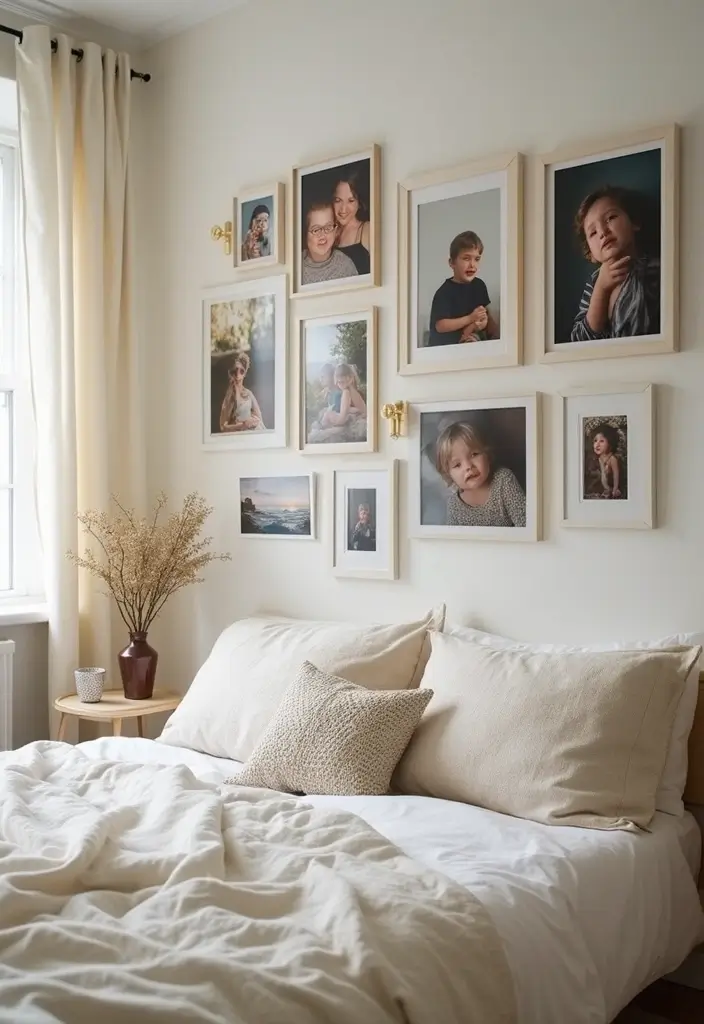
1. Family Journey Timeline

You want a bedroom wall that tells your family story. A photo wall that shows how you have grown, in a simple line. Here is how to build it. You’ll love the look when it fills your space.
– Pick 12 to 15 photos that mark big moments. A newborn, first steps, a school page, a vacation, a graduation.
– Arrange them left to right. The order should feel natural, like a book of your life.
– Use 3 or 4 frame sizes. Mix wood, metal, and color. A varied look adds depth.
– Keep a light mat around each photo so they pop. Use a similar color family to stay cohesive.
– Leave room to add new photos later.
– Leave about 2 inches between frames for clean lines.
– If you rent, use removable strips to protect walls.
– Choose portrait and landscape photos to add variety.
– Consider a light source that softens glare, like a lamp.
– Label the back of frames with dates for easier updates.
Next, plan the layout before you drill.
– Lay the frames on the floor to test spacing.
– Trace outlines on kraft paper and tape them to the wall to test the look.
– Start hanging from the middle photo and move outward for balance.
Then add small touches.
– A small clock, a plant, or a keepsake sits beside the row without crowding it.
– Add captions or dates in neat handwriting for a personal touch.
Tips:
– Use a shared color family for all frames.
– Vary frame sizes for rhythm.
– Keep captions short and clear.
– Use a level and tape measure to stay straight.
This wall becomes a living story you update as your family grows.
A photo wall is more than decor; it’s a timeline of love and growth. Choose your moments, arrange them like a story, and watch your bedroom transform into a beautiful narrative of your family journey!
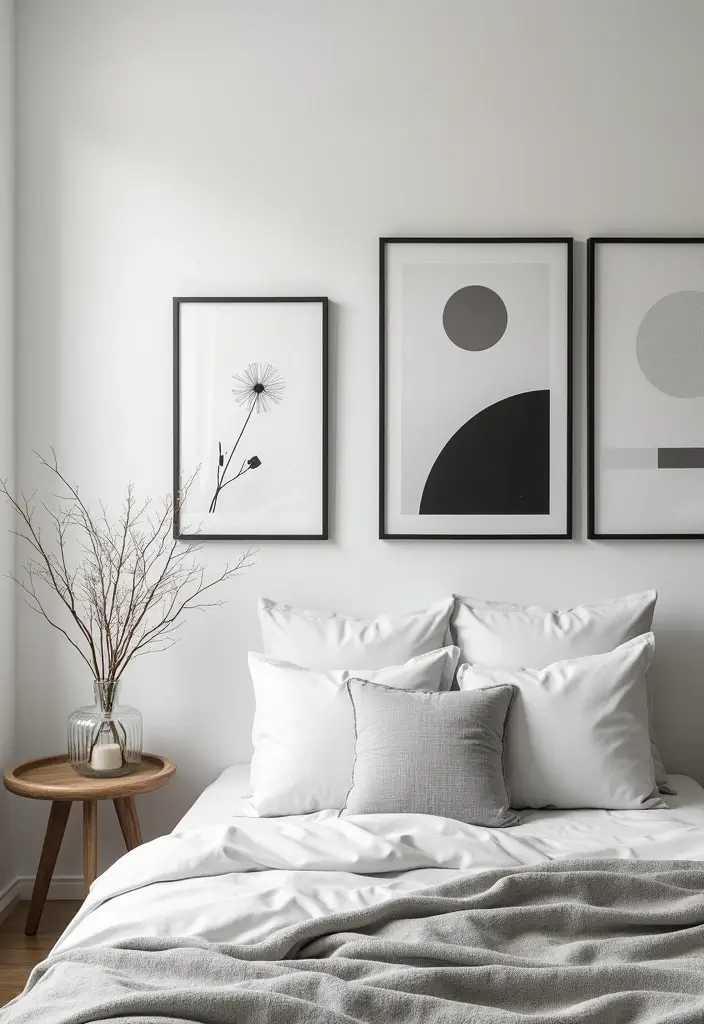
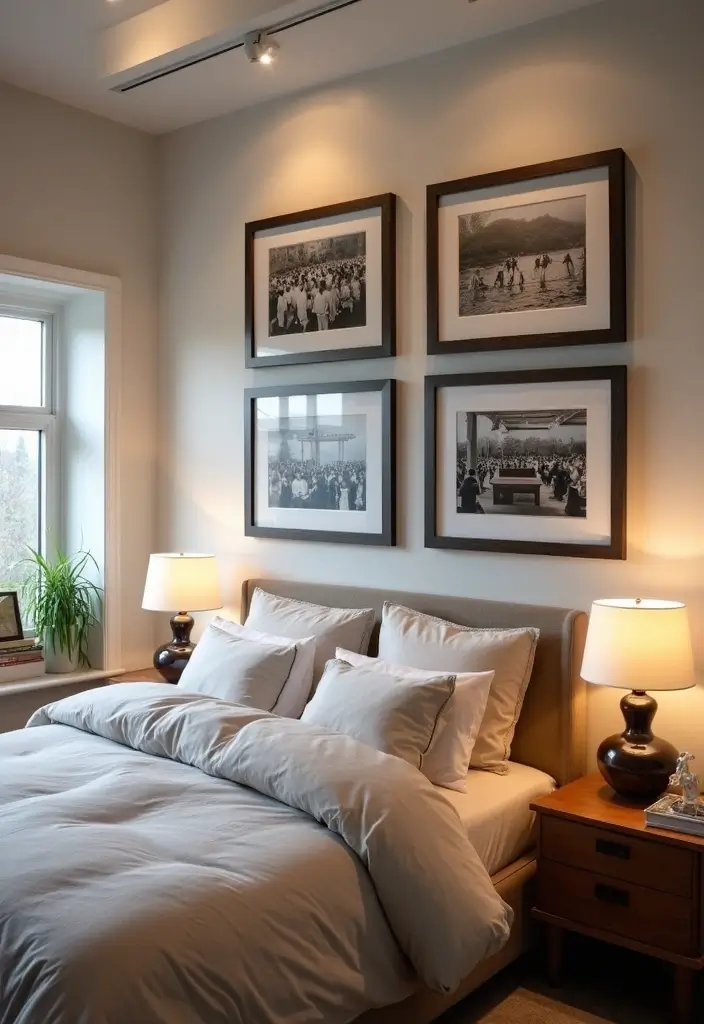
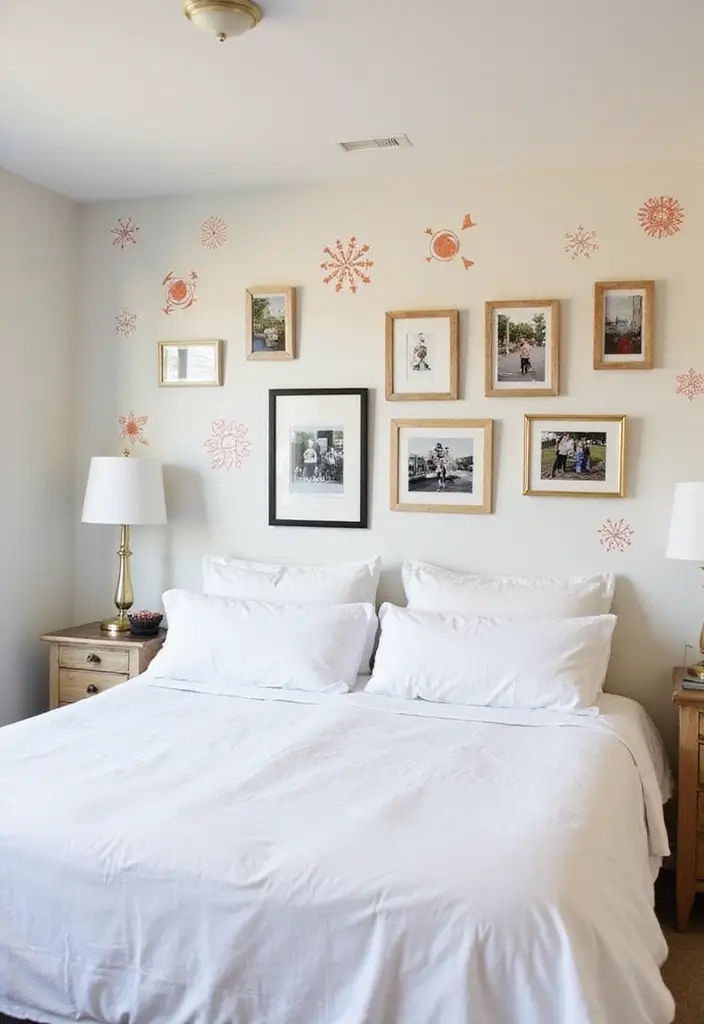
2. Themed Color Palette
Your photo wall should feel calm and true to your story. A themed color palette makes it easy to keep every piece in place. If your room leans beige and white, try black-and-white photos in monochrome frames; memories shine.
Pick 2-3 main colors to guide every choice. They act as the backbone for frames and prints. Choose warm neutrals like cream, taupe, and wood, or cool shades such as ivory, gray, and black. If you want a pop, add a soft accent color in small amounts, like sage or blush.
Apply color across elements. Black frames with white prints give strong contrast. Natural wood frames with sepia photos add warmth. Mix square and rectangular shapes to keep the wall lively yet cohesive. If you add wall decals, keep them in the same color family for a seamless look.
Suggestions:
– Stick to 2-3 main colors to avoid overwhelming the space.
– Use a mix of square and rectangular frames.
– Consider adding wall stickers in the same color for a coherent look.
Next steps: plan the layout on the floor first, then hang with even spacing. Choose either a neat grid or a relaxed salon style, and keep matting consistent to unify every piece.
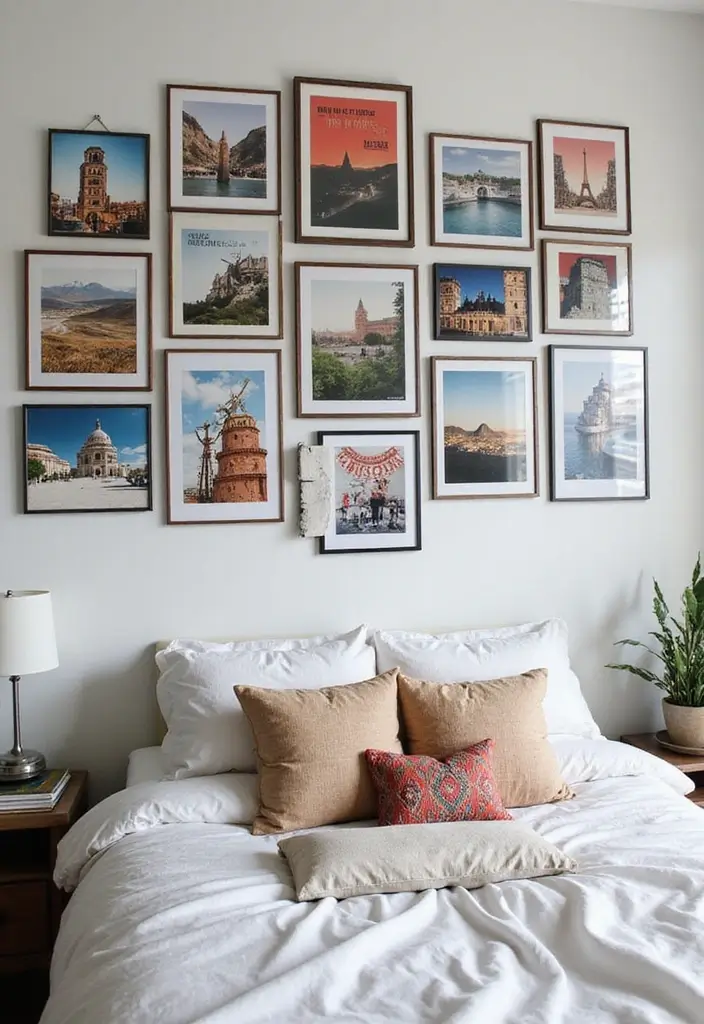
3. Travel Memories Collage
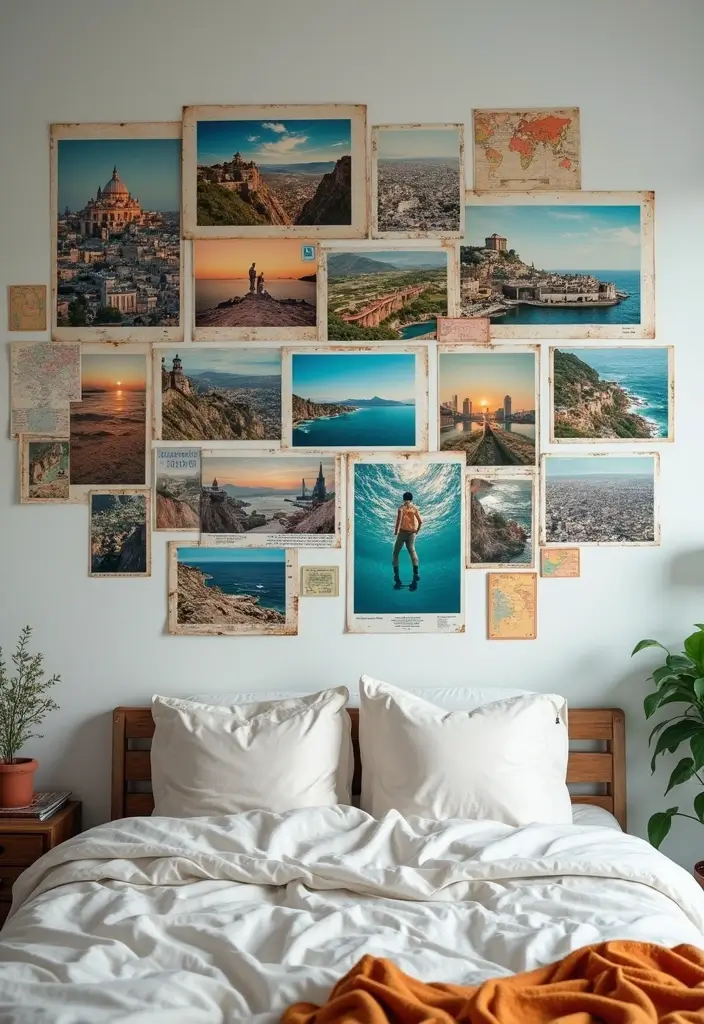
You need a travel wall that tells your story. Create a travel memories collage on your bedroom wall. Use photos from land trips, city hops, and quiet moments from your journeys. Mix wide landscapes with close ups and candid shots to keep the scene dynamic.
Add maps or postcards beside your photos. A small twist of geography adds interest and a hint of wanderlust. The display becomes more than a memory shelf; it invites you to relive moments and plan new trips.
Tips:
– String lights frame the collage for a soft, dreamy glow.
– Place photos in an organic, loose layout instead of a strict grid.
– Pin ticket stubs, boarding passes, or small keepsakes around the edges to anchor the story.
Next steps:
– Pick a wall you see every day. Gather 18 to 25 images in vertical and horizontal sizes.
– Print in a consistent tone (matte finish helps unify busy shots).
– Use removable hooks and a simple paper map to guide placement.
This approach keeps your wall easy to refresh. Swap in new photos after trips. It stays personal and fresh without crowding the space.
If you travel slowly, let room breathe and keep the focus clear.
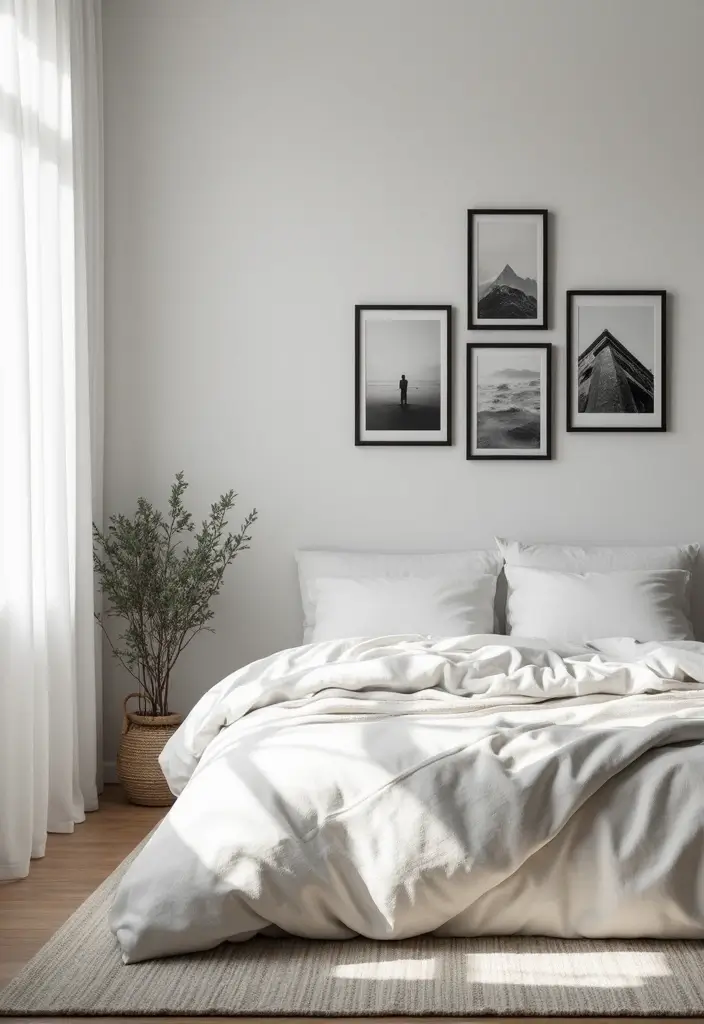
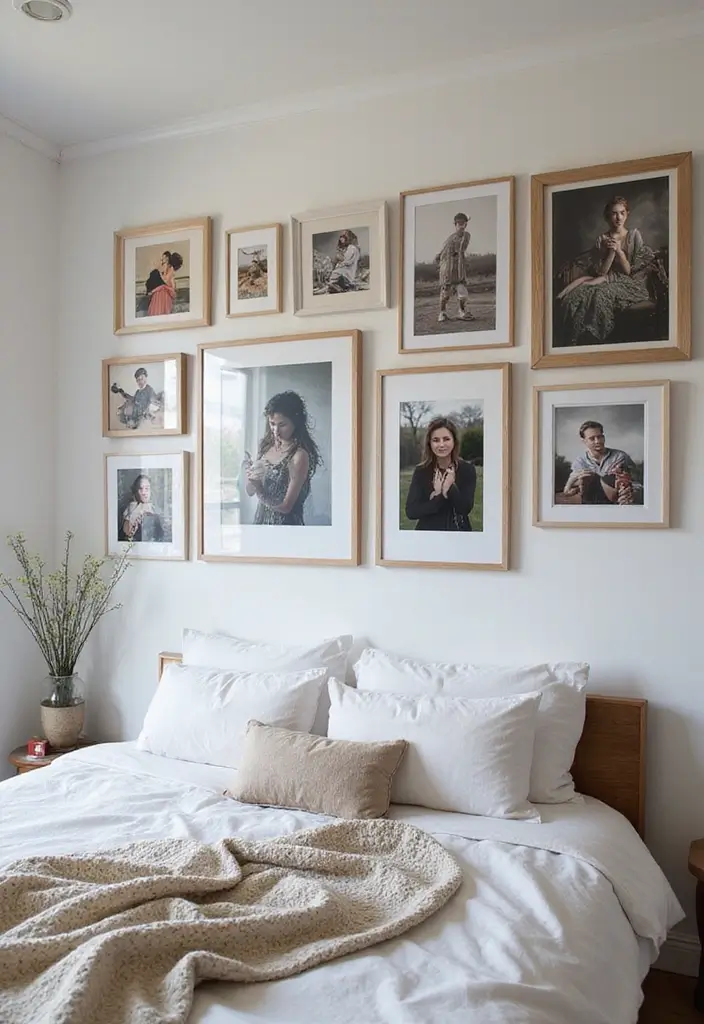
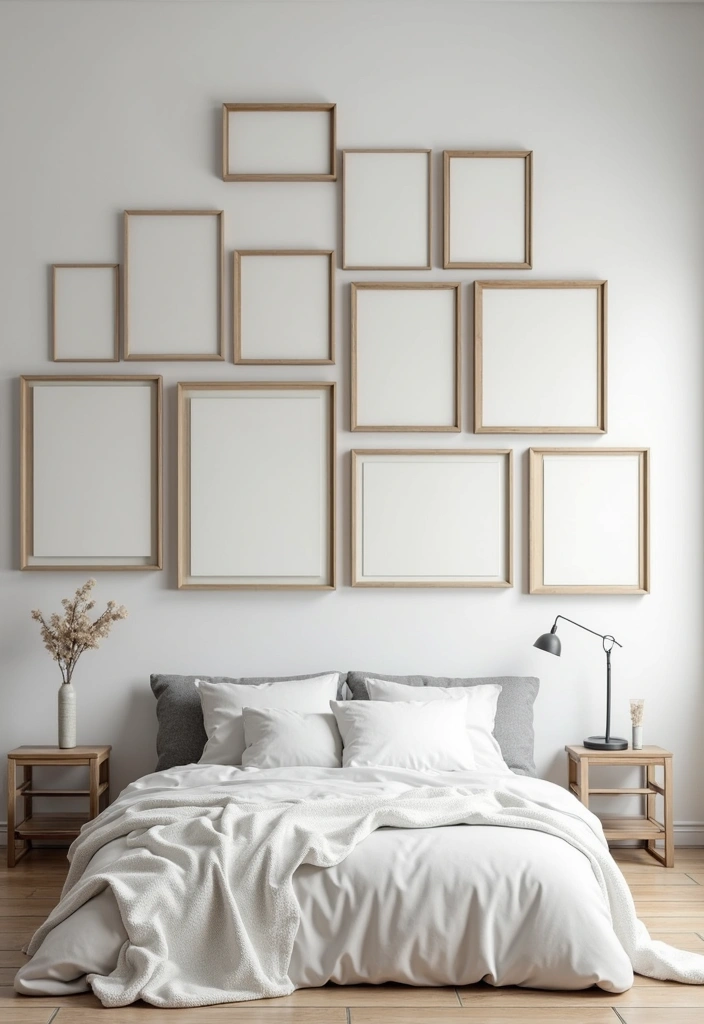
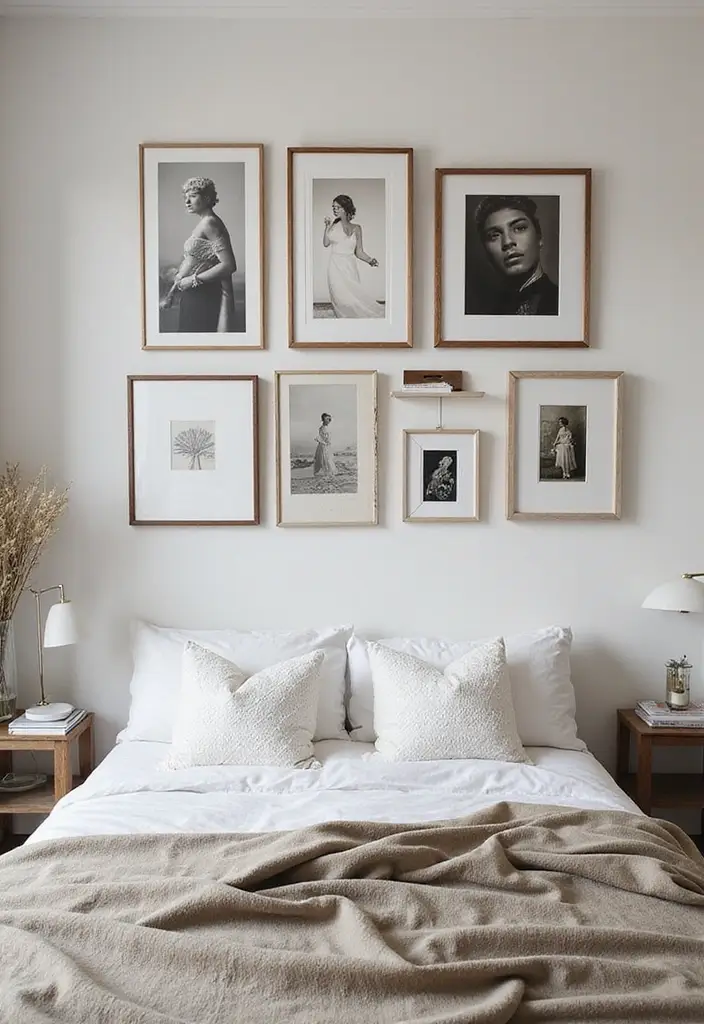
4. Minimalist Black and White Display
Trying to give your small bedroom a clean, modern look? A black and white photo wall can do it. Pick photos that tell a mood: moody portraits, quiet landscapes, or sharp urban scenes. Look for strong contrasts so every image earns its place on the wall. Here is why contrast matters.
Keep frames slim and simple. Choose metal frames in black or white, or plain wood. The idea is to let the photos shine, not the frames. If a frame competes with the image, swap it out.
Plan the layout before you hang. A grid gives a neat, orderly feel that’s easy to scan. If you want a wow moment, add one colorful piece to break the monochrome. This keeps the scene lively without breaking the calm. Suggestions:
– Use a grid layout for a structured appearance.
– Incorporate a statement piece in color to break the monochrome.
– Stick to a theme, like nature or urban landscapes, for visual consistency.
Next steps. Measure the wall. Decide photo sizes like 5×7, 8×8, or 11×14. Do a quick floor mock with paper cutouts to check gaps. Print matte photos for a soft, modern look.
Placement tips. Start at eye level. Tape the grid on the wall. Keep gaps between frames at 2 to 3 inches. If the wall is short, run a vertical column instead of a wide block.
5. Artful Framed Quotes
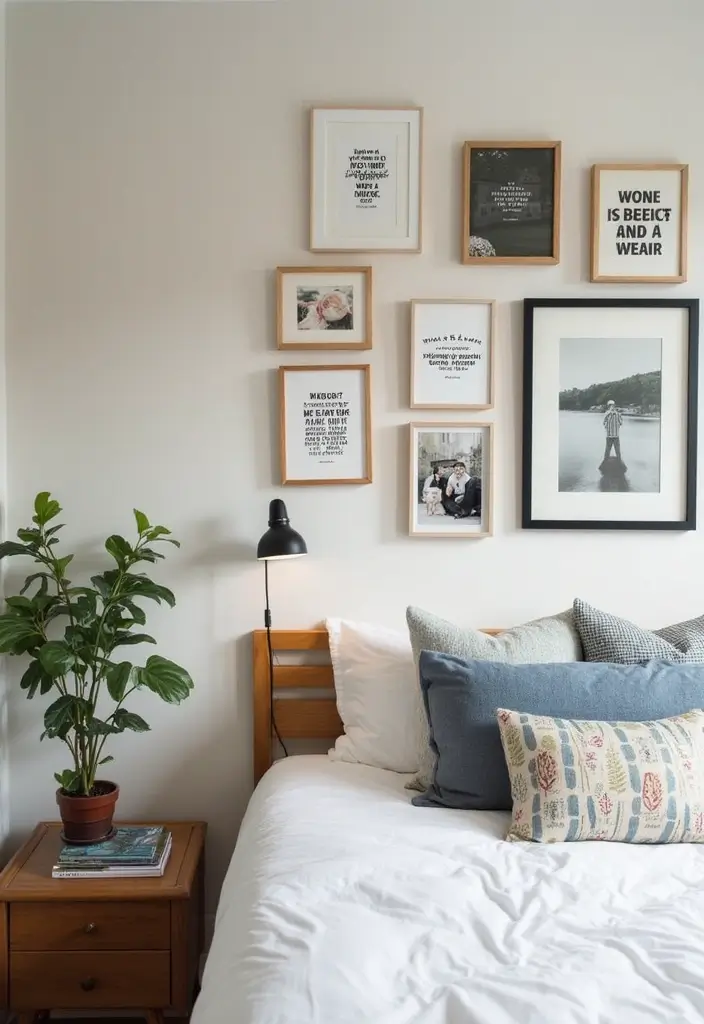
Here is why framed quotes work on a photo wall. They add a calm voice to your photos and remind you of your goals. You can pick quotes that matter to you and place them beside memories that echo the message.
First, pick quotes you love. Look for lines that fit your room mood: gentle, brave, hopeful. Write them on paper and test a few on the wall with masking tape. This helps you see how they feel next to your photos.
Next, choose frames. Mix wood and metal to create texture. Try different sizes and add a few mats to give space between pieces. Keep some frames the same color for a cohesive look, and let others stand out.
Then plan your layout. A neat grid gives a calm vibe, while a salon style can feel lively. Start with a main quote in the center and place related photos around it. Use a consistent spacing, about 2 inches, to keep it tidy.
Pair quotes with photos that echo the message. A photo of you reading fits a line about growth. A memory from a trip can sit next to a quote about adventure.
Refresh as the year changes. Swap quotes seasonally or when your goals shift. This keeps your wall feeling fresh without buying new pieces.
Tips:
– Use different frame styles for variety
– Create a loose layout rather than rigid alignment
– Keep the color palette in harmony with your room
Next steps: test a small section first, then expand.
6. Create a Floating Shelf Gallery
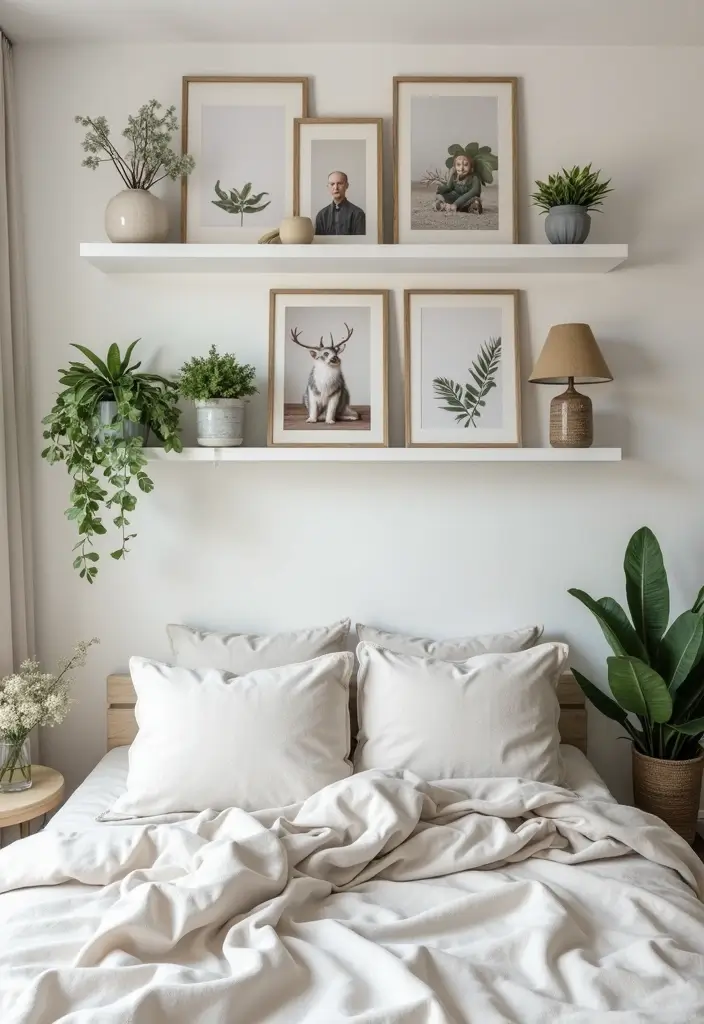
You want a wall that shows your story and stays easy to refresh. A floating shelf gallery can do that. It blends photos with small decor while keeping the room calm and tidy.
Here is why it works. Shelves hold a mix of shapes and colors without crowding the wall. You can move items around in minutes. No nail heavy changes every time you want a new look. Now, let’s break it down so you can set it up.
What you’ll do
– Start with shelves of different lengths. The variety creates an soft, asymmetric feel.
– Pick a wood tone or finish that fits your bedroom. Light, warm, or dark wood works well.
– Plan the layout first. Measure space and mark where each shelf will sit. Aim for two shelves at different heights.
– Choose a small mix of items. Framed photos, a plant, a book, and a little art piece make a balanced display.
– Mix display methods. Let some frames lean for depth and place others upright on the shelf.
– Add one larger piece above the top shelf to anchor the look.
Suggestions:
– Use shelves in different lengths for an asymmetric design.
– Incorporate artwork on the wall above the shelves for added interest.
– Mix and match frame styles to keep it intriguing.
Practical tips
– Rotate photos every few months to keep the story fresh.
– Secure shelves properly to the wall to stay safe and level.
– Keep a cohesive color family so the display looks intentional.
Next steps
– Measure your wall, pick a starting set of shelves, and gather a few photos. Then start small and grow the gallery as you live with it.
A floating shelf gallery is your secret weapon for a photo wall that tells your story. Easily swap out photos and decor to keep your space fresh and inviting!
7. Circular Frame Display
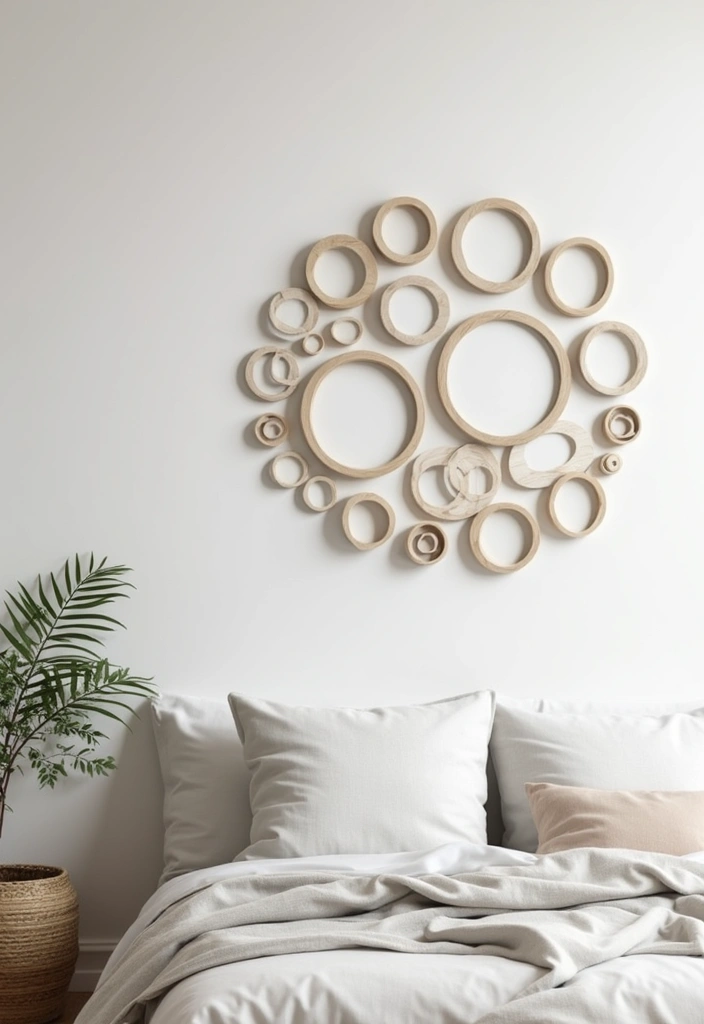
Need a photo wall that feels fresh without clutter? Circular frames give your bedroom a clean, modern touch you can see and feel. The round shapes soften the sharp edges you usually see in wall galleries. This setup looks effortless yet intentional.
Here is why circles work well in a small space. They create gentle motion that leads the eye from one memory to the next. You get visual interest without a heavy, busy vibe. You can switch photos anytime and keep the same round frame theme.
Let’s break it down and plan your display.
– Pick 3 to 5 frames in different sizes. Mix 6 inch, 8 inch, and 10 inch frames for variety.
– Decide on color. Go bold with a few colored frames or keep everything in neutral tones for a calm, cohesive look.
– Choose a center piece. Start with a larger frame in the middle and arrange other frames around it, or try a spiral that moves outward.
– Add small touches. Between frames, place a tiny art print or a tiny wall sculpture to add texture.
How to install without a mess
– Map the layout with paper cutouts taped to the wall first.
– Use proper hanging hardware for each frame weight.
– Hang the center frame first, then place the others. Step back often to see the rhythm.
– If a frame feels off, tiny shifts can fix the flow.
With this circular display, your memories tell a soft, stylish story every night.
8. Kids’ Art Showcase
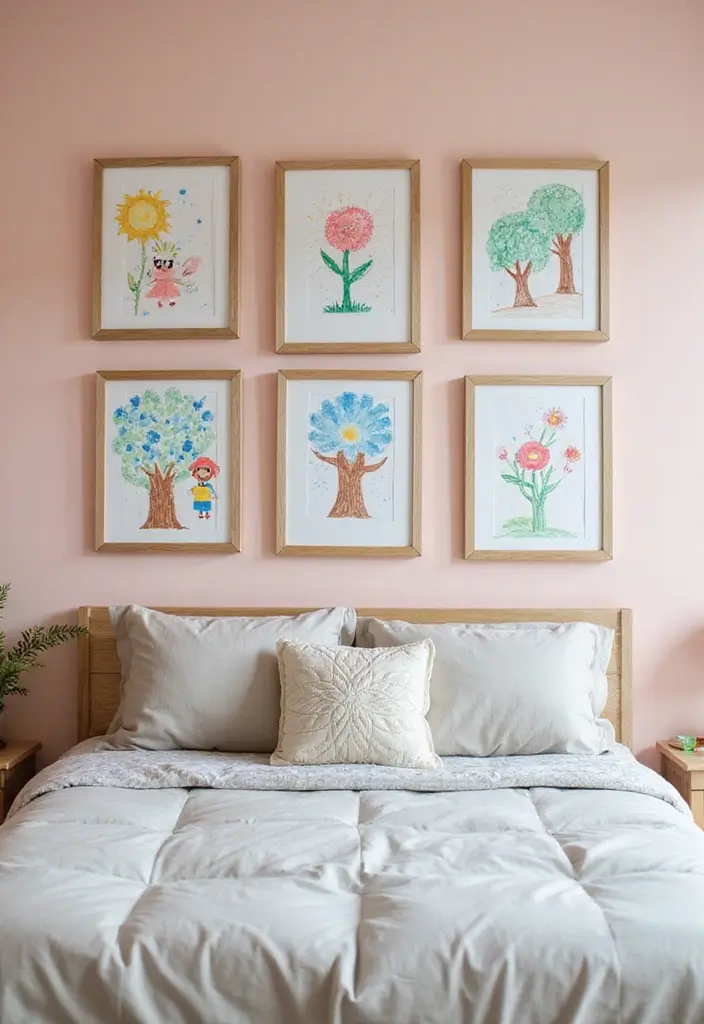
Want a photo wall that feels warm and personal? Kids’ art is a simple way to tell your story in a room you use every day. A few bright drawings can turn a plain wall into a home gallery that you and your family notice with every walk by.
Here is why this works. It celebrates creativity, keeps your space lively, and gives your child a sense of pride. You win by adding color without extra clutter.
Next, set up one clear zone on the wall. A 3 by 4 foot space is enough to show a dozen pieces at once. It is easy to manage and looks intentional when you keep the layout simple.
Choose frames that fit your style. You can use bright frames to echo the art’s color or white frames to keep a calm look. Clip frames are great for fast changes. Simple open frames work well if you prefer a neat, minimalist feel.
Tips:
– Create a dedicated section of the wall for their artwork.
– Use clip frames for easy switching of art pieces.
– Encourage kids to create seasonal art for a fresh look.
To keep the display fresh, rotate pieces regularly. Swap in new drawings each month or with the seasons. Store older works in a simple folder or take quick photos for a digital keepsake. If you have many pieces, group them by color or theme to make the wall feel cohesive.
Next steps are easy. Pick the wall, buy a few frames, and start with 6–8 pieces. Then keep updating it as your child grows.
9. Memory Jars as Decor
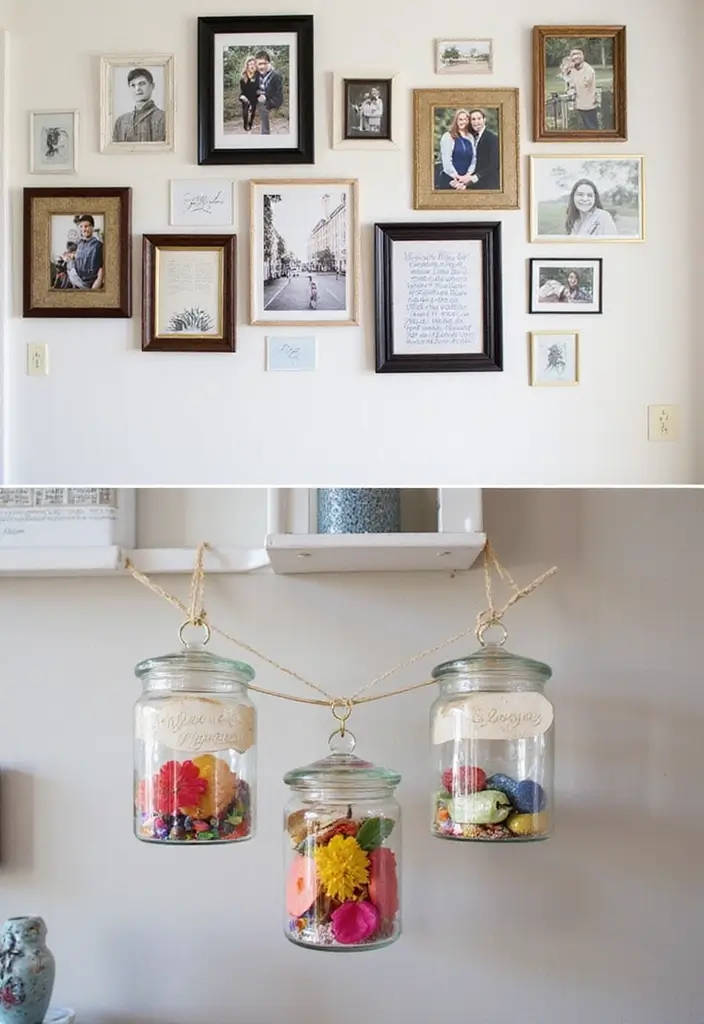
Looking to give your bedroom wall a personal, playful vibe? Memory jars beside your photo frames add a touch of whimsy and texture. They turn a wall into a story you can read at a glance.
What goes in the jars? Tiny notes about a memory, ticket stubs, pressed leaves, or a small charm. Each item points to a moment you want to remember. Keep a stash of ready notes so you can swap memories later.
Visual tips to shine
– Use jars of different sizes and glass colors. This creates variety and depth.
– Label jars with dates or events so your wall tells a clear timeline.
– Add fairy lights inside or around the jars for a soft glow.
– Place jars at varying heights to draw the eye along the display.
How to set it up
– Gather jars, notes, and tiny keepsakes.
– Pick a color feel for the display and stick to it.
– Mount photos first, then tuck the jars among them.
– Add lights and labels, and adjust heights as you step back.
Next steps
– Refresh a jar every month or two, swap in new memories, and let your wall grow with you.
– Keep jars lightweight for easy rearranging, and invite friends to add their own moments.
10. Art and Photography Fusion
You want a wall that tells your story. Art and personal photos together do that. This mix adds color and life to any room. Here is how to make it work.
Start with a theme. Think travel, family moments, or a hobby you love. Choose artworks that echo your memories so the pieces feel joined. Plan a gallery wall that looks balanced, not busy.
Let one big piece anchor the wall. Add photos and smaller art around it in a loose grid. Let a few frames hang a bit off the line for a casual vibe.
Tips:
– Use colors in the art and photos that talk to each other.
– Mix frame styles to tell the two kinds apart.
– Let large pieces be the focal point and let small pieces fill gaps.
Here is how to put it into action. Measure the wall. Tape the layout on the wall or lay it out on the floor. Use a rail or wire for easy changes later. Hang from the center and keep even spacing.
Example plan. Pick 3 photos and 2 art prints. Choose frames in two colors that fit the room. Lay the plan on the floor, adjust, then hang piece by piece.
Lighting helps the story live. Place a soft lamp nearby or use track lights to sweep across the wall. If your space is small, try a compact layout with fewer pieces. This idea fits bedrooms, living rooms, or hallways. Give the wall a week to settle, then tweak spacing and frames if needed.
11. Seasonal Rotations
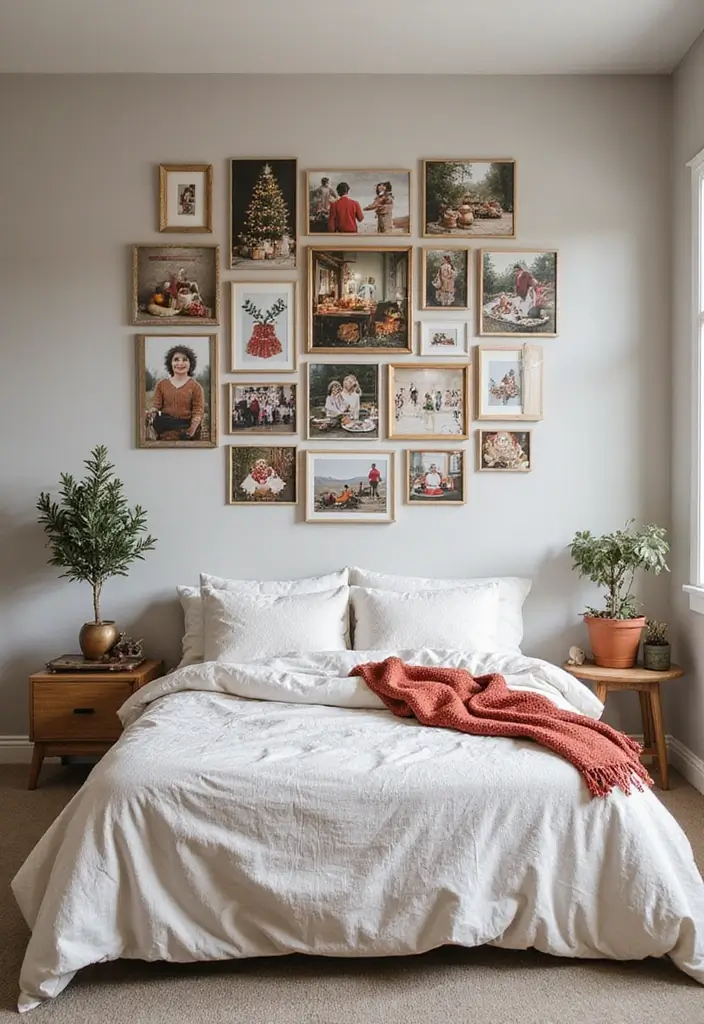
Your bedroom photo wall should feel fresh without a full makeover. Seasonal rotations make it simple. You relive memories and match the room’s mood as the year changes. Best of all, you reuse what you have and spend little.
Here is how to start. Pick four sets for autumn, winter, spring, and summer. Keep images simple and easy to swap. Create a rotation calendar so you know when to switch them. Decide on a grid or a small ledge for fast changes.
Use removable adhesive strips or clips. They keep the wall intact. Store off-season photos in decorative boxes and label them by season.
Tips:
– Build a simple rotation calendar you check every few weeks.
– Add tiny seasonal accents like a mini pumpkin or a snowflake to boost the theme.
– Keep frames that open easily for quick swaps.
– Keep a compact archive of favorite shots from each season for quick restocking.
Next steps: choose a layout that supports quick changes. A grid or a ledge works well. Keep the color and frame style steady to avoid clutter. A simple routine makes the wall feel lively all year. This approach fits small bedrooms and busy lives.
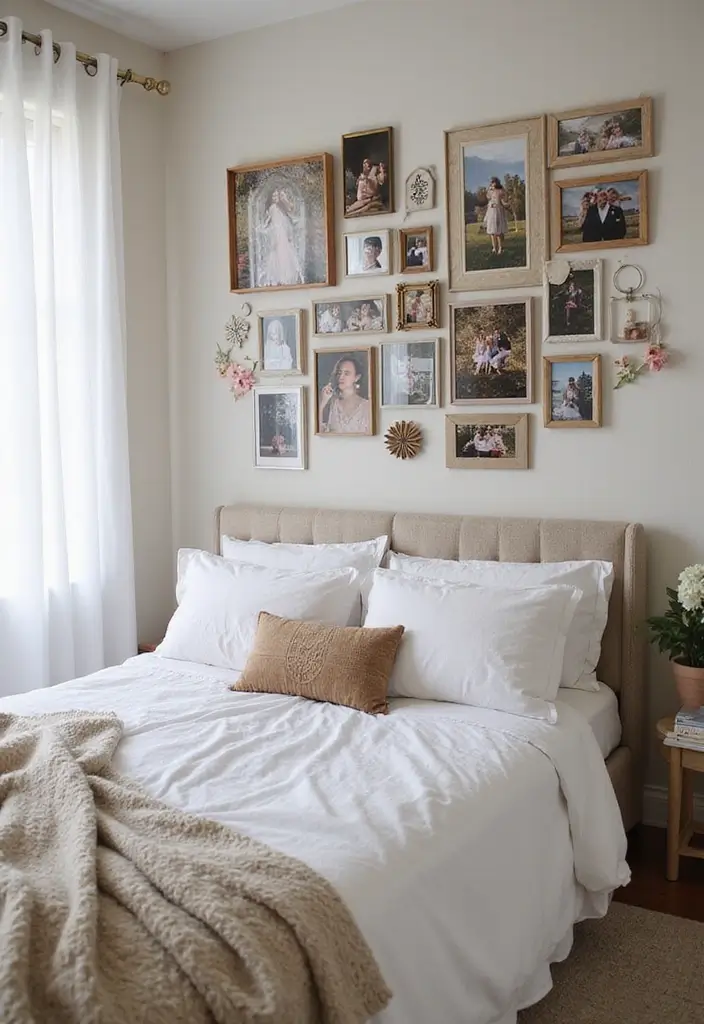
12. Heartfelt Memories
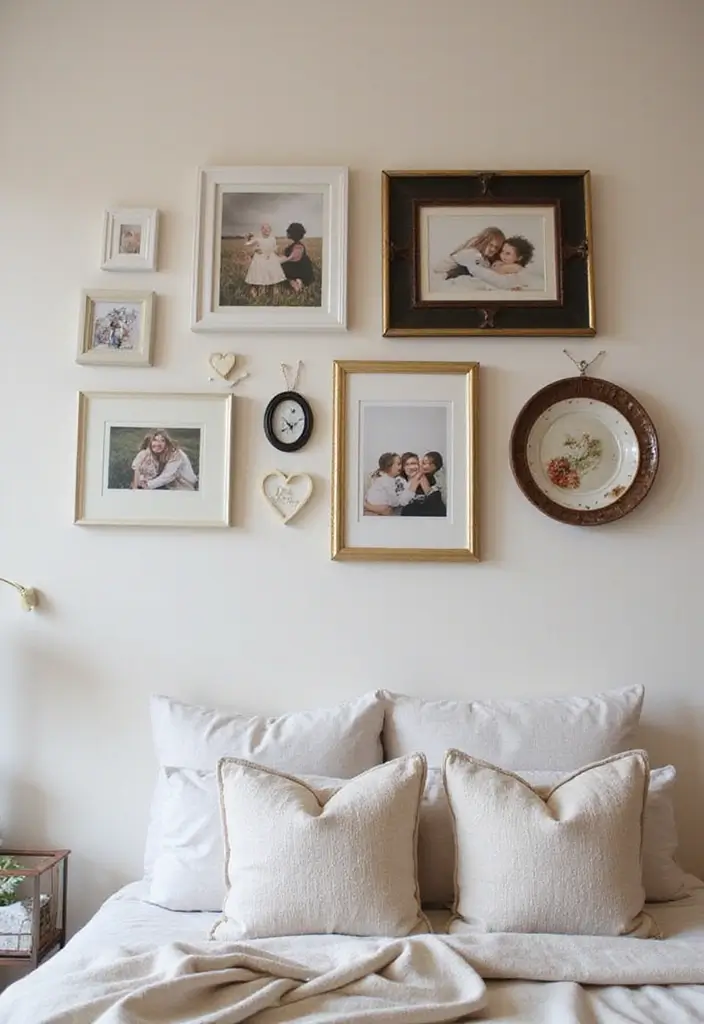
Your bedroom wall can tell your story through heartfelt memories. You want it to feel warm, not busy. Start by picking photos that capture weddings, birthdays, and anniversaries—the moments that mean the most to you.
Choose frames that are elegant but simple. The goal is to let the images shine. Neutral tones help them blend and feel calm.
Here is why this approach works. Make the wall a visual love letter. Place a central statement piece, perhaps a favorite couple photo, a meaningful quote, or a single print that sums up your story. Let other pictures orbit it in a thoughtful pattern.
Layout ideas: a clean grid around the center, a soft gallery wall with even spacing, or a staggered cascade that mirrors a memory timeline.
Start with the anchor piece. Hang it at eye level where you read the room. Build outward with photos from near and far. Use even gaps so the wall feels calm. If you prefer a bold look, mix portrait and landscape orientations, but keep the frames in the same finish.
Tips:
– Use neutral frame colors to keep a delicate touch.
– Add small decorative elements like hearts or flowers for warmth.
– Add captions below photos to give quick context.
Small choices here make a big warm impact.
13. Polaroid Photo Strings
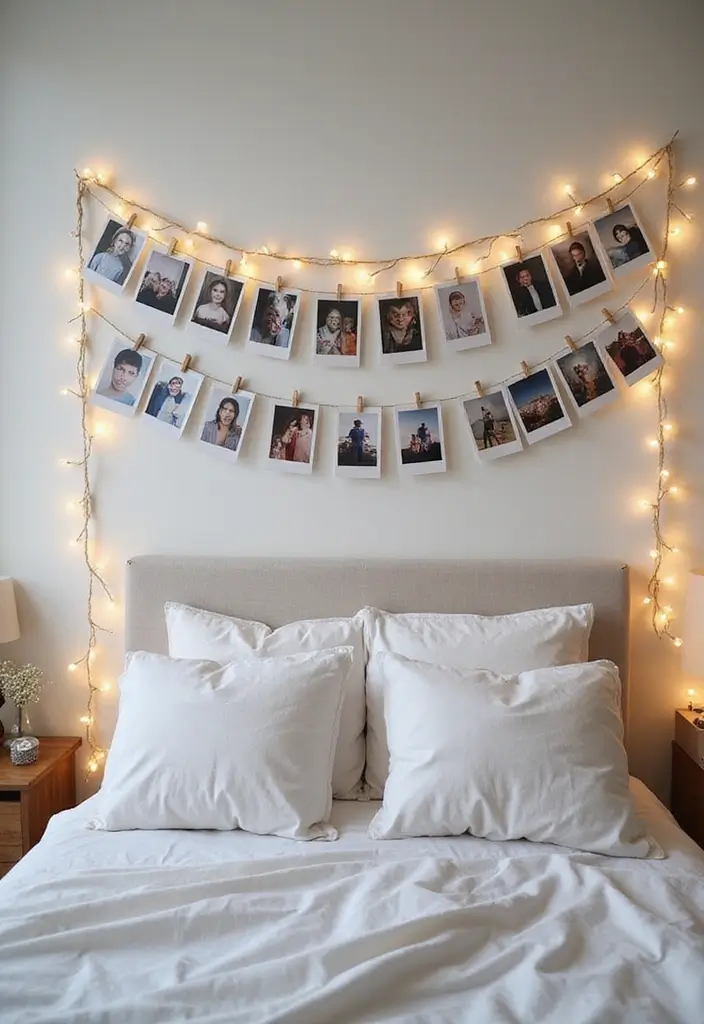
Want a casual way to show many photos without crowding your wall? A Polaroid photo string fits the bill. You hang mini portraits on twine or string lights. It feels playful and keeps your space flexible.
Here is how to set it up so it works in any room.
What you need
– Polaroid photos or square prints
– Durable string or twine
– Small clips or tiny clothespins
– Battery-powered fairy lights (optional)
– Hooks, tape, or nails for the wall
How to arrange it
– Plan a line that fits your wall. A straight line works, or try a gentle wave.
– Measure and mark where the clips will go.
– Clip each photo with a light grip. Keep space between shots so they can breathe.
– If you use lights, wrap them where the string sits or place a couple of bulbs along the line.
Why you’ll love it
– It’s easy to swap in new photos as your story changes.
– It adds warmth with soft light and a friendly vibe.
– You can bend the display to fit tight corners or long walls.
Tips:
– Use pastel string to match soft bedroom tones.
– Create a wave or spiral pattern for a playful look.
– Add tiny clips or decorative charms between photos.
Next steps. Rehang as your room shifts, and enjoy a living wall.
14. Mixed Media Approach
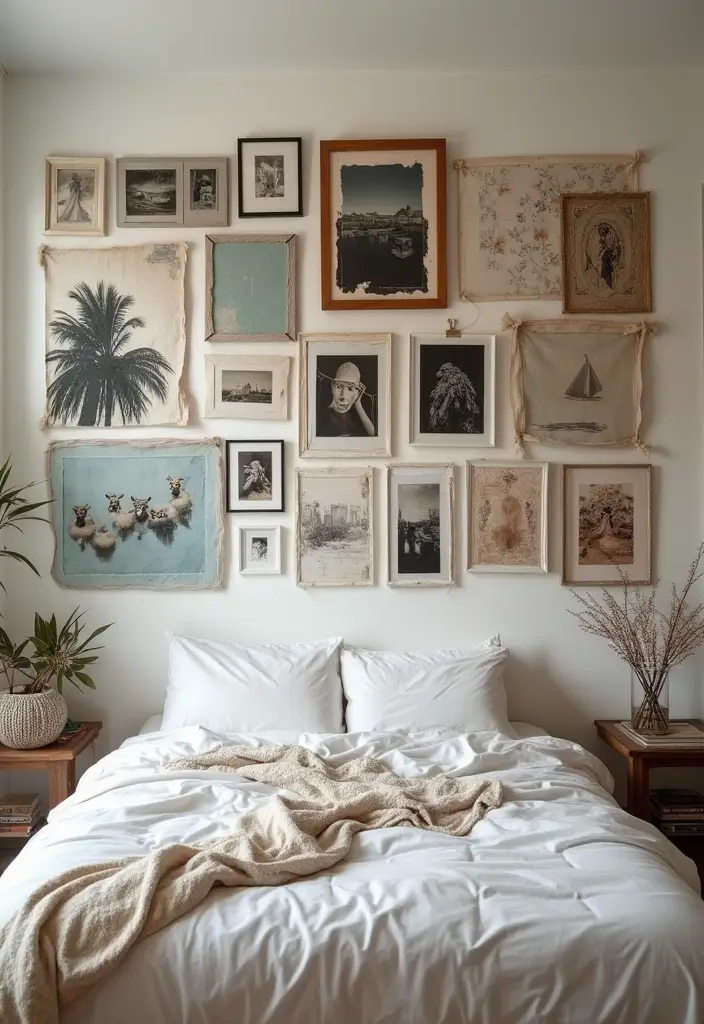
You’re looking for a photo wall that feels rich, not flat. A mixed media approach blends photos with textiles and prints to create depth. Add a lace panel beside a black-and-white portrait, or tuck a fabric swatch under a frame. The touch of fabric and prints adds story.
Here is why: different materials catch light in different ways. Texture invites you to look closer. A cohesive layout keeps the wall from feeling chaotic.
Next, how to do it:
– Start with one anchor piece. A larger photo in a simple frame sets the tone.
– Build around it with textiles and prints. Place a lace strip or canvas patch next to the frame.
– Pick a color flow. Let every piece share a common hue or shade.
– Mix textures. Use wood, fabric, metal, and paper.
– Mind the scale. Pair big works with small ones to keep balance.
– Plan the layout first. Try the arrangement on the floor, then hang with spacing.
– Finish with small accents. A metal clip, a fabric badge, or a tiny mirror ties it together.
This method tells a varied story without clutter. You get warmth, movement, and a bedroom that feels lived-in.
15. The Floating Frame Effect
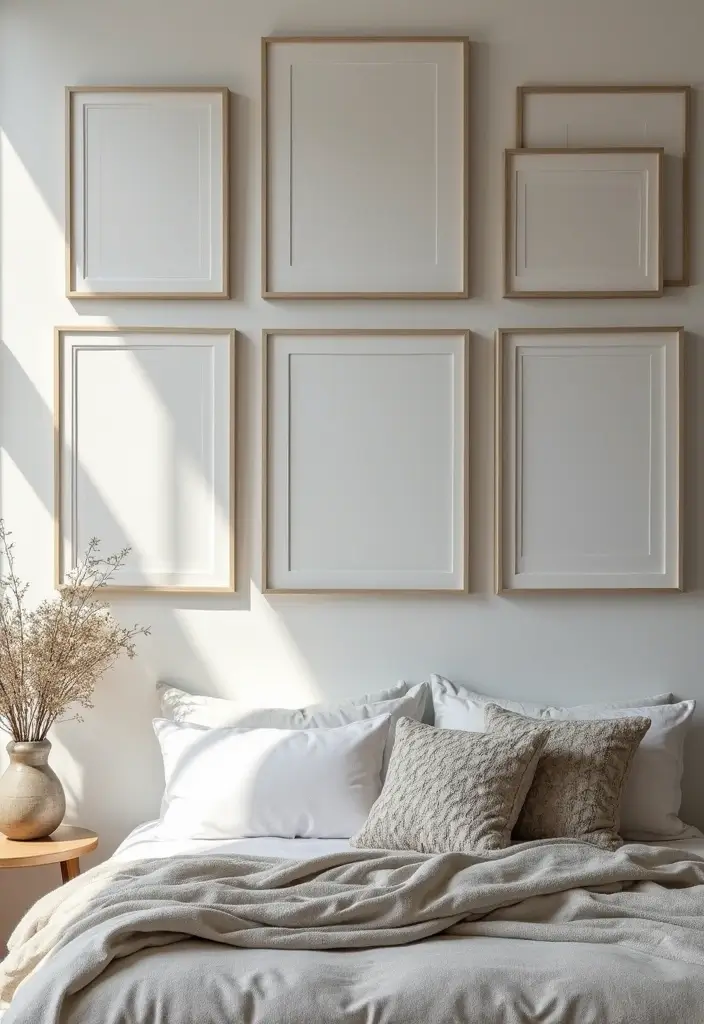
You want a bedroom that feels calm and personal. You want photos that tell your story, not a wall full of busy frames. The floating frame effect can do that.
Here is why this works. Floating frames sit on the wall with tiny spacers. The glass and photo seem to hover just off the surface. That subtle lift keeps the focus on your memories.
Let’s break it down. How do you build the look? Start with a plan. Choose a mix of frame sizes so some pieces stand out and others support them.
Tips:
– Use different frame sizes for contrast.
– Pair floating frames with light-colored walls for enhanced visibility.
– Incorporate mirrored or acrylic elements for a modern twist.
– Leave 2 to 3 inches between frames to give each photo room to breathe.
– Try a few layouts: a clean grid, a gentle arc, or a loose cluster.
Next steps. Hang with lightweight hardware and clear spacers so the frames truly hover. Keep the wall clean and the glass free of fingerprints to keep images sharp.
The look adapts to your space. Swap in seasonally changed shots. Rotate favorites as your story grows.
16. Vintage Charm
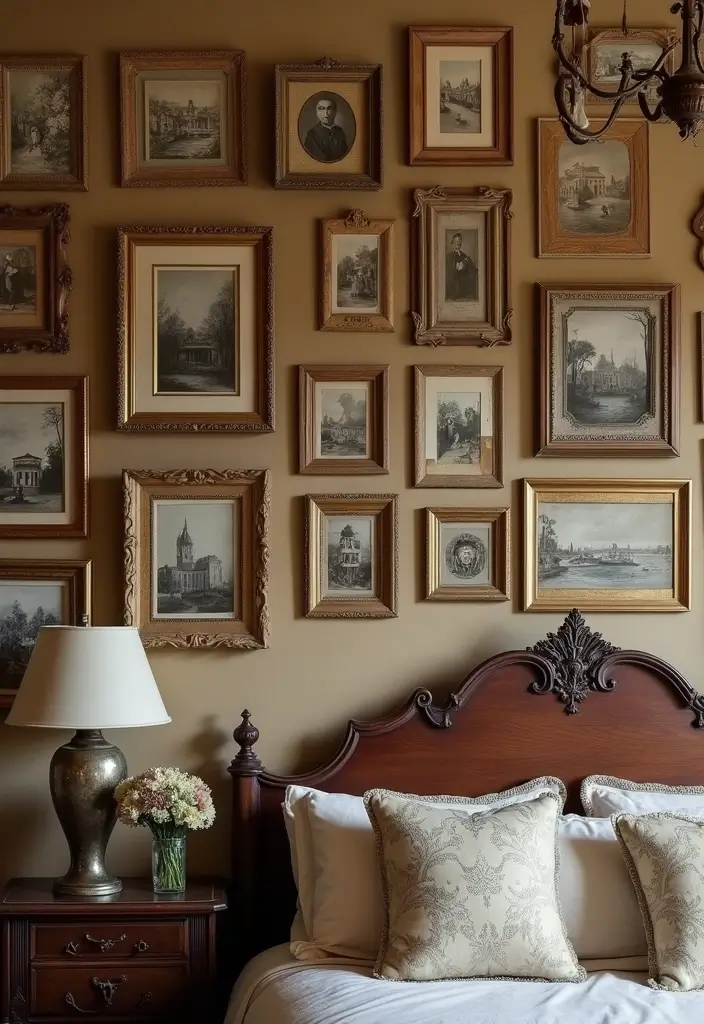
If you want a bedroom wall that feels timeless, this vintage charm idea helps you tell your story. Choose sepia-toned photos or classic black-and-white images. Show family history or your favorite vintage memories.
Mix ornate frames with simpler ones to keep the look old-world yet calm. A balanced mix makes the wall feel intentional instead of busy. Hang the frames in a salon style to add layers. Vary heights and use different shapes and sizes for visual rhythm.
Here is why this approach works: warm tones and worn wood pull the room together, while bold shapes keep it interesting.
To start, measure your wall and sketch a plan. A neat grid helps, but you can mix two sizes for interest. Keep the wall color simple so the photos stand out. If your room has wood furniture, match frames to wood tones. For a memory wall, start with 5 frames and build up later. This vintage look keeps your story front and center. You can swap in new photos over time. Use frames in brass, wood, or black metal to fit your style.
Tips:
– Add decorative elements like antique clocks or vintage books to complement the theme.
– Lay out the frames on the floor before hanging to plan spacing.
– Choose a unifying mat color or frame finish to keep the look cohesive.
17. Iconic Movie Poster Mashup

You want a wall that shows your film love and your life. A movie poster mashup blends famous posters with your own photos. This keeps your space personal and easy to update. Here is why this works: it tells a story in a single glance. Let’s break it down into doable steps.
Choose your posters and photos
– Pick 3 to 6 posters you love and choose photos that connect to those films.
Plan the layout
– Sketch a simple layout on paper to see grid or staggered patterns.
Frame and color harmony
– Match frames in a single color family to bind the look.
Mounting and spacing
– Use removable strips and keep even gaps for balance.
Finish with small details
– Add a ticket stub, prop, or a small photo to deepen the theme.
Lighting and display tips
– Add a small, warm light above the wall to highlight the poster lineup.
Printing details
– Print posters at true size or with simple matting to keep details clear.
Budget and timing
– Set a small budget and hang items in stages to learn spacing.
Next steps: measure space, print the right sizes, and hang with care.
Remember, this wall is a living story. Start simple, then grow the display as you find new favorites. Change is easy with removable hardware. Take your time and enjoy the process.
18. Geometric Patterns
Is your bedroom wall feeling a bit flat? Geometric photo walls add structure without shouting. The clean lines guide the eye and tell your story through shape and color. You get a modern look that still feels personal.
Start with shapes that fit a simple vibe: triangles, hexagons, and squares. Pick 3 or 4 colors that match your bed linens or rug. Mix wood, metal, and painted frames to add texture.
Tips:
– Here is how to set it up.
– Test the layout on the floor with your frames and adjust until it feels right.
– Trace the outline on the wall with painter’s tape to map the shape.
– Space pieces about 2 to 3 inches apart for a clean rhythm.
– Mount the frames with level and wall anchors for a sturdy hang.
– Label and swap photos later to keep the look fresh.
– Keep a single color anchor to tie the shapes together.
Next steps: start with a small set of three or five frames. Swap in new shots later to refresh the wall. This approach works well in rooms that prize order and calm.
Geometric photo walls add structure and style to your bedroom, turning flat spaces into stunning stories. Choose shapes that reflect your personality and colors that resonate with your decor for a modern, personal touch!
19. Personal Milestone Highlights
Your bedroom can tell your story with a Milestone Wall. You want a display that feels calm and personal, not crowded. Here is why a dedicated milestone section works: it makes your wins visible and keeps you focused on what you’ve achieved. This small zone can transform how you feel in your room.
– Plan the space. Choose a wall at eye level near your door. Measure the area. Sketch a rough layout.
– Pick a consistent look. Choose the same frame color and mat style. Mix sizes but keep the feel.
– Create a chronological flow. Oldest to newest left to right, or top to bottom.
– Light it right. Use warm LED light strips or a small wall sconce to softly highlight. A soft glow helps calm the room.
– Add keepsakes. Place awards, certificates, or a tiny trophy on a nearby shelf.
– Add captions. Include date, place, and a short note about the moment.
– Keep it fresh. Swap in new milestones each year. Store digital copies for the future.
– Final touch. Choose subtle mat colors to tie photos together.
Next steps: gather your photos, pick frames, and map the wall. Start with a simple trio and grow as you add more milestones.
20. Family Tree Display
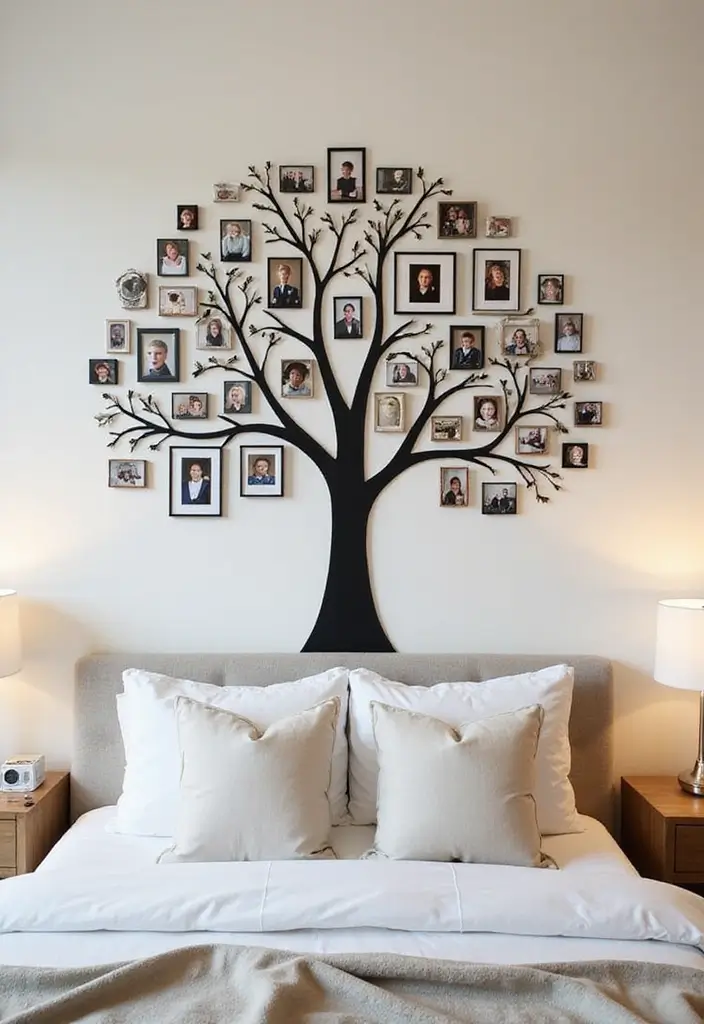
Looking to tell your family’s story on the wall? A family tree photo wall turns history into art you can live with.
Start with a tree backdrop. Use a large tree silhouette or a branch pattern painted, drawn, or as a wall decal. Choose colors that fit your room.
Next, plan the photo layout. Use different frame sizes to show generations and personal spots. Place the oldest photos near the trunk and the newer ones along the branches. Print a mix of 5×7, 4×6, and wallet-sized pictures for variety. Lay the pieces on the floor first to test the look. When you are happy, map the spots on the wall with painter’s tape.
Hang photos with hooks or strips that are easy to swap. Keep the spacing even, but let some frames break the grid for character.
Tips:
– Add leaves or flowers around the tree for a soft, natural touch.
– Outline the tree with string lights for a warm glow.
– Put names or dates under each photo so the story is clear.
Next steps: refresh the wall as your family grows. Swap in new pictures and adjust labels when needed. This keeps your display alive and meaningful.
21. Inspirational Travel Quotes
Want a travel wall that keeps your dreams in sight? Pair your travel photos with short, punchy quotes to spark your next trip. A gallery-style layout can tell the story of your journeys in a single glance.
Here is why this works: photos capture moments, quotes set intentions. Together they create a simple map from memory to action. You’ll feel inspired every time you walk in the room.
– How to build it
– Pick 6 to 9 photos that show a clear arc—a place you loved, a path you took, a milestone from your travels.
– Choose three brief quotes that match your goals. Keep them easy to read at a distance.
– Use a consistent frame style or a shared theme (wood, black metal, or white) to unify the display.
– Color and layout
– Pull two or three colors from your photos for mats or the wall color. This makes the wall feel cohesive.
– Arrange the pieces in a grid or a gentle timeline. The order should feel like a walk through your story.
– Practical tips
– Pick frames that echo the vibe of your trips.
– Try different font sizes but keep the quotes legible.
– Rotate quotes as your travel goals shift for fresh energy.
– Sample quotes (no attribution needed)
– Wander often, wonder always.
– The world is wide; your courage is wider.
– Go where the road invites you.
Next steps: gather your images, test a few layouts, and hang a mock display before nailing the nails.
22. The Story of Us
Your bedroom wall can tell your love story in a calm. Start with a clear goal: a photo wall that fits you, not cluttered. Pick images that map your journey, first date, a fun vacation, a quiet night at home. This is your diary. Let it speak in simple steps.
Choose frames that fit your style and stay consistent. A single frame color or a simple border keeps the display calm. Decide on a layout first, a neat grid for a tidy look or a salon hang for a relaxed vibe. Measure eye level and use a level as you mount.
Add captions that fit the moment. A short line can show the date, place, or a small memory. Try a then and now pair to highlight growth and change over time.
Decor touches sing softly. Small hearts, a sprig of dried flowers, or a tiny charm work as accents, not distractions. Use a soft wall color behind the display to help photos pop.
<Practical tips: use wall-safe clips or lightweight frames for easy swaps. Keep the space clean regularly so memories stay bright.
Next steps: pull your favorite photos, pick a frame style, plan your layout, and start hanging.
23. DIY Stenciled Wall Art
Is your photo wall begging to tell a bigger story? DIY stenciled wall art can do that. It links your memories with words and shapes, and it adds a personal touch you can see every day. Here is why it works: the art becomes a bridge between photos and mood.
Here is how you can start
– Pick a theme that fits your photos. It could be travel quotes, homey lines, or simple shapes that echo your images.
– Choose stencils you like. Use 2–3 fonts to keep things readable. Mix a bold letter with a clean sans for balance.
– Plan the layout first. Tape mock panels to the wall or cut paper to test spacing. Move pieces until the rhythm feels right.
– Paint with care. Use acrylics and a small brush or sponge. Apply light, even layers. Add a colored background if you want the stencil to pop.
– Pair with photos in frames. Create a cohesive group by using frames in the same color family.
– Hang with variety. Put some pieces at different heights for visual movement.
What you’ll need
– Stencil sheets and a few simple designs
– Acrylic paint, small brushes or sponges
– Painter’s tape and a ruler
– Blank panels or sturdy frames
– Optional: a light background color for the stencil area
Tips and ideas
– Keep colors consistent across stencils and photos.
– Clean stencils after use and dry them flat for next time.
– If a stencil bleeds, back off with a lighter layer and try again.
– Try word art for quotes or shape art like leaves, arrows, or stars.
Next steps
– Start small with one panel, then grow your wall over time.
– Rework a corner you want to refresh by swapping in new quotes or shapes.
– Celebrate your wall as a living story you update with memories.
24. Elegant Frame Mix
Struggling to make your bedroom wall feel personal and polished? A frame mix can tell your story quickly. Mix elegant frames in different shapes and sizes to hold portraits, travel photos, and art. The frames add refinement and keep it real.
Choose frame styles that feel luxe but work together. Try metallic finishes—gold, silver, brass—or ornate details. To keep the wall cohesive, pick a color family and repeat it in every frame.
Suggestions:
– Use a cohesive color palette across all frames.
– Arrange the pieces in an asymmetric layout for a modern rhythm.
– Add mirrors or glass accents to brighten the space.
Here is why this works: it adds depth, guides the eye, and makes a room feel curated.
Practical steps to pull it off:
– Gather photos that tell your story, mixing portraits with art.
– Choose 4–6 frames in two finishes, then lay them out to test balance.
– Map the layout with paper cutouts or tape, then mount with a level.
– Start with a bold centerpiece, place lighter pieces around it.
– Plan a seasonal rotation so the wall stays fresh.
Next steps: spend 30 minutes this weekend to test the layout, then hang.
25. Nature-Inspired Displays
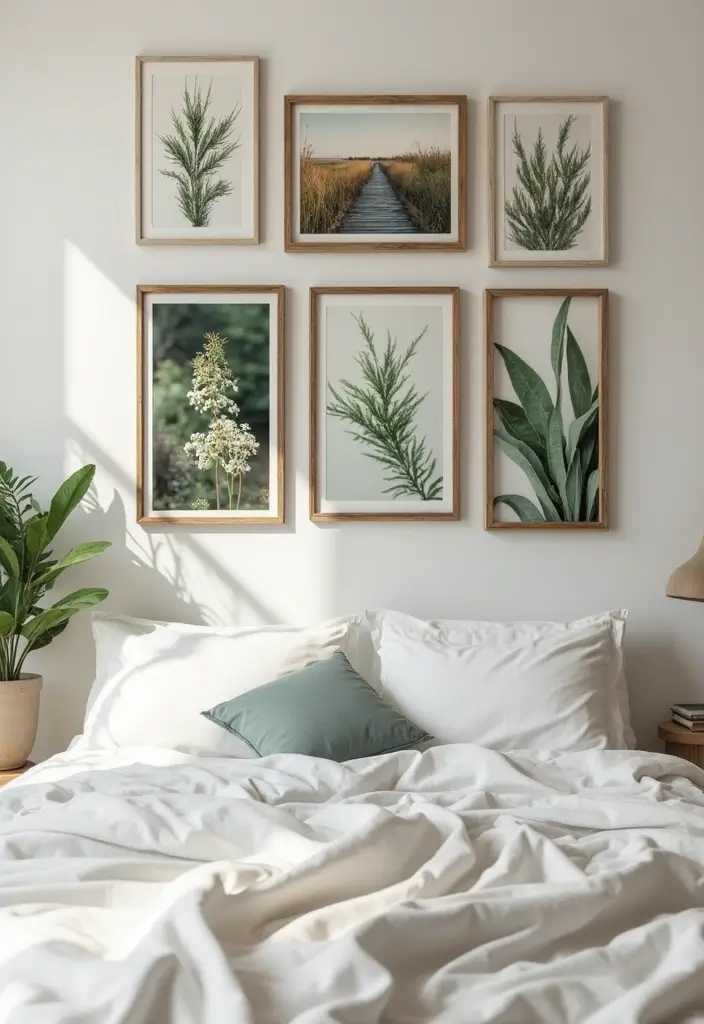
You want a photo wall that feels calm and true to you. A nature-inspired display can lift your mood and connect your room with the outdoors. Let’s build one that’s easy to change as you grow.
Here is why it works. Natural photos and green accents calm the eye. Earthy frames add warmth, while pressed leaves or tiny flowers tucked into frames bring a real touch. You can swap pieces with the seasons, so the wall stays fresh without a big redo.
Next steps. Pick outdoor shots, landscapes, or nature art that match your space. Use frames in earthy tones, like brown, olive, or taupe, to blend with bedding and furniture. Consider a few pieces with different sizes for depth. Add pressed leaves between photos for texture. Arrange the group as a loose grid or a winding line so the eye moves naturally.
Lighting and placement matter. Put the wall where you sit most, and let it catch daylight or warm lamp light in the evening. A small botanical corner nearby with one or two potted plants can echo the theme and keep things balanced.
Suggestions:
– Earthy frame tones to match the nature theme.
– Create a botanical corner with small plants to complement the display.
– Experiment with different photo orientations for variety.
26. Whimsical Fantasy Theme
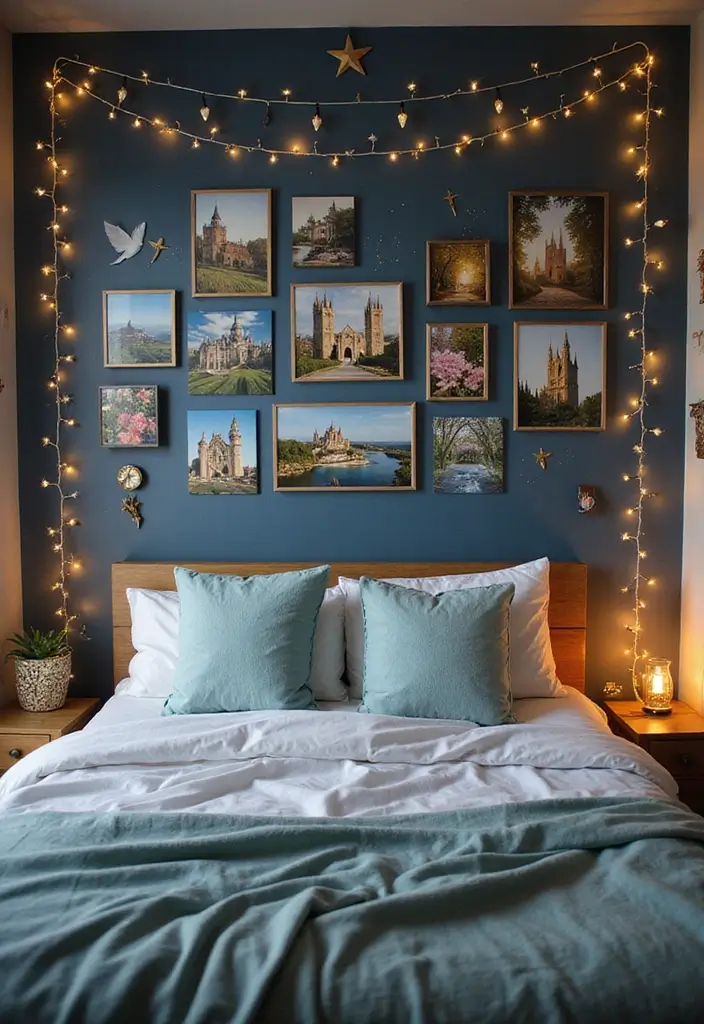
Want a bedroom wall that feels like a tiny fairy tale? A whimsical fantasy photo wall can do it. Use photos from magical trips, fantasy adventures, castles, or dreamy skies to tell your story. Add soft lighting and gentle colors to create an otherworldly mood. You will feel pulled into a calmer space every time you walk in, a place where your day can fade away.
Here is why it works. A soft palette keeps the wall soothing. Pastel frames blend photos without shouting. The cloud or spiral layout guides the eye naturally. Warm lights add warmth and make the space feel cozy, not cold. This setup helps memories feel connected instead of scattered.
Here is how to set it up.
– Decide on a soft color palette. Think blush pink, pale mint, lavender, and cream.
– Pick frames in pastel tones or clean white to keep the look light.
– Plan a cloud shape or a gentle spiral for the photo layout. Test ideas on the floor before you hang them.
Make the scene come alive.
– String warm fairy lights above the frames to glow softly across the wall.
– Add paper clouds or light fabric shapes that seem to drift near the photos.
– Include a few tiny props, like a fairy figure or small stars, but keep them simple.
Next steps: start with two big photos as anchors, then fill gaps with smaller shots. Move things around until the rhythm feels right. Finally, refresh the wall when you travel or collect new memories.
27. Bold Geometric Art
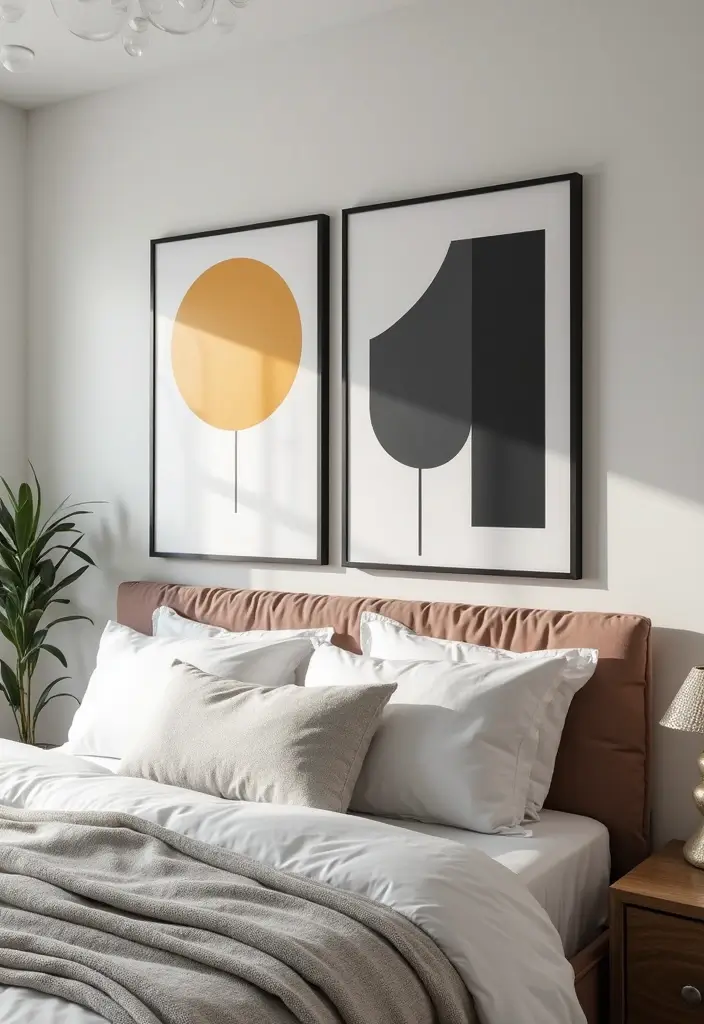
If your bedroom feels flat, bold geometric art can give you a striking focal point. Clean lines and strong color blocks wake up a plain wall. Pair them with your photos to tell your story in a fresh, modern way. Here is why this look works and how you can pull it off in your space.
– Choose a cohesive palette Start with two base colors you love. Pick one accent color that appears in your photos for unity.
– Mix shapes and sizes Combine triangles, squares, and circles in different sizes for energy and balance.
– Layer for depth Place your pictures in front of the geometric art to create a sense of dimension.
– Keep spacing balanced Leave even margins so the wall feels organized, not crowded.
– Add wall decals A few decals in matching shapes can reinforce the theme without crowding the display.
– Choose materials that suit the room Prints on canvas, metal, or wood add texture and shine to catch the light.
This approach works with minimalist decor and adds a refined touch to your room. Next steps: lay out the pieces on the floor to test a grid or staggered setup, then hang once you love the flow. Start with two to four pieces and grow from there.
Transform your bedroom with bold geometric art! It’s the perfect way to bring life to flat walls while telling your story through photos. Choose a cohesive palette, mix shapes, and watch your space come alive!
28. Monochrome with a Twist
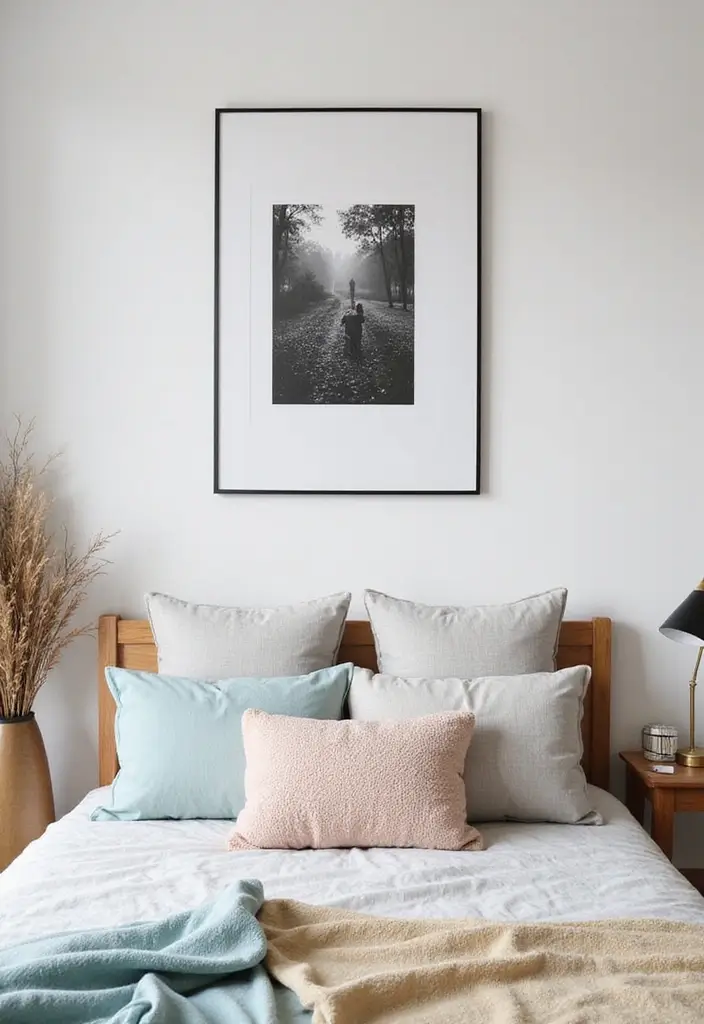
If you love the clean look of black and white photos but want a spark, try a monochrome wall with a twist. The calm, classic photos stay the focus, but color appears in small, thoughtful ways. The result feels fresh without breaking the simple vibe.
Here is why this works: color pops catch the eye and still let the photos stand out.
– Frame color pops – Pick 2 frames and give the backing or mat a bold hue that matches one shade from your photo set.
– Colorful decor items – Add a bright plant pot, a vase, a throw pillow, or a small rug that echoes the frame color. Keep the rest simple.
– Smart layout – Arrange photos in a line that guides the eye. Try a diagonal path or a staggered grid for a natural sense of flow.
Limit yourself to two or three color accents so the wall stays calm. Use texture too. Wood, metal, or glass frames add depth to the look.
Start small. Choose one wall, lay out the frames on the floor, and test different spacings. Measure, mark with painter’s tape, and hang. Next steps: swap in one new color and one new photo to refresh the story. You can swap prints seasonally to keep it fresh. This approach stays simple as your style changes.
29. The Love of Coffee
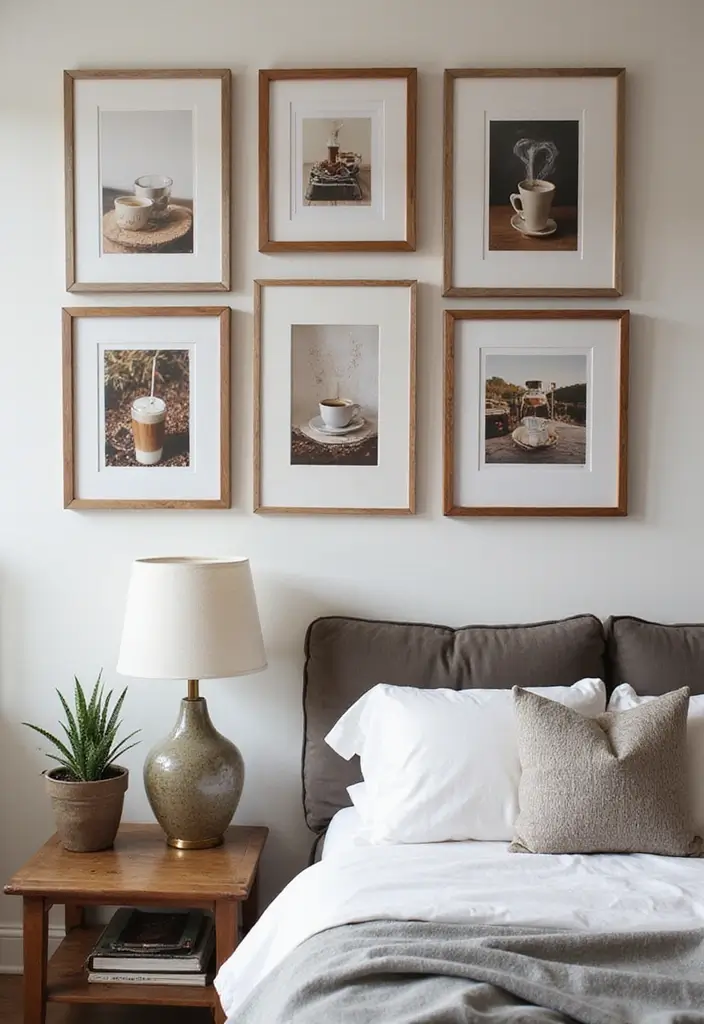
Turn a Coffee Wall into Your Daily Joy
Love coffee? Turn a corner of your bedroom into a warm, cafe feel with a dedicated coffee wall. You get daily joy from small moments like a perfect latte or a quiet shop visit.
Here is why it works: photos of cafes, latte art, and cozy mugs create a narrative you can live in every day. Build it with purpose and ease.
– Choose a wall near your seating area and plan a friendly layout.
– Pick frames in warm wood or simple black to fit the vibe.
– Print a mix of photos: cafe interiors, barista smiles, latte art close-ups, and your own coffee moments.
– Add a quote strip in a favorite line about mornings or a mug shot wall.
Next, bring in small decor. Use a couple of mugs on a narrow shelf, a glass jar of beans, and a tiny tray for rings or keys. Let the photos vary in size to keep the eye moving, but keep a cohesive color palette—creams, browns, and soft greens.
Lighting matters. Use warm bulbs or string lights to glow around the wall.
Maintenance is easy. Rotate photos with the seasons, keep frames tidy, and avoid overcrowding. With care, this corner stays a daily hug for your love of coffee.
30. Everyday Moments
You want your bedroom to feel warm and personal. A wall of everyday moments can help. Use candid photos from daily life. Think of moments like friends laughing, cooking, or quiet mornings. This approach shows the beauty of routine. It adds a sense of warmth to your room. Arrange these photos informally to feel authentic and cozy.
Here is why it works. Let’s break it down. Candid moments read as real life. They spark memories every day. A mix of faces, foods, and routines adds texture. A soft wall color helps the photos pop.
Next, plan the display. Keep the layout informal. Let photos breathe on the wall. Mount a long line at eye level or create a loose cluster. Use different sizes for depth. A low, cozy nook ties the wall to the room.
Tips:
– Use simple, understated frames to keep the focus on the moments.
– Create a cozy nook with pillows or throws to complement the display.
– Add small shelves or hooks for functional decor.
Next steps: choose a handful of candid shots, pick frames, and start with a small wall display. For a cleaner look, keep mats simple and edges loose. If you want a fresh feel, rotate a few photos every season.
Conclusion
A personalized photo wall can beautifully reflect your life and experiences, transforming a simple bedroom into a storytelling sanctuary.
With these 30 creative ideas, you can curate a space that not only showcases your memories but also enhances your decor. Allow your walls to speak your story, creating a unique blend of art, memories, and personal style.
Frequently Asked Questions
What are some creative ways to display photos on a bedroom wall?
There are so many fun and creative ways to display photos on your bedroom wall! You could try a themed color palette to keep everything cohesive, or opt for a floating shelf gallery that combines photos with small decor pieces. Consider a polaroid photo string for a casual vibe, or mix in artful framed quotes to inspire you daily. Your wall can tell your story beautifully while keeping the room feeling personal and inviting.
How can I create a minimalist photo wall that reflects my personality?
To create a minimalist photo wall that truly reflects your personality, start by selecting a few key photos that resonate with you. Use a black and white display for a clean, modern look, or try a geometric pattern to add structure without clutter. Make sure to balance your photo choices with negative space to keep the wall feeling open and serene. This way, your wall becomes a calm yet powerful expression of who you are.
What types of photos work best for a personalized photo wall?
For a personalized photo wall, it’s best to choose photos that hold significant meaning for you. Consider using heartfelt memories from special occasions like weddings or birthdays. You could also include travel memories that capture your adventures, or even candid shots of everyday moments that bring you joy. Mixing these types of images will help create a rich narrative that truly tells your story.
How often should I update my photo wall to keep it fresh?
Updating your photo wall can be a fun way to keep your space feeling fresh! Consider doing a seasonal rotation where you swap out photos based on the time of year, or whenever you have new memories to share. This can be as simple as changing a few images or completely redoing the layout. Keeping it dynamic not only highlights new experiences but also gives your wall a new look without needing a complete overhaul.
Can I incorporate other art forms into my photo wall design?
Absolutely! Incorporating other art forms into your photo wall can elevate its aesthetic. For example, you can mix in art and photography fusion by pairing your photos with paintings or prints that resonate with you. Adding textiles or mixed media elements like fabric panels alongside your images can create depth and visual interest. This blend of styles allows you to tell your story in a more unique and artistic way.
Related Topics
photo wall ideas
bedroom decor
minimalist design
personalized displays
gallery wall
creative arrangements
family memories
DIY art
themed decor
whimsical touches
easy updates
seasonal decor