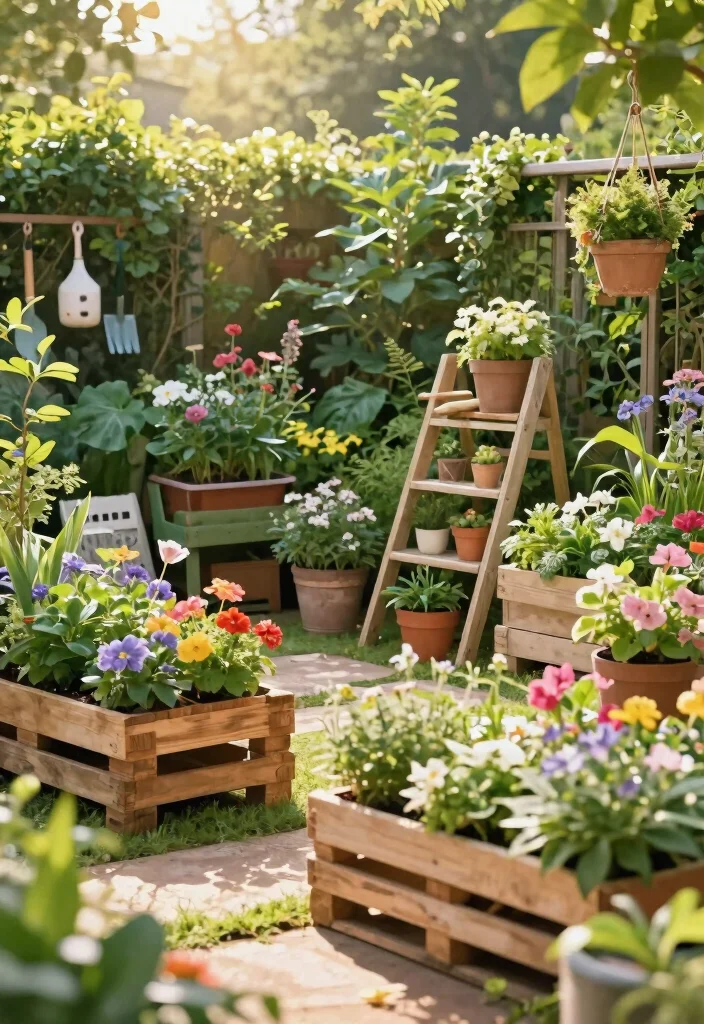
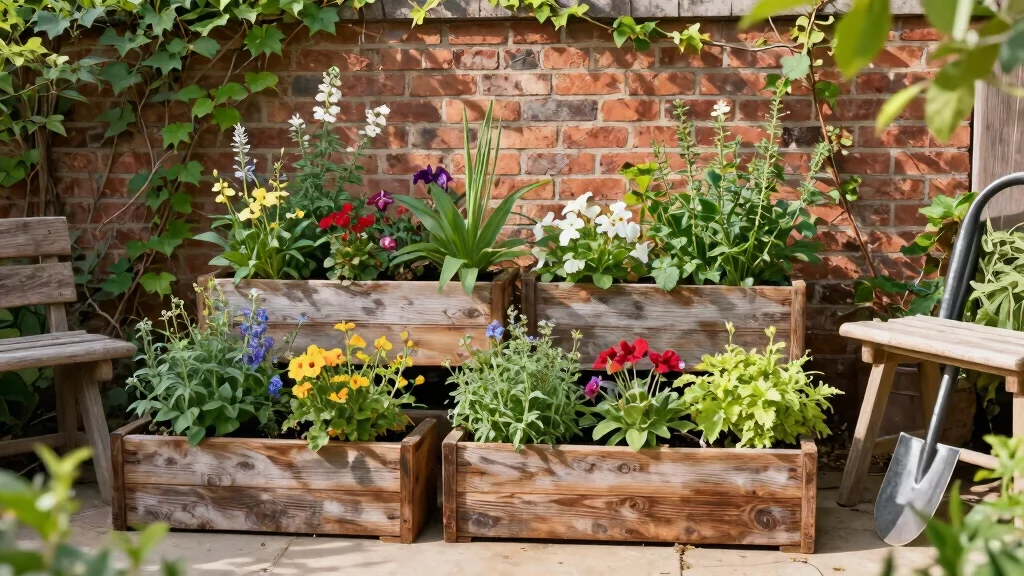

Are you ready to transform your gardening experience? With the rise of urban living, many of us are craving a touch of nature right in our homes. I created this post to help you tap into that desire by showcasing 14 fantastic planter box plans. Whether you’re a seasoned gardener or just starting out, these plans cater to all skill levels.
If you love gardening, or are simply looking to enhance your outdoor décor, this one’s for you. We all know that creating a beautiful green space can seem overwhelming, especially in limited areas. That’s why I pulled together these DIY planter boxes that are clever, easy to follow, and perfect for bringing your gardening dreams to life. From vertical designs for small spaces to unique raised bed options, you’ll find something that suits your style and garden needs.
Get ready to dig into a world of creativity! You’ll gain practical ideas and step-by-step guidance to build your own planter boxes. These projects will not only spruce up your outdoor areas but also give you a sense of accomplishment as you grow your own plants right at home. So grab your tools, and let’s dive into these inspiring planter box plans!
1. Pallet Planter Box
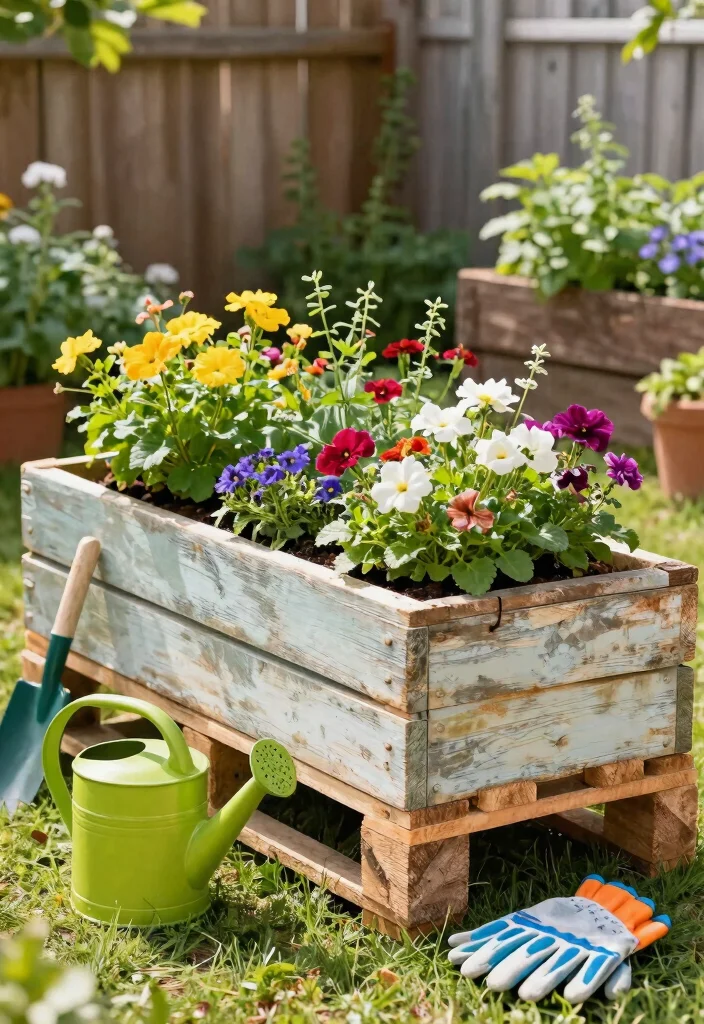
If you’re looking for an affordable and creative way to garden, consider using wooden pallets. These versatile materials can easily be transformed into a charming vertical planter box that saves space and adds rustic flair to your outdoor area. Simply stack and fill each compartment with soil and your favorite plants for a unique garden feature that stands out.
Start by preparing your pallet; make sure it’s sanded smooth to avoid splinters. If you want, give it a coat of exterior wood paint or sealant to enhance durability. Position it in a sunny spot and line it with landscape fabric to keep the soil in place.
Essential materials to gather:
– Sturdy wooden pallets
– Sandpaper for smoothing
– Optional exterior wood paint or sealant
– Landscape fabric for soil containment
Follow these steps to create your planter:
1. Sand down the pallets thoroughly.
2. Optionally paint or seal the wood for weather resistance.
3. Stand the pallet upright, lining the back with fabric to hold soil.
4. Fill each section with soil and plant your favorite greenery.
With trailing plants like ivy or petunias spilling over the edges, your pallet planter will be a stunning focal point in your garden!
Turn a pallet into a thriving, space-saving planter box with a few screws and a coat of exterior sealant. Even small balconies deserve bold greenery—these planter box plans prove that DIY charm is just a few steps away.
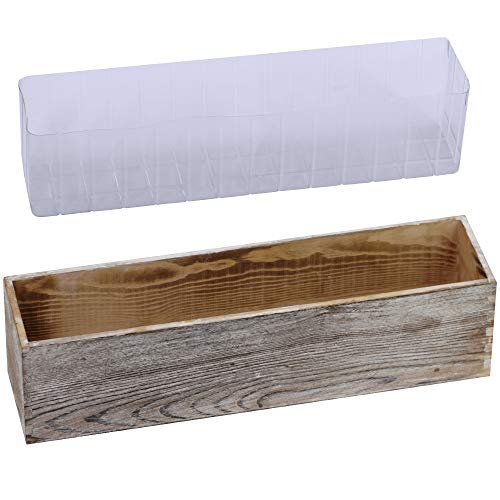
Quantity: Pack of 1 Rustic Rectangular Wood Planter Box Decorative Wooden Succulent Planter Window Box comes with a matching Removable Plastic Liner.

✔️WHAT IS INCLUDED? Wood Box with Plastic Liner (Flower/plant is not included) (Sell in Set of 4 Boxes)
2. Ladder Planter Box
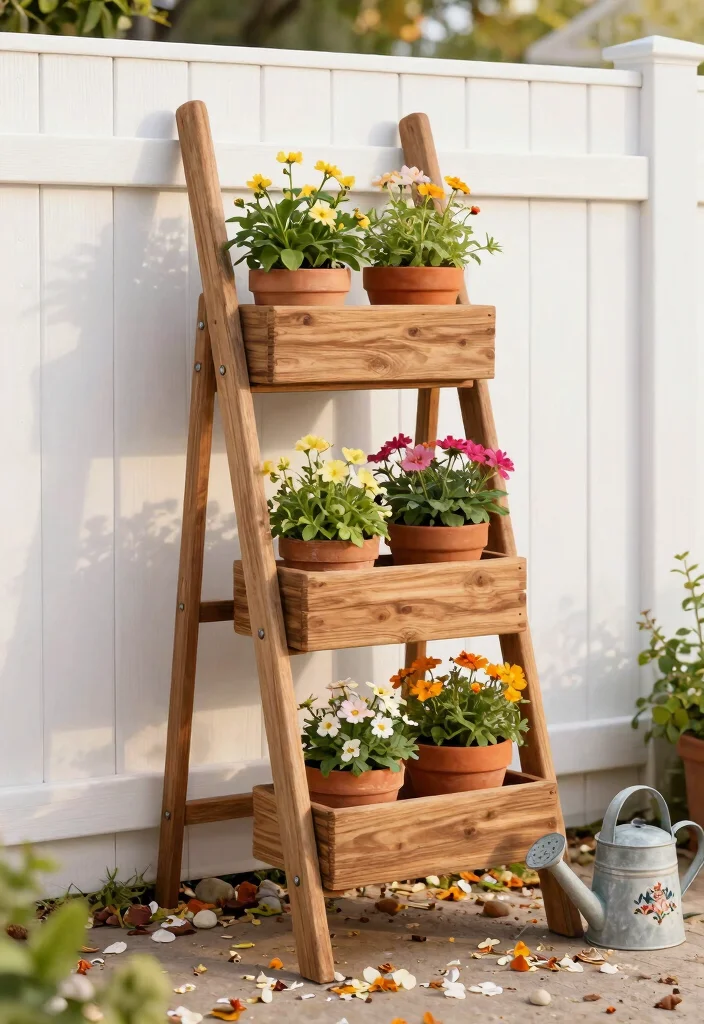
Looking for a way to combine functionality with aesthetic appeal? A ladder planter box is a fantastic solution that brings an eye-catching element to your garden. Using an old wooden ladder as a framework for your planters creates a vertical garden that not only saves space but also adds height and charm.
Begin by cleaning your ladder and consider painting it to give it a fresh look. Then, attach small pots or wooden boxes to each step, allowing for a delightful display of flowers or herbs. This project is perfect for those new to woodworking.
Materials you will need:
– An old wooden ladder
– Small pots or wooden containers
– Potting soil to fill the containers
– Plants of your choice for vibrant color
Here’s how to assemble your ladder planter:
1. Clean the ladder and paint if desired for added style.
2. Secure pots or boxes on each step, using screws or adhesive.
3. Fill pots with soil and arrange your plants.
4. Position the ladder against a wall for stability.
This setup invites a lively display that draws the eye upward, making your garden feel more inviting and dynamic!

[MINIMAL FOOTPRINT & MAXIMIZED SUNLIGHT] Save your valuable floor area! Designed to occupy very little ground space, this ergonomic trapezoid 5-tier vertical garden planter raised bed maximizes your growing capacity vertically. The smartly staggered structure ensures no plant is shaded, allowing every leaf to receive full sunlight and moisture. Whether on a narrow balcony or compact patio, this versatile vertical raised garden bed is perfect for harvesting fresh veggies, herbs, and blooms!

【3 Tier Raised Garden Bed】The vertical garden planter adopts 3 tier design, so there is enough space to plant and divide vegetables, herbs, flowers, etc. Save a lot of space for you and keep your garden well organized.

Spacious 5-Tier Growing Area: Designed with 5 separate planting boxes, this garden planter provides generous room for growing fruits, succulents, vegetables, or colorful flowers while keeping your gardening area neatly organized in one place.
3. Rain Gutter Planters
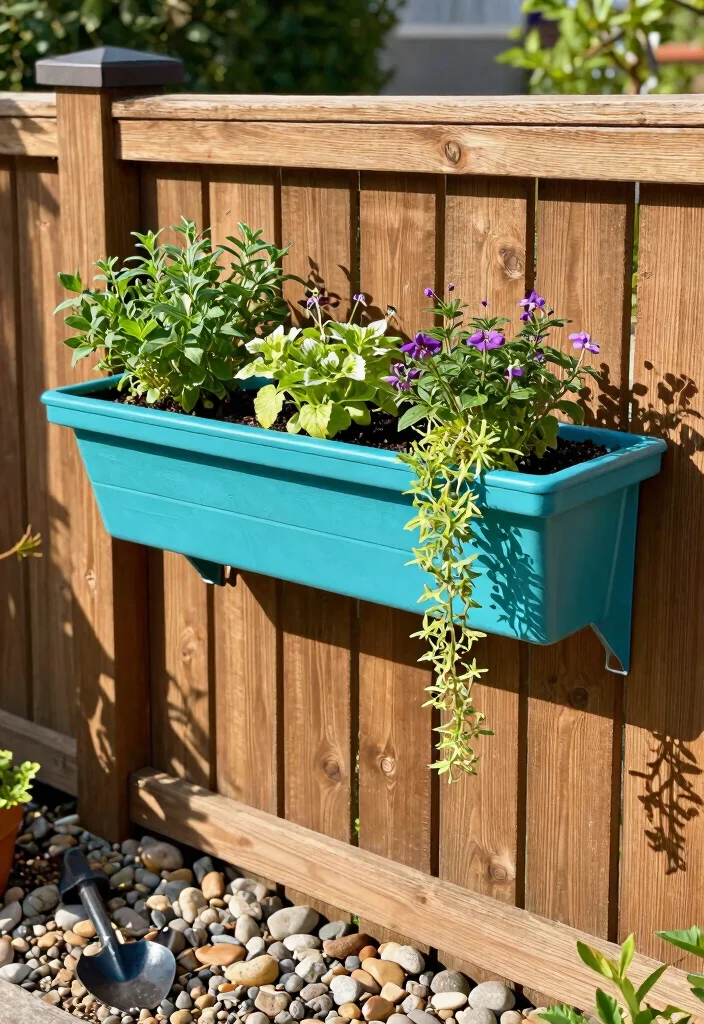
Transforming old rain gutters into stylish planter boxes is a smart way to maximize space in your garden. This DIY project is perfect for small areas, allowing you to grow herbs and flowers vertically. Plus, it’s a fun activity you can enjoy with your family!
To start, simply cut the gutters and mount them either horizontally or vertically on your walls or fences. This design keeps your plants accessible while adding a unique touch to your outdoor decor.
Gather these essential materials:
– Old rain gutters
– Mounting brackets for stability
– Screws for attachment
– Potting soil for planting
– A variety of plants like herbs or succulents
Follow these straightforward steps:
1. Cut the gutters into your desired lengths.
2. Drill holes in the bottom for proper drainage.
3. Securely attach mounting brackets to your chosen surface.
4. Fill gutters with potting soil and plant your greenery.
This clever design is especially useful for herbs, making it easy to grab fresh ingredients right when you need them in the kitchen!

More suitable raised garden bed size and Volume:67"L x 20"W x10"H, 7 Cu. Ft. You can cultivate plants, like vegetables, flowers, herbs in your patio, yard, garden, and greenhouse.


More suitable raised garden bed size and Volume:67"L x 20"W x10"H, 7 Cu. Ft. You can cultivate plants, like vegetables, flowers, herbs in your patio, yard, garden, and greenhouse.
4. Horizontal Hanging Planter Box
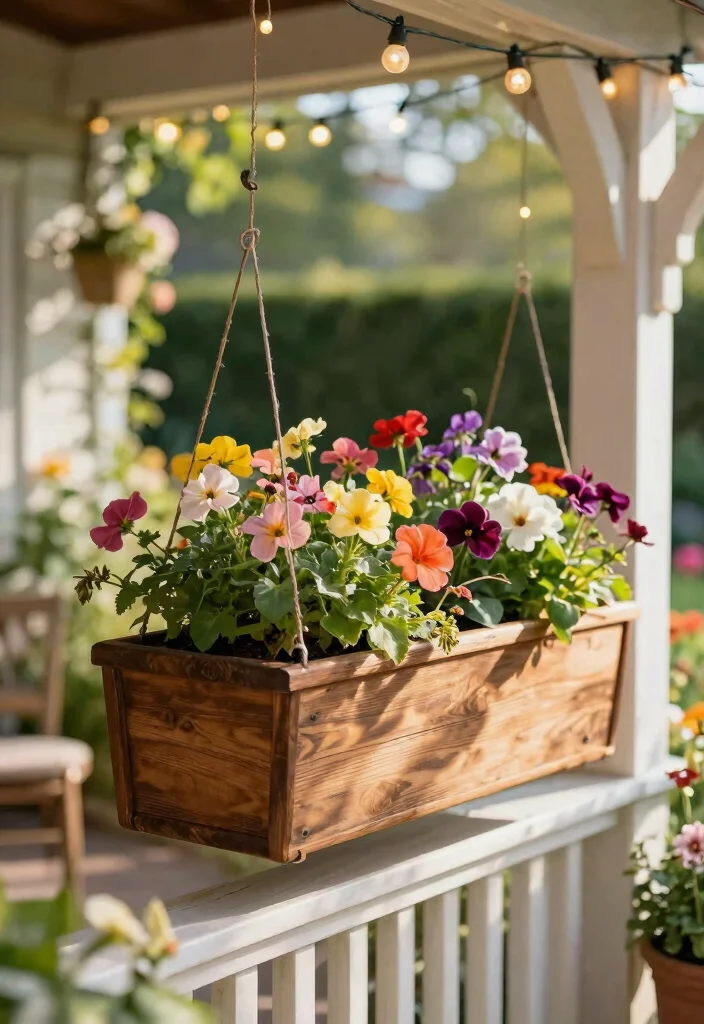
Elevate your gardening experience with horizontal hanging planter boxes that add a fresh twist to vertical gardening. These planters are perfect for smaller yards or patios, offering a modern look while maximizing planting space. Their horizontal design makes tending to your plants simple and enjoyable.
Begin by assembling your planter box using sturdy wooden boards, ensuring they are deep enough for your plants. Then, attach ropes or chains for hanging, making it easy to place them at the right height.
Materials to prepare:
– Wooden boards or ready-made planter boxes
– Rope or chains for suspension
– Potting soil to nourish your plants
– A selection of plants to brighten your space
Here’s how to get started:
1. Build your planter box from wooden boards, ensuring depth for roots.
2. Attach strong ropes or chains securely to both sides.
3. Fill your boxes with potting soil and arrange your plants.
4. Hang at a comfortable height on your porch or balcony.
Mixing various plant types creates a beautiful layered effect, with colorful flowers offering a vibrant display that enhances your outdoor ambiance!

Balcony Rail Planter: Rectangular outdoor planters was designed to maximize inside growing space allowing dirt and roots to grow strong and deep.This special design can be hung on the balcony, window, garden,railing, anywhere in the room,also can be used as desktop.

【Universal Fit for Most Railings】Stop worrying if it will fit! Our adjustable railing planter boxes bracket (made of sturdy, powder-coated iron) securely mounts on any railing from 1.6" to 4.9" wide. This no-drill design protects your property, giving you a stable, custom fit for your balcony, deck, or patio fence.

【 Vertical Raised Garden Bed with Trellis】Perfect for home gardening lovers, this herb planter outdoor with 4 garden boxes let you plant vegetables, herbs, and flowers in separate plant bed while the 11-inch trellis supports climbing plants like tomatoes, strawberries, vines, and peppers. The balcony raised garden beds outdoor with legs creates an optimal environment for your plants to thrive.
5. Tiered Planter Box
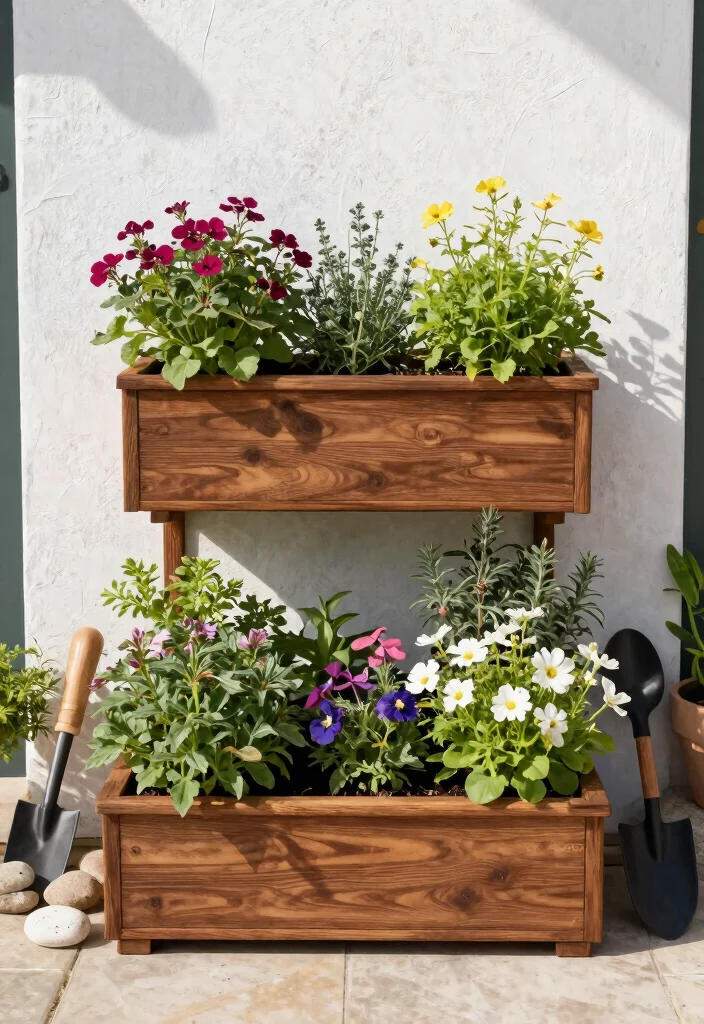
For an eye-catching gardening solution, consider creating a tiered planter box. This design maximizes your planting area while offering multiple levels of growth in a compact space. It’s perfect for balconies and patios, adding depth and interest to your garden.
Start by cutting wooden boards to form three or more levels, each at varying heights for a stunning visual effect. The construction process is straightforward, even for beginners.
Key materials needed:
– Wooden boards for creating the tiers
– Screws for stability
– Landscape fabric to hold soil
– Potting soil for planting
– A variety of plants for diverse displays
Follow these steps to build your tiered planter:
1. Cut boards to create levels, ensuring height variation.
2. Secure each tier using screws for added strength.
3. Line the interior with landscape fabric to keep soil in place.
4. Fill each tier with soil and plant a selection of varieties.
Using herbs on the top tier for easy access and flowering plants on lower levels creates a visually appealing display that’s both functional and beautiful!
Tiny balconies love a tiered planter box—it’s proof that small spaces can yield big blooms. With these planter box plans, you stack herbs, veggies, and color at different levels, making gardening doable and fun for beginners.

Durable Material: planter liner mades of super strong and durable nonwoven fabric, this landscape cloth is the perfect liner for large vegetable trough outdoor large elevated beds. The liner is porous enough to allow excess water to drain and tough enough to prevent soil from escaping

【Perfect Fit for Any Planter】63" x 114" (160cm x 290cm) liner is designed to perfectly match common large vegetable troughs, raised bed dimensions and landscaping projects. The fabric can be easily trimmed with scissors to custom-fit any smaller planter boxes, flower pots, or window boxes, making it a versatile replacement liner for various gardening needs.
【Perfect Fit for Any Planter】63" x 83" (160cm x 210cm) liner is designed to perfectly match common large vegetable troughs, raised bed dimensions and landscaping projects. The fabric can be easily trimmed with scissors to custom-fit any smaller planter boxes, flower pots, or window boxes, making it a versatile replacement liner for various gardening needs.
6. Bottle Planter Boxes
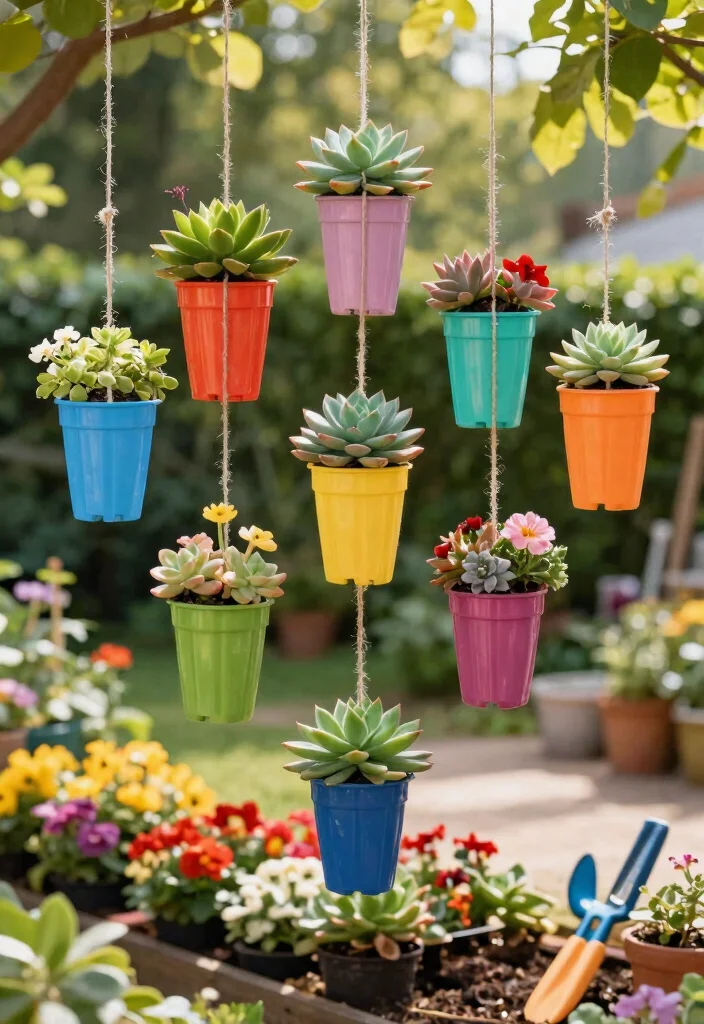
Get creative by transforming plastic bottles into playful planter boxes that are both eco-friendly and enjoyable to make. This project is perfect for teaching kids about gardening while promoting recycling! You can hang or stack these bottle planters for a modern aesthetic in your garden.
Start by cutting the bottles in half, leaving the top half to serve as a reservoir for water. Drill drainage holes in the bottom and fill them with potting soil, then you’re ready to plant.
Materials required:
– Plastic bottles of any size
– Scissors for cutting
– Potting soil for your plants
– Small plants or succulents for easy care
Steps to create your bottle planters:
1. Cut the bottles in half, keeping the top half with the cap.
2. Drill small holes in the bottom for drainage purposes.
3. Fill with potting soil and select your plants.
4. Hang or stack the bottles to form a unique vertical garden.
Opt for succulents or small herbs that thrive in smaller spaces, requiring minimal maintenance while adding charm to your garden!

Dimensions - Height: 4" | Opening: 4"x4" | Interior Dimensions: L-3" x W-3" H-3.5" | Wood Thickness: 0.25" | Brown Wood Color | Pack of 4
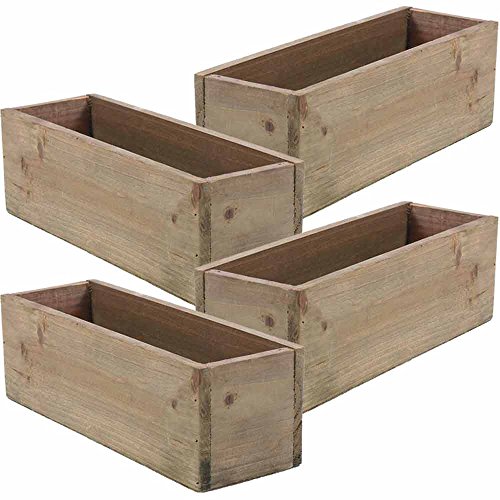
MULTI PACK - Each Set includes 4 individual planter boxes with plastic liner

Difficulty Rating & Requirements
Overall Difficulty Rating: Medium
Building planter boxes can be a rewarding project for anyone interested in gardening. The difficulty can vary based on the design you choose and the materials required. Most plans are suitable for individuals with basic DIY skills, but some designs may challenge beginners or require a bit more expertise. If you have a passion for gardening and a willingness to learn, you’ll find this project manageable and satisfying.
Time Estimate:
⏱ Estimated time: 2-5 hours, depending on the complexity of the planter box.
– Planning and Design: 1 hour
– Material Gathering: 1-2 hours
– Building: 2-3 hours
Skill Requirements:
– Required skills: Basic woodworking, measuring, and basic tool handling.
– Beginner-friendly: Yes, many designs can be tackled by beginners with some guidance.
– Skills that can be learned: Measuring, cutting, and assembling materials can be learned during the project. However, more advanced skills like construction or woodworking might take extra practice.
Tools & Materials Needed:
🧰 Essential items checklist:
– Wood or pallets (Required)
– Nails or screws (Required)
– Hammer or drill (Required)
– Saw (Required)
– Sandpaper (Optional, for smoothing edges)
– Wood stain or sealant (Optional, for weatherproofing)
– Measuring tape (Required)
– Protective gloves (Optional, for safety)
Step-by-Step Overview:
1. Planning and Design (1 hour): Choose the planter box design that fits your space and style. Measure your area to ensure it fits properly.
2. Material Gathering (1-2 hours): Purchase or collect the materials you need. Ensure all items are ready before you start building.
3. Building (2-3 hours): Cut the wood to the desired sizes, assemble the box using nails or screws, and sand any rough edges. If including a base, make sure it has drainage holes.
4. Finishing Touches (Optional, 30 minutes): Apply wood stain or sealant to protect the planter from weather damage.
Cost Comparison: Professional vs DIY:
Creating a planter box yourself can save you money. A professionally built planter can cost anywhere from $100 to $300, depending on design and materials. In contrast, building your own can be done for as low as $30 to $100. You may want to hire help if you choose a more complex design or lack the necessary tools, but many basic designs are perfectly doable as a DIY project. This not only saves money but allows you to add a personal touch to your garden.

【3 Tier Raised Garden Bed】The vertical garden planter adopts 3-tier design, so there is enough space to plant and divide vegetables, herbs, flowers, etc. Save a lot of space for you and keep your garden well organized.

Four-Layered Garden Design: This planter box features a four-tier structure, allowing you to cultivate a variety of plants in separate layers. You can plant everything from vegetables and herbs to flowers, fruits, and even strawberries. Each tier offers ample space for healthy growth without overcrowding your plants
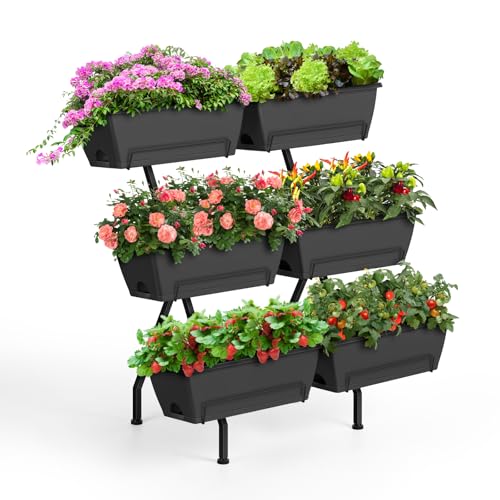
【Space-Saving Vertical Garden System】 Six stackable planters transform tight spaces into lush gardens – perfect for urban balconies, small patios, or indoor greenery. Strategically alternate herbs, flowers and vegetables across tiers to create your perfect mini ecosystem.
7. Concrete Block Planters
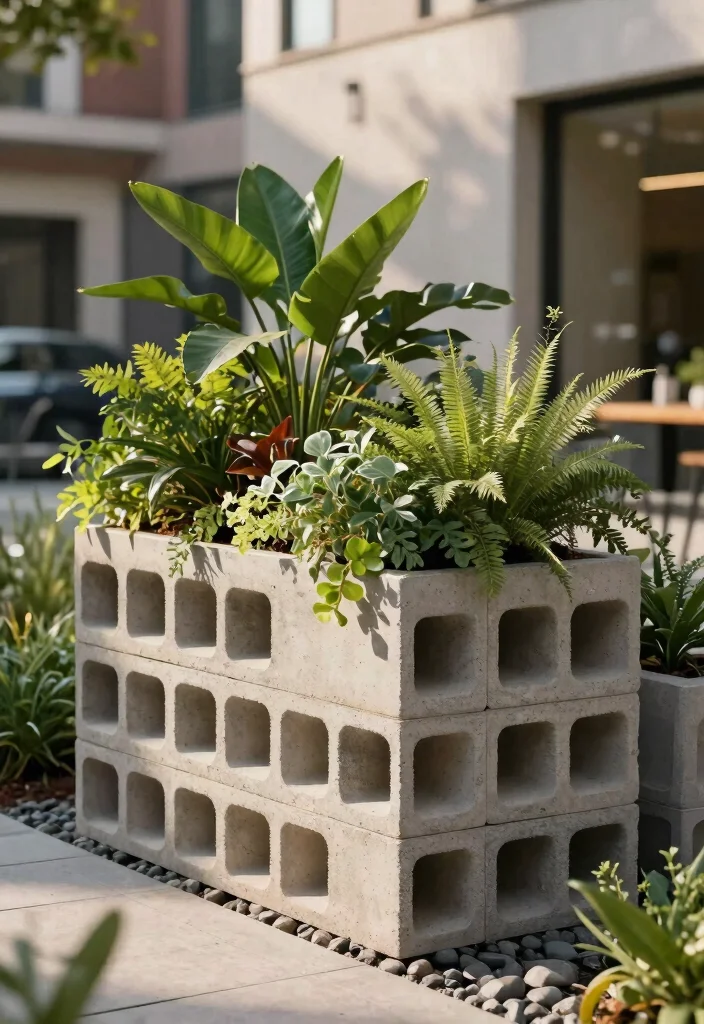
For those seeking a modern and industrial touch, concrete block planters are a stylish choice for urban gardening. These durable planters can be arranged in various configurations, allowing you to create a personalized raised bed that fits your space perfectly. Plus, they withstand the elements beautifully.
Begin by selecting a suitable location and arranging the concrete blocks to form your desired shape. Fill each block with potting soil to ensure proper drainage for your plants.
Materials needed:
– Concrete blocks for structure
– Potting soil to nourish plants
– A selection of plants to fill your space
Follow these simple steps:
1. Choose your layout and arrange concrete blocks accordingly.
2. Fill the blocks with potting soil, ensuring proper drainage.
3. Plant your selections and add mulch to help retain moisture.
Concrete blocks can serve a dual purpose as seating, making them a practical addition to your garden while enhancing its modern appeal!

Multifunctional Design: This garden planter is separated into two growing areas for different plants or planting methods. The baffle can be removed to form a bigger growing area.

Raised Planter Box - Our s size greenhouse hoops are designed for 1-3.5ft wide mini raised garden beds or raised planter box, and it suitble for both indoor and outdoor use. perfect for mesh netting, shade cloth, freeze cover, plstic sheeting to protect your plant from all seasons.
8. Single-Container Vertical Gardens
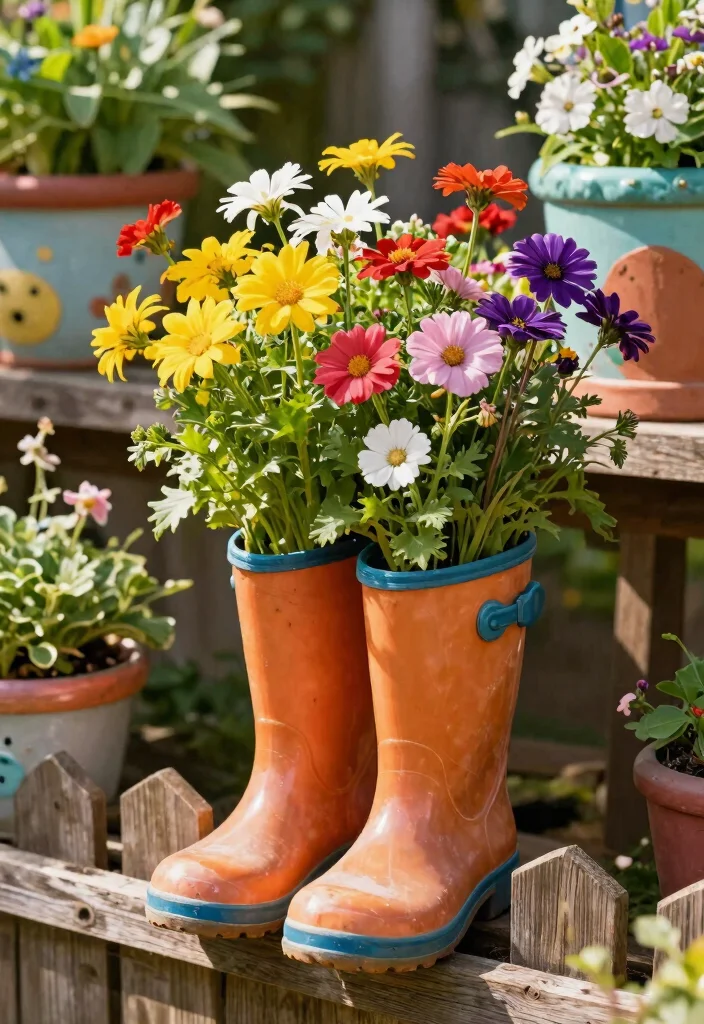
Single-container vertical gardens offer a simple yet effective way to maximize space while creating a striking focal point. You can use any container you like—from old buckets to shoes—to showcase your plants creatively. This beginner-friendly idea encourages you to express your personality through gardening.
Start by ensuring your chosen container has drainage holes to promote healthy plant growth. Fill it with potting soil and arrange your plants as desired.
Key materials for this project:
– Any container of your choice
– Potting soil for planting
– A variety of plants (flowers, herbs, or veggies)
Steps to create a single-container vertical garden:
1. Prepare your container with drainage holes.
2. Fill with potting soil and arrange your plants creatively.
3. Position the container in a sunny spot or against a wall for support.
Using colorful containers can bring vibrancy to your space, creating a fun and eclectic garden theme that reflects your style!

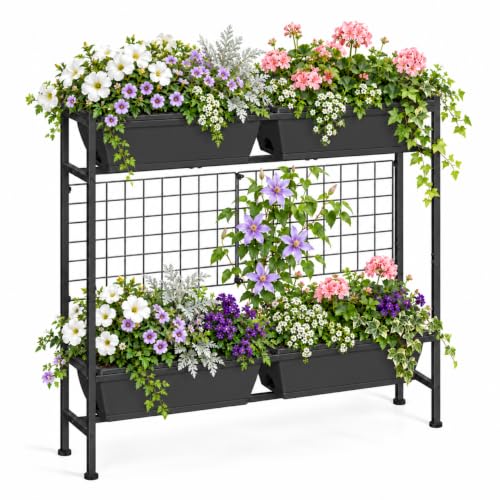
【 Vertical Raised Garden Bed with Trellis】Perfect for home gardening lovers, this raised garden beds outdoor with 4 flower pots let you plant vegetables, herbs, and flowers in separate planters while the 11-inch trellis supports climbing plants like tomatoes, strawberries, vines, and peppers. The planters for indoor plants create a optimal environment for your plants to thrive.

【Tiered Vertical Raised Garden Bed】Split-level and ladder design can offer ample spce for plants to grow and plant on each tier can receive enough sunshine. In addition, the triangular design of the base legs makes the planter stand more stable when bearing weight.
9. Vertical Trellis Planter Box
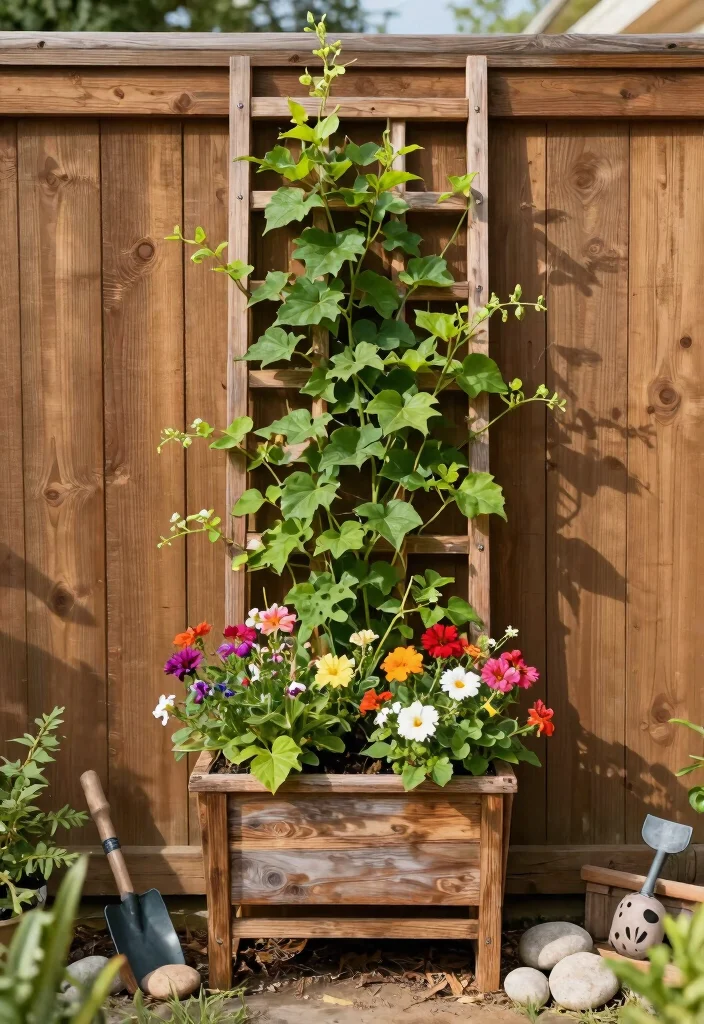
Enhance your garden’s functionality and beauty with a vertical trellis planter box. This design allows climbing plants, such as tomatoes or flowering vines, to grow upward, saving valuable ground space. It’s an excellent option for small gardens and can be tailored to suit your specific plant needs.
Start by constructing a planter box to your desired size, then create a trellis structure at the back using wooden slats. Fill the box with potting soil and plant your climbing species for a stunning display.
Materials you need:
– Wooden boards for the planter and trellis
– Screws for assembly
– Potting soil for planting
– Climbing plants of your choice
Follow these steps to construct your vertical trellis planter:
1. Build the planter box based on your size preferences.
2. Create a trellis structure at the back using slats.
3. Fill with potting soil and plant your climbing species.
4. Secure the trellis to the box and place it in a sunny spot.
Regular pruning will help your climbing plants flourish along the trellis, creating a visually striking vertical display!

【Wide Application】Our raised bed liners keep soil in, so you can install the bed on a patio, paved area or concrete slab or any hard surfaces without washing away the soil. They help prevent weeds from infiltrating the flower bed, and drain away excess water to avoid drowning the plants

Resistant Non-Woven Material: Crafted from strong non-woven fabric, this Raised Garden Bed Liner serves as a reliable Non Woven Fabric Liner for raised beds, handling soil weight and frequent watering in greenhouses, patios, and outdoor garden setups

Premium Durable & Functional Non-Woven Fabric: Crafted from heavy-duty, ultra-durable non-woven fabric, this landscape liner provides the perfect balance for your raised garden bed. It is porous enough to allow excess water to drain freely, preventing root rot, yet tough enough to effectively contain soil and prevent erosion. This breathable barrier also blocks weeds from growing up into your precious soil.
10. Recycled Drawer Planters
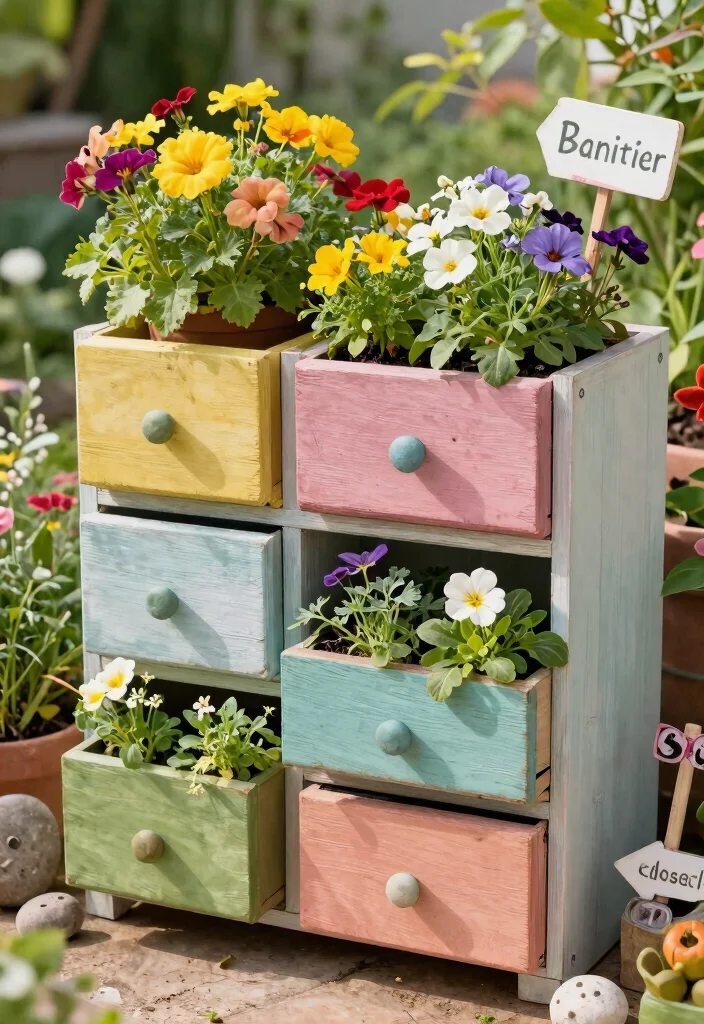
Repurposing old drawers into planters is a creative way to infuse character into your garden while giving new life to unused items. These drawer planters can be stacked or arranged side by side, creating a layered look that’s both unique and eye-catching. This project is ideal for DIY enthusiasts who love recycling materials.
Start by cleaning and decorating your drawers; a fresh coat of paint can add flair and personality. Drill holes in the bottom for drainage, then fill them with potting soil and your chosen plants.
Materials you will need:
– Old wooden drawers
– Potting soil for planting
– Plants (flowers or herbs for variety)
– Optional paint or varnish for decoration
Here’s how to create your drawer planters:
1. Clean and decorate the drawers as desired.
2. Drill holes in the bottom for proper drainage.
3. Fill with potting soil and plant your selections.
4. Arrange the drawers in your garden for a whimsical touch.
Using different sizes of drawers adds interest, and consider planting flowers in the top drawer while using the bottom for herbs, combining beauty with practicality!
11. Fabric Hanging Planters
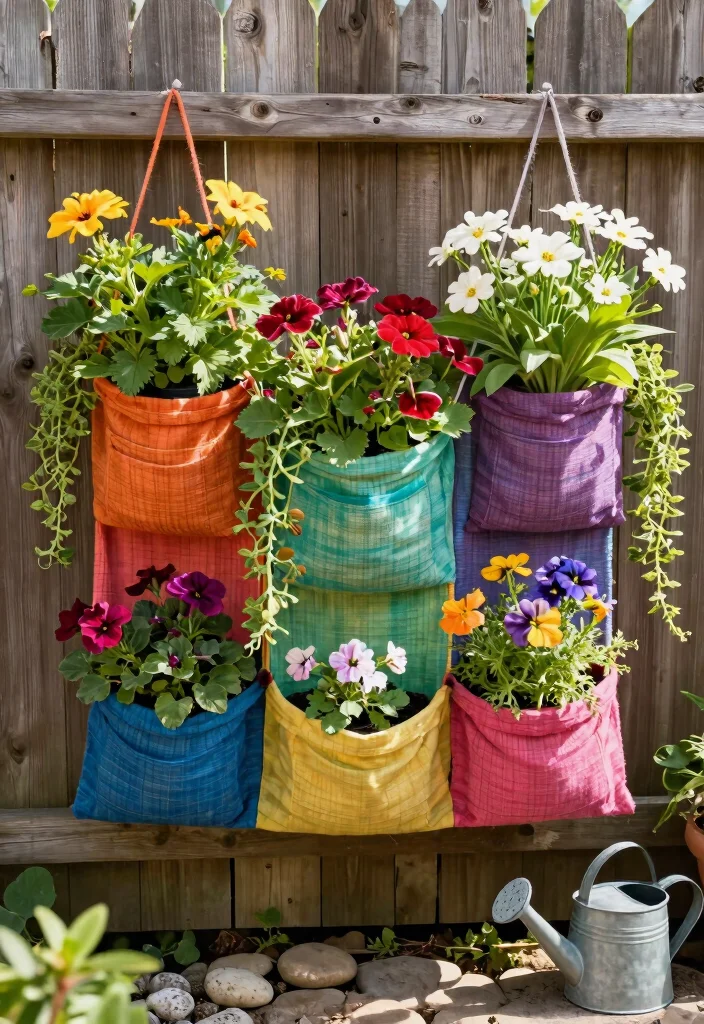
For a unique twist on vertical gardening, fabric hanging planters provide a soft and innovative touch. These planters offer a wide variety of plants the chance to thrive, and their lightweight design makes them easy to hang wherever you like. Create a vertical garden that adds texture and color to your outdoor space.
Begin by creating pockets in durable fabric using sewing or strong adhesive. Fill each pocket with potting soil, and choose your plants to complete your design.
Materials needed:
– Durable fabric like canvas or burlap
– Rope or strong thread for hanging
– Potting soil to nourish your plants
– A selection of plants for variety
Steps to make your fabric hanging planters:
1. Create pockets in the fabric for planting.
2. Fill each pocket with potting soil and plant your selections.
3. Hang the planter against a wall or fence using sturdy rope.
Choose trailing plants for the top pockets and upright plants for the lower ones to achieve a beautiful cascading effect!
12. Hanging Window Box Planters
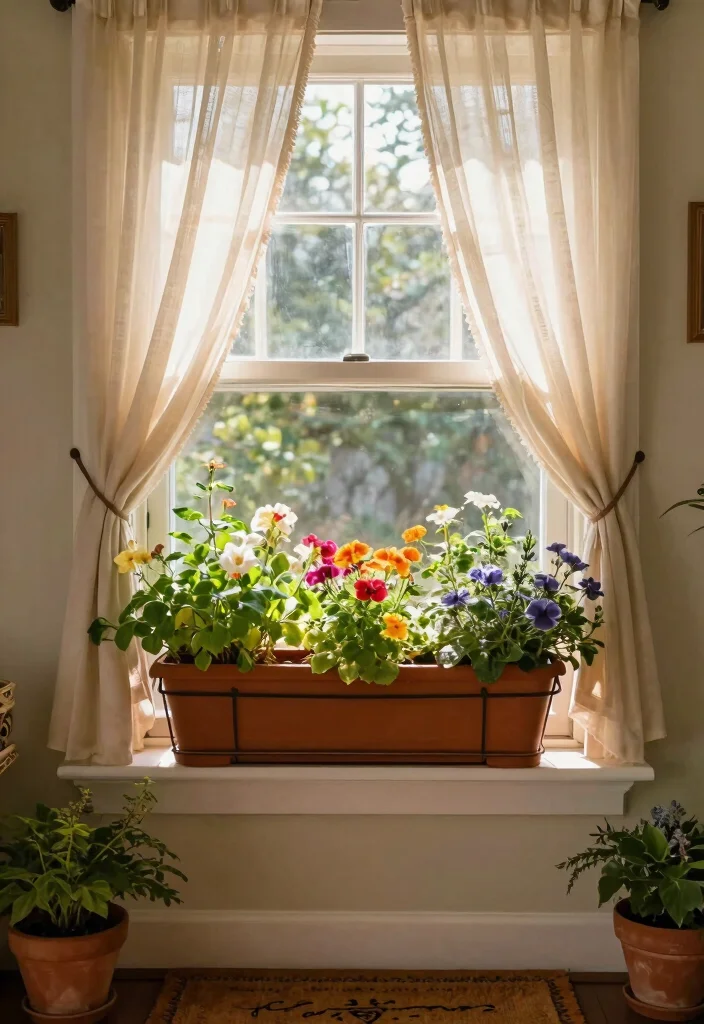
Enhance your home’s exterior with hanging window box planters that add vibrant color and life. These boxes are perfect for displaying flowers or herbs, brightening up any window or porch area. They’re easy to install and bring a fresh, inviting look to your space.
Start by choosing sturdy window boxes and attaching mounting brackets for a secure fit. Fill them with potting soil, arranging your plants for a delightful display at eye level.
Materials to prepare:
– Durable window boxes for planting
– Mounting brackets for secure attachment
– Potting soil to nourish your plants
– A selection of plants for visual interest
Follow these steps to create your hanging window boxes:
1. Choose strong window boxes and attach the brackets securely.
2. Fill with potting soil and arrange your plants as desired.
3. Position them at eye level on your balcony or window sill.
Opt for a mix of fragrant herbs and colorful flowers that bloom at different times to keep your display dynamic throughout the seasons!
13. Straw Bale Planters
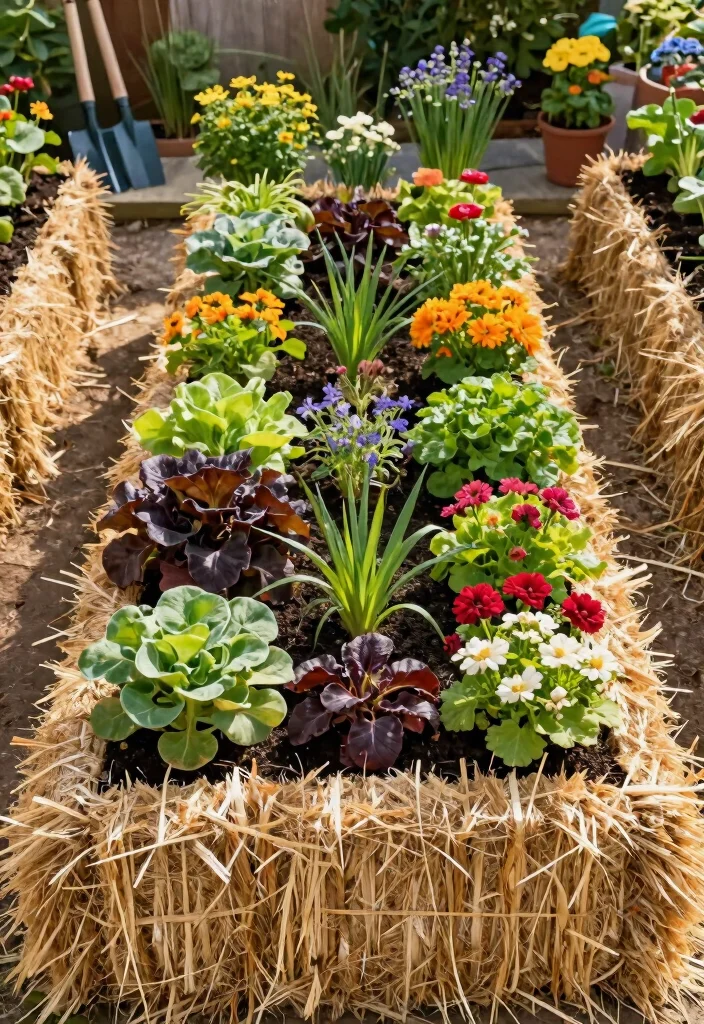
If you’re looking for a unique gardening method, straw bale planters offer a fun and innovative option. Straw bales provide excellent drainage and warmth for your plants, making them ideal starter beds for vegetables and flowers. This project is perfect for beginner gardeners eager to try something new.
Begin by positioning the straw bales in a sunny location, cut side up. Soak the bales with water to start the decomposition process, then add potting soil on top for planting.
Materials needed:
– Straw bales for structure
– Potting soil to nourish your plants
– A selection of plants for your garden
Steps to create your straw bale planters:
1. Arrange the straw bales in a sunny area, cut side facing up.
2. Soak the bales with water to initiate decomposition.
3. After a few days, add potting soil on top.
4. Directly plant seeds or seedlings into the soil.
This method is excellent for growing tomatoes, peppers, and cucumbers, as these plants thrive in the warm, decomposing straw environment!
Straw bale planters warm the soil and boost drainage, turning a sunny corner into a thriving starter bed for veggies. Tip: soak the bales first, then top with potting soil to get steady roots, even in small spaces. If you’re using planter box plans, straw bales fit small spaces.
14. Mobile Planter Boxes
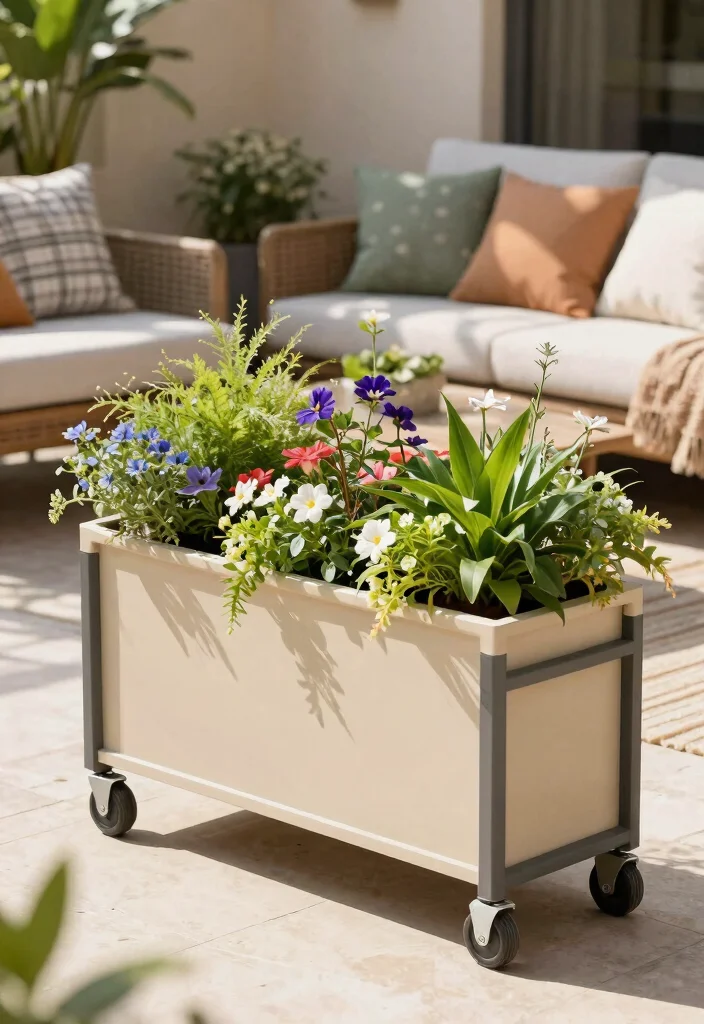
For ultimate flexibility in your gardening, mobile planter boxes allow you to change your garden layout whenever you desire. These planters can be easily wheeled around your patio or balcony, adapting to sunlight and space changes with ease. Whether for seasonal planting or simply rearranging your decor, mobile planter boxes provide convenience and versatility.
Start by constructing your planter box and securely attaching wheels to the bottom for mobility. Fill it with potting soil and plant your selections for a vibrant display.
Key materials to gather:
– Wooden boards or pre-made planter boxes
– Wheels for easy movement
– Screws for assembly
– Potting soil for planting
– A variety of plants to fill your boxes
Here’s how to create your mobile planter boxes:
1. Build your planter box and attach wheels securely.
2. Fill with potting soil and add your chosen plants.
3. Roll the planters to your desired location.
Using a mix of herbs and flowers that bloom at different times keeps your garden vibrant and full of life throughout the growing season!
Choosing the Best Materials for Your Planter Box
Your material choices determine lifespan, maintenance, and whether your plants stay healthy.
Best Wood Choices
| Wood Type | Best For | Key Benefit |
|---|---|---|
| Cedar or redwood | All outdoor planters | Naturally withstands weather, rot, and insects |
| Cedar fence pickets | Budget builds, small spaces | Rot-resistant and inexpensive |
| 2×3 lumber | Structural supports | Stronger than 2x2s, resists cracking under load |
| 2x4s | Vertical legs | Maximum stability for tall planters |
| 2x2s | Light supports only | Acceptable for minimal loads, prone to cracking |
Protective Finishes
- Semi-transparent stain — shows wood grain, tones down color, protects from elements
- Opaque/solid-color exterior product — paint-like finish with heavier coverage
- Exterior-grade paint — works on metal, plastic, concrete, terracotta, and wood for bold color plus protection
- Exterior wood sealant — blocks moisture to prevent rotting
Liners and Drainage
- Never use plastic on the bottom — traps water, causes fungal root rot
- Avoid plastic on the sides — prevents soil breathing, lowers grow medium quality
- Use weed fabric instead — contains dirt while allowing air and water flow
Critical Safety Warning
Do not use pressure-treated lumber for edible plants. The preservatives can leach into soil and poison vegetables, herbs, and fruits.
Common Planter Box Mistakes to Avoid
Even the best planter box plans can fail if you miss a few critical details during build and setup. I’ve seen promising projects turn into wobbly, waterlogged disappointments because of simple oversights that are easy to prevent.
- Use rot-resistant wood outdoors. Cedar, redwood, or cedar fence pickets hold up against moisture far better than standard lumber and still keep costs reasonable.
- Let pretreated lumber dry fully. If you buy pretreated boards for outdoor durability, give them two full weeks to dry before cutting. Working them too soon leads to warped wood and frustrating assembly.
- Avoid pressure-treated lumber for edibles. The chemicals in pressure-treated boards can leach into soil and get absorbed by vegetables, herbs, or fruits. Keep this material strictly for ornamental plantings.
- Drill drainage holes in wooden bases. Skipping this step traps moisture, rots roots, and shortens your box’s lifespan. It’s one of the most common and damaging mistakes I see.
- Never line the bottom with solid plastic. That creates a water-trapping pool that suffocates roots and causes fungal rot. If you need a liner, use weed fabric on the sides to contain soil while still allowing breathability, or add holes to any plastic barrier.
- Skip chicken wire for drainage layers. The small mesh pockets fill with soil and compact, blocking water flow entirely. Use a coarser hardware cloth or proper drainage gravel instead.
- Drill pilot holes before driving screws. This is especially crucial with cedar, which splits easily. I recommend drilling two pilot holes at each end of your sideboards for cleaner assembly and stronger joints.
- Check your measurements against your actual space. Fixed plan dimensions rarely fit perfectly. Customizing length to run a deck rail or fill a porch gap makes the difference between a built-in look and an awkward gap.
- Protect wood with exterior sealant. Unsealed wood absorbs moisture, swells, and deteriorates faster. A proper sealant plus a strong plastic liner on interior sides (not the bottom) adds years of service.
- Level your cuts and legs carefully. Inaccurate cuts and uneven legs produce wobbly, slanted boxes that drain poorly and look amateur. Measure twice, cut once, then check with a level before filling.
Maintaining Your Planter Box for Longevity
A well-built planter box deserves regular care to last through many growing seasons. I focus on three areas: moisture control, surface protection, and smart material choices.
Controlling Moisture
- Drainage holes: Drill several holes in the base so water exits freely instead of pooling and rotting the wood from the inside out.
- Soil barriers: Line the box with plastic sheeting or an old compost bag turned inside out, stapled to the walls with holes poked in the base. This keeps damp soil from pressing directly against the wood while still letting water drain.
- Avoid bottom plastic without drainage: Never seal the bottom with solid plastic—it traps water, suffocates roots, and causes fungal rot.
- Side breathability: Skip plastic on the walls, which blocks air movement and degrades soil quality. Weed fabric works better for containing dirt without smothering it.
Protecting the Finish
- Seal before planting: Brush on an exterior wood sealant to create a moisture barrier before you add soil.
- Stain application: Work in small sections with a semi-transparent stain, brushing it on and immediately wiping with a rag until the tone looks right. This preserves a natural wood appearance while shielding from sun and rain.
- Painted boxes: Use exterior latex paint in two full coats, adding a third coat to end-grain pieces where water soaks in most aggressively. Follow all drying and curing times on the label.
- Varnish for raw wood: Two coats of varnish over debarked wood helps prevent rot in outdoor conditions.
Material and Design Choices
- Weather-resistant lumber: Cedar and redwood hold up naturally against the elements without chemical treatments.
- Skip pressure-treated wood: The preservatives can leach into edible crops.
- Raised and wheeled bases: Casters or legs lift the box off the ground, improving drainage and stopping stains on paving. Polyethylene panels on a metal frame offer another durable route, with optional liners and lockable wheels for mobility.
- Internal containers: Nest plastic storage bins inside wooden frames to reduce soil volume, cut costs, and keep the outer shell drier.