
Cleaning your bedroom walls may not seem like a priority, but over time, dust, stains, and scuff marks can build up, making your space feel neglected and uninviting. If you’ve noticed that your walls look dull or dirty, it’s time to take action! A clean bedroom not only enhances aesthetics but also improves your overall mood and well-being.
In this guide, you will learn simple and effective techniques to clean your bedroom walls, making them look fresh and new again. You’ll discover the materials needed, step-by-step instructions to follow, and tips to maintain your walls in the long run. By the end of this guide, your bedroom will feel rejuvenated and welcoming.
This is a beginner level project and will take approximately 1-2 hours to complete. Grab your cleaning supplies, roll up your sleeves, and let’s get started on transforming your space!
TL;DR Summary
– Clean your bedroom walls to enhance your living space.
– Gather materials like a sponge, bucket, and cleaner.
– Follow the step-by-step guide for effective cleaning.
– Enjoy a refreshed and inviting bedroom atmosphere.

LINT-FREE ON GLASS: Soft microfiber helps lift dust, smudges, and everyday messes without leaving lint behind, making it a go-to cloth for mirrors, windows, stainless appliances, and quick wipe-downs around the home.

10x GRIP-ROOT WEAVE - TRAP MORE, WORK LESS: Ultra-absorbent microfiber towels for car Grip Root weave works like PLANT ROOT FOLLICLES, sucking up & LOCKING AWAY 8x to 10x its weight in liquid, particulates, moisture, grime and dirt in far LESS TIME than traditional ‘Heavy Duty’ Cleaning Rags. Each towel features a 2.5mm thick design, providing enhanced durability and better grip during use.
Effective Streak-Free Cleaning: Clean kitchen countertops, windows, mirrors, bathroom surfaces, stainless steel, car interiors, glass, and other delicate surfaces with just water or your favorite cleaner—these microfiber cloths deliver streak-free, neat results with minimal effort, making daily cleanup fast and simple
Prerequisites/Materials Needed
- Cleaning solution (all-purpose or mild detergent)
- Warm water
- Bucket
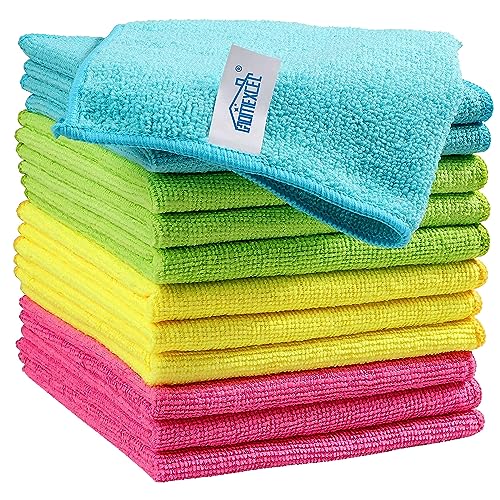
- Soft sponge or cloth
- Magic eraser (optional)
- Step ladder (if necessary)
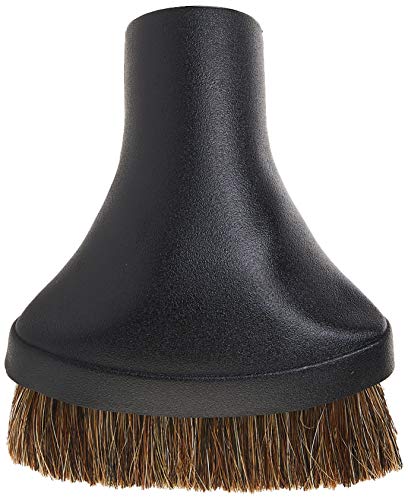
- Vacuum with brush attachment
- Microfiber cloth
This vacuum accessory will fit all major canister vacuums, upright vacuums and central vacuum brands with 1.25 Inch connections

Rich Package: The chaseroad 3PCS Horse Hair Brush shop vac accessories set, which includes 2 durable and scratch-resistant brushes, 1 vacuum adapter (1 1/4″ to 1 3/8″). Our round brush attachment works on a variety of surfaces, making it easy to keep your home clean and as convenient as possible.

[Fits Most 1 1/4 inch Vacuums]Designed to fit most standard 1.25 inch vacuum hoses and wands, this horse hair vacuum attachment is compatible with many canister, upright, and central vacuum systems
Skill Level & Time Estimate
Skill Level: beginner
Estimated Time: 1-2 hours
Step Breakdown:
– Gather materials: 10 minutes
– Dust and prep walls: 15 minutes
– Clean walls: 30 minutes
– Dry and finish: 15 minutes

High-Density Cleaning Power: Denser foam structure lifts stains faster while maintaining surface safety. Lasts 3x longer than basic sponges.

EXTRA DURABLE DESIGN: Our durable cleaning erasers are crafted with high-quality Basotect W foam from BASF

Eraser sponge: The eraser does not contain any chemical detergents. No detergent is needed during use, only water is needed. The super cleaning ability of the cleaning sponge makes the surface of the object cleaner and more beautiful.
Step 1: Gather Your Cleaning Supplies
Start by collecting all necessary cleaning supplies to ensure a smooth process.
1. Locate your cleaning solution and warm water.
2. Get a bucket for mixing the solution.
3. Grab a soft sponge or cloth for scrubbing.
4. Don’t forget the vacuum with a brush attachment for dusting.
Pro Tip: Ensure your cleaning solution is suitable for your wall type to avoid damage.
Why this matters: Having everything on hand will save you time and make your cleaning session more efficient. You won’t have to stop midway to hunt for supplies.
Time estimate: 10 minutes.

Commercial-grade, abrasive cream cleanser

Tough on stains, gentle on surfaces

The contoured handle absorbs pressure and protects the knuckles. The brush is washable and reusable, with stiff blue sponge bristles firmly attached to the brush head, making it easy for you to apply pressure for heavy-duty cleaning. Specially designed for both domestic and professional environments to easily clean mineral deposits, splotch, grime, and other dirt.
Step 2: Dust the Walls
Before applying any cleaning solution, dust the walls to remove loose dirt and debris.
1. Use the vacuum with a brush attachment to gently go over the walls.
2. Pay special attention to corners and edges, where dust tends to accumulate.
3. Alternatively, you can use a dry microfiber cloth.
Warning: Avoid using a rough cloth, as it may scratch the paint or finish.
Why this matters: Dusting first will prevent dirt from turning into mud when you apply the cleaning solution, ensuring a more effective clean.
Time estimate: 15 minutes.

Cat Ear Shape Design: Features charming cat ear shaped wooden steps that provide both functional climbing surfaces and decorative appeal to enhance your home while entertaining your feline companions.

HANDRAIL AND TOOL TRAY IN ONE PIECE: Flip the handrail upward to effortlessly convert the 3 Step Ladder into a fully functional tool tray, combining convenience and stability in one easy motion. The ladder's uniquely designed foldable handrail is integrated with the no-installation tool tray, eliminating the need to climb back and forth on the ladder. It helps you solve the problem of reaching items easily and folds down to only 3.74 inches for easy storage and carrying

Stable & Stury Construction: Made of thickened aircraft-grade aluminum frame, this 2 step ladder is lightweight yet sturdy. The side crossbars of this step stool for adults enhance basic support and it bears up to 300 lbs
Step 3: Prepare the Cleaning Solution
Mix your cleaning solution to effectively clean the walls.
1. Fill your bucket with warm water.
2. Add the recommended amount of your chosen cleaning solution (usually a few capfuls).
3. Mix gently to create suds without excessive foam.
Pro Tip: If your walls are particularly dirty, consider adding a bit of vinegar to the solution for extra cleaning power.
Why this matters: A well-mixed cleaning solution ensures that you have the right balance of cleaning agents to tackle dirt without damaging surfaces.
Time estimate: 5 minutes.

REUSABLE MICROFIBER MITT: Slip-on cleaning glove traps dust and hair for faster wipe-downs; rinse or machine wash and reuse, so you can replace disposable wipes; elastic cuff helps keep the mitt in place while cleaning around the home.

Super Absorbent:With a high quality short-pile microfiber design, these microfiber cleaning cloths are ultra Absorbent, They can easily absorb large amounts of liquid and wring out spills easily, perfect for wiping surfaces without leaving marks, Even after repeated cleaning, they retain water absorption and softness, ensuring lasting durability

Microfiber 16 x 12-inch cleaning cloth (24-pack); ideal for cleaning cars, trucks, boats, and more
Step 4: Test the Solution
Before cleaning the entire wall, always test the solution on a small area.
1. Dip your sponge or cloth into the cleaning solution.
2. Choose a discreet spot on the wall and apply the solution.
3. Wait a few minutes to observe any adverse reactions (color fading or paint peeling).
Warning: If you notice any negative reactions, stop and choose a milder solution.
Why this matters: Testing ensures you protect your walls from damage and ensures the cleaning solution is effective.
Time estimate: 10 minutes.

Universal dusting Vacuum attachment by Wessel-Werk is the largest and most durable all-around nozzle for hard surfaces. Ideal to clean furniture, paneling, armatures, and other surfaces in your home, office, workshop, or car.

This shop vacuum brush attachment dusts the area as it cleans by lifting dust and debris into the airstream

𝐂𝐥𝐞𝐚𝐧𝐢𝐧𝐠 𝐓𝐢𝐠𝐡𝐭 𝐒𝐩𝐚𝐜𝐞𝐬: This vacuum brush is perfect for everyday home cleaning. It is especially suitable for cleaning nooks and crannies and places that are difficult to reach, making your cleaning easy
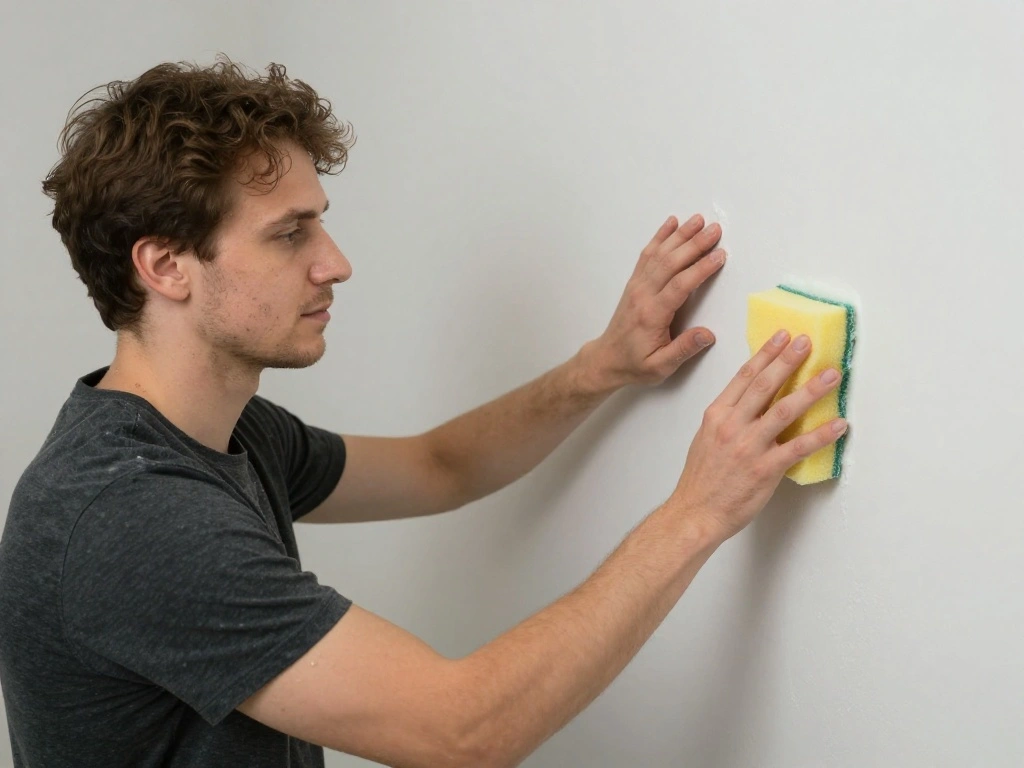
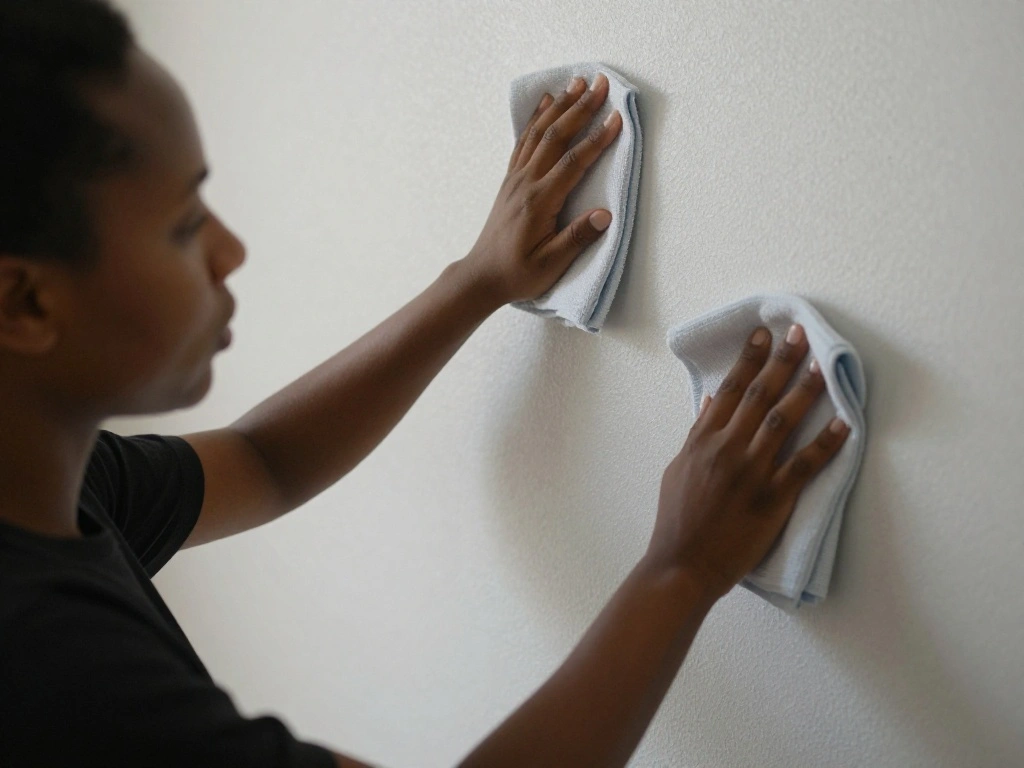
Step 5: Clean the Walls
Now it’s time to start cleaning your walls!
1. Moisten your sponge or cloth in the cleaning solution.
2. Start at the top of the wall and work your way down to avoid streaks.
3. Use circular motions and light pressure to avoid damaging the paint.
4. Rinse the sponge regularly to avoid spreading dirt.
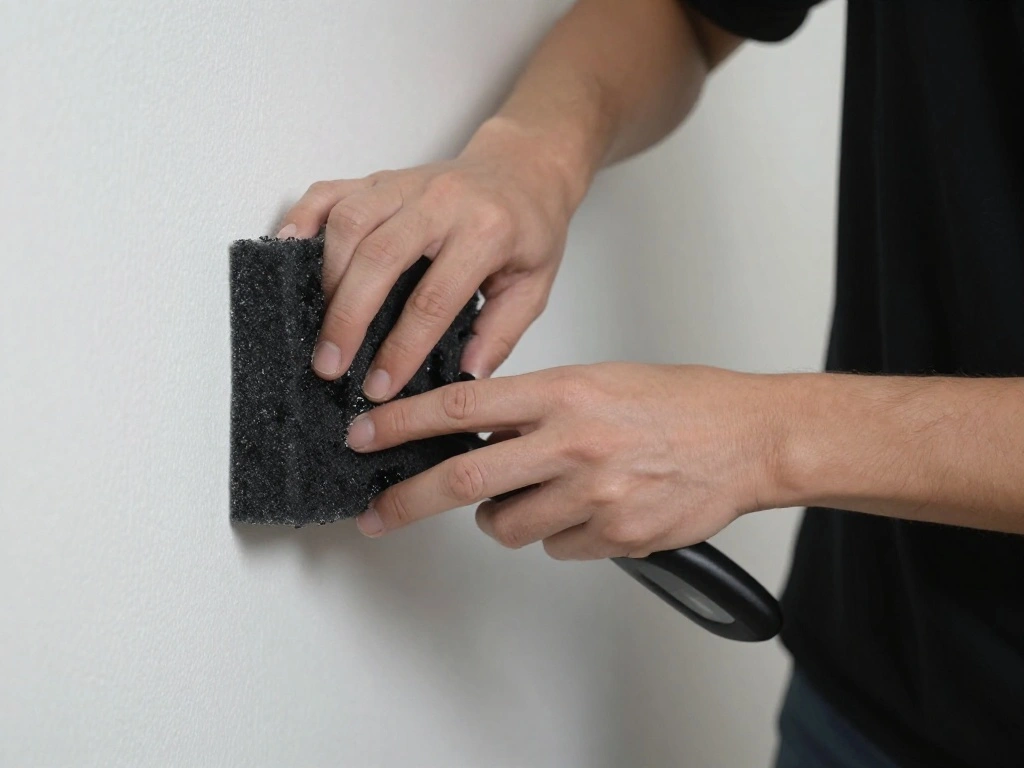
Pro Tip: For stubborn stains, use a magic eraser.
Why this matters: Cleaning from top to bottom prevents dirty water from dripping onto areas you have already cleaned, ensuring a consistent clean.
Time estimate: 30 minutes.

2x Density Magic Sponge Erasers : The magic sponge eraser is made of environmental friendly melamine foam, no irritation. And nano-manufacturing technology makes the sponge deeply absorbs stubborn stains, cleanup without the scrubbing, surface of the object is more clean

Quick Shoe Cleaning for Busy Parents: Instantly erase dirt and scuffs from kids’ school sneakers, sports cleats, and family shoes, no sprays, no soaking, no mess.

12 Pack Magic Sponge Eraser: Value pack for daily cleaning, easily clean various stains such as oil, marker, coffee, desktop scratches, etc
Step 6: Rinse the Walls
After cleaning, it’s crucial to rinse off the cleaning solution to prevent residue build-up.
1. Empty the bucket and fill it with clean, warm water.
2. Dampen a clean sponge or cloth in the water.
3. Wipe down the walls again to remove any soap residue.
Warning: Avoid soaking the walls, as excess moisture can cause damage.
Why this matters: Rinsing helps maintain the appearance of your walls and prevents any potential damage from leftover cleaning products.
Time estimate: 15 minutes.

The contoured handle absorbs pressure and protects the knuckles. The brush is washable and reusable, with stiff blue sponge bristles firmly attached to the brush head, making it easy for you to apply pressure for heavy-duty cleaning. Specially designed for both domestic and professional environments to easily clean mineral deposits, splotch, grime, and other dirt.

Complete cleaning set – 4-in-1 brush kit with stiff & soft bristles + sponge scrubber removes grime, soap scum and stains from bathroom, kitchen, tiles and more.

Soft scrub cleanser
Step 7: Dry the Walls
To finish, it’s essential to dry the walls properly.
1. Take a dry microfiber cloth or towel.
2. Wipe down the walls to remove any remaining moisture.
3. Ensure there are no damp spots left, especially in corners.
Pro Tip: Open windows or turn on fans to speed up the drying process.
Why this matters: Allowing walls to dry fully prevents mold growth and keeps your bedroom fresh.
Time estimate: 15 minutes.

Heavy Duty Steel Construction: Made from reinforced steel, these wall mount ladder hooks provide strong and stable support for hanging ladders, folding chairs, and patio furniture. Built for long-lasting garage storage and organization.
Heavy Duty Steel Construction: Made from reinforced steel, these wall mount ladder hooks provide strong and stable support for hanging ladders, folding chairs, and patio furniture. Built for long-lasting garage storage and organization.

LIGHT AND SAFE: This tough-as-nails, 4-Foot step ladder with tool platform weighs only 9 pounds.
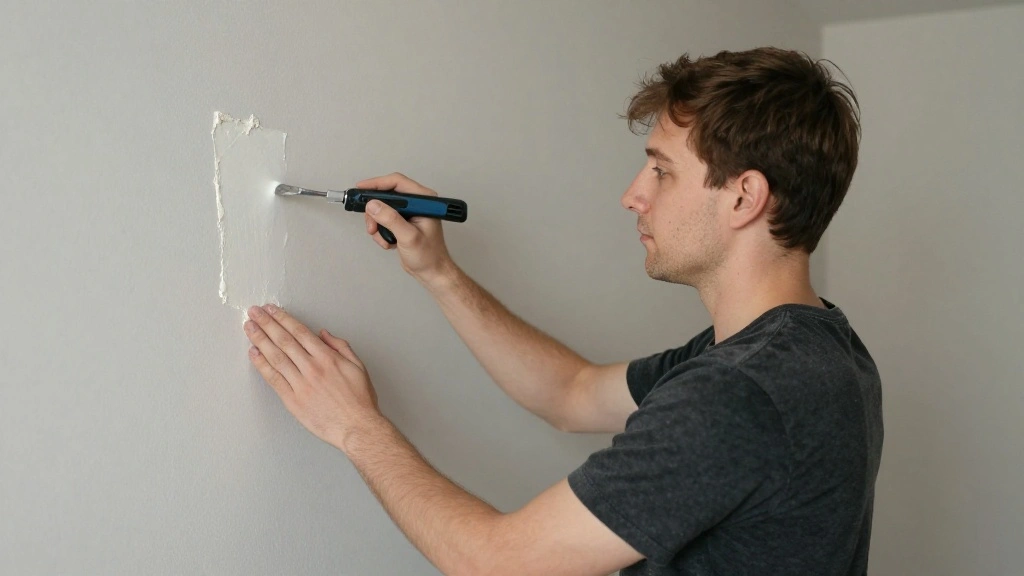
Step 8: Inspect and Touch Up
After cleaning, inspect the walls for any spots that may need touch-ups.
1. Look for remaining stains or scuff marks.
2. Use a magic eraser for stubborn marks or touch-up paint for small imperfections.
3. Make sure to follow the same technique used for cleaning.
Warning: Ensure the touch-up paint matches the wall color to avoid visible patches.
Why this matters: Touching up imperfections maintains the clean look of your walls and enhances the overall appearance of your bedroom.
Time estimate: 15 minutes.
Step 9: Maintain Your Clean Walls
To keep your walls looking fresh, establish a maintenance routine.
1. Dust your walls monthly to prevent dirt build-up.
2. Spot clean any stains as soon as you notice them.
3. Consider using a protective wall finish if you have children or pets.
Pro Tip: Regularly wipe down high-traffic areas to keep them looking new.
Why this matters: Proactive maintenance can significantly extend the time between deep cleans, keeping your bedroom inviting year-round.
Time estimate: Ongoing, 5-10 minutes monthly.
Pro Tips
- Use the Right Tools: Invest in good-quality sponges and cloths for better cleaning results.
- Choose the Right Time: Clean on a cloudy day to avoid direct sunlight causing streaks as walls dry.
- Protect Your Floors: Lay down a drop cloth to catch any drips or dirt.
- Be Gentle: Avoid scrubbing too hard to prevent paint damage.
- Keep a Cleaning Schedule: Regularly clean walls to maintain a fresh look.
Common Mistakes to Avoid
Warning: Skipping the dusting step can lead to muddy walls.
Always dust before washing to ensure a proper clean.
Warning: Using harsh chemicals can damage paint.
Stick to gentle solutions for best results.
Warning: Over-saturating the walls can cause peeling.
Use damp, not wet, cloths for cleaning.
Troubleshooting Section
Problem: Walls still look dirty after cleaning.
Solution: Ensure you used enough cleaning solution and rinse thoroughly.
Problem: Paint is coming off during cleaning.
Solution: Stop immediately and switch to a milder solution.
Problem: Stains remain after multiple cleanings.
Solution: Use a magic eraser specifically for tough stains.
Variations/Alternative Methods
Alternative Method 1: For textured walls, consider using a soft-bristle brush to reach into crevices.
Alternative Method 2: For painted walls, a diluted vinegar solution can effectively clean without harsh chemicals.
Pros: Gentle on paint and effective against grime.
Cons: May require more scrubbing.
FAQs
What if I don’t have a magic eraser?
You can use a damp sponge with a bit of baking soda for similar results.
How long should I wait after cleaning before using the room?
Wait at least 30 minutes to ensure walls are completely dry.
Is it safe to use vinegar on painted walls?
Yes, but always dilute it to prevent damage.
Conclusion
Congratulations on successfully cleaning your bedroom walls! You’ve taken a significant step towards creating a more inviting and pleasant atmosphere in your space. Now that your walls are fresh and clean, consider decluttering or rearranging furniture for an even bigger change. Remember to maintain your clean walls through regular dusting and spot cleaning.
For more home improvement tips and DIY projects, check out our related resources. Keep up the great work, and enjoy your refreshed bedroom!