


Most folks skimp on concrete, and it’s the #1 reason posts lean and fail. You need enough volume to anchor against wind and ground shift. Calculate it by subtracting your post’s width from the hole size, then multiply by depth. A typical 4×4 in a 30″ hole needs about 0.21 cubic feet of displacement. Add a gravel base for drainage, bury one-third of your post underground, and match everything to your local frost line. The following sections walk through the exact math and mistakes to avoid.
Why Proper Concrete Volume Matters
Why do so many fence posts end up leaning after just a few years? Inadequate concrete volume is almost always the culprit. When you skimp on concrete, you invite structural failure. The right concrete volume anchors your post solid, resisting wind, soil movement, and whatever loads come its way. You must match your concrete volume to your post diameter and hole depth. Considering your soil type and frost line is essential, not optional. A gravel layer underneath helps too. Too little concrete causes your post to shift, your fence to look terrible, and early repairs. Proper concrete volume keeps your fence stable for years.

Works with ALL post types.

𝗙𝗔𝗖𝗜𝗟𝗜𝗧𝗜𝗘𝗦 𝗟𝗜𝗙𝗘: Your life is made easier by Fence Post because it is quick and easy to mould, shape, and adjust by following clear instructions. For preparing the expanding concrete foam, no further materials are required. There is no need for extra mixing equipment or water. The kit is bundled with everything needed
Prepare Your Hole: Diameter, Depth, and Drainage
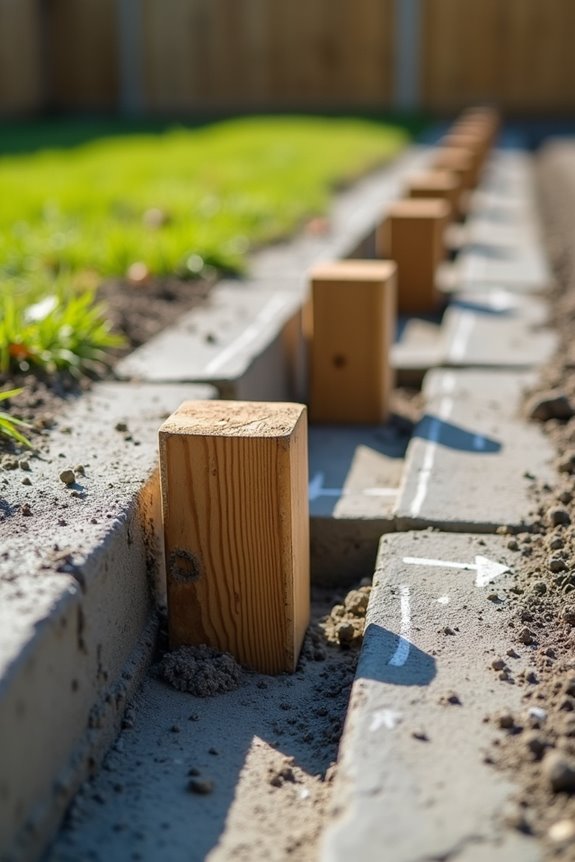
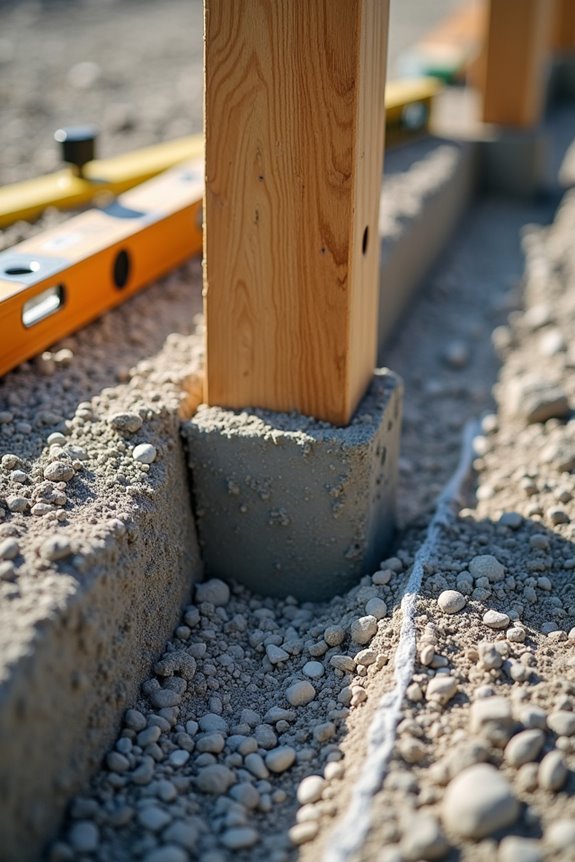
I’ll walk you through getting your hole sized right, because the diameter and depth you dig makes a significant difference in keeping that post standing strong for years. You’ll want a hole that’s roughly three times wider than your post—so a 4″ post needs about a 12″ diameter hole—and deep enough to go one-third to one-half the height of what’s sticking up above ground. I always dig mine in an inverted cone shape with a 4″–6″ gravel layer at the bottom, which prevents moisture problems and keeps everything stable when frost rolls through.

[Durability]: Made of 14-gauge high durability steel with a black powder coating finish, it can prevent cracking, peeling, and rusting, ensuring a long-lasting service life.

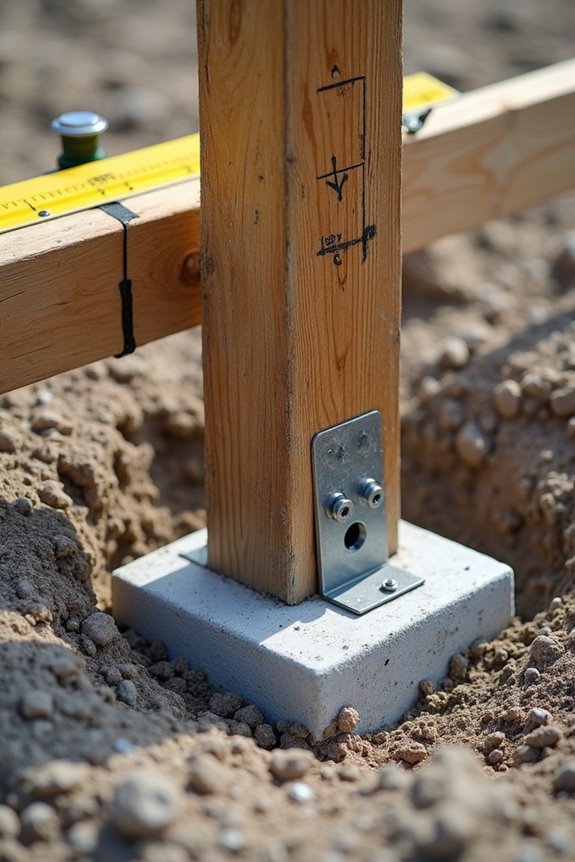
✅ Use with 4x4 posts: Fits nominal standard 4x4 posts (actual 3.5"x 3.5" wood post on the market). Up to 5.5" tall, securely fixed to your concrete slab or wooden floor without any problems.

Premium Concrete Post Anchor: Crafted from high-grade, thickened steel through precision welding, these anchors offer exceptional durability. Their powder-coated finish effectively prevents rust, extending the service life of 4x4 post base.
Calculating Hole Diameter
Getting your hole diameter right is one of the most important steps. The three-times rule works well: multiply your post width by three. So if you’re working with a standard 4-inch post, you’ll dig a hole about 12 inches across. A proper fence post hole diameter gives your concrete enough surface area to grip that post securely.
Measure your post width, multiply by three, and you’ve got your hole diameter calculation. Add a 6-inch gravel base at the bottom for drainage. This approach ensures proper drainage and concrete adhesion to the post.
Drainage Layer Installation
Now that you’ve got your hole dug to the right size, it’s time to set up the foundation that’ll keep your post standing strong for years. Start by adding 4–6 inches of gravel right at the hole bottom. This drainage layer prevents water from pooling around your post, which is especially important with clay soil or high water tables. The gravel lets water flow away from your post, preventing moisture from rotting it out. Compact it firmly, creating a stable base for both your post and concrete footing. Proper drainage also provides frost protection; better drainage means less water freezing and shifting your post around. Spending five minutes on proper backfill drainage now prevents structural problems later during post installation and concrete curing.
Should Posts Go Below the Frost Line?
Why does frost matter so much when you’re setting fence posts? Soil frost is your fence’s worst enemy. When you install posts above the frost line, freeze-thaw cycles lift them right out of the ground. This is how you end up with leaning fences.
I always dig deep holes that go below the frost line. Your local frost line varies; it’s shallow in the South, but up north you’re talking 48 inches or more. That post depth matters significantly for stability.
When you set posts below that line, concrete volume aside, you’re anchoring them properly. The deeper installation prevents uneven settling and keeps everything straight for years. Getting it right now prevents structural failure and the expense of repairs later.
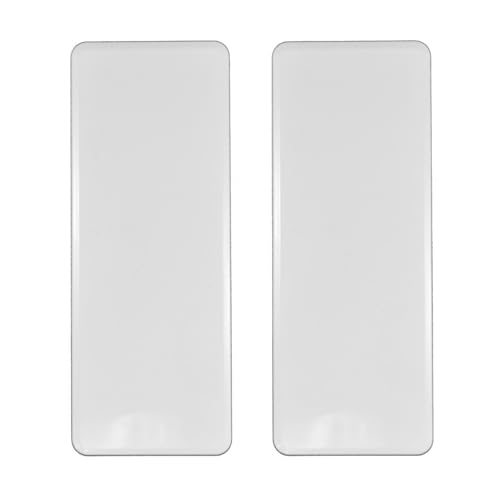
FINISHED FENCE HOLE COVER: Give your fences a finished look with Weatherables Fence Post Hole Cover, made from white vinyl and designed to fit true 1.5in x 5.5in route holes to hide the hole from view for a finished and complete look.

Easily cover the routed holes in your vinyl posts | Place a bead of clear 100% silicone to attach to the post

FAST AND EASY TO INSTALL: the original, simple fence post repair. Saves hours of hard work. No digging required.
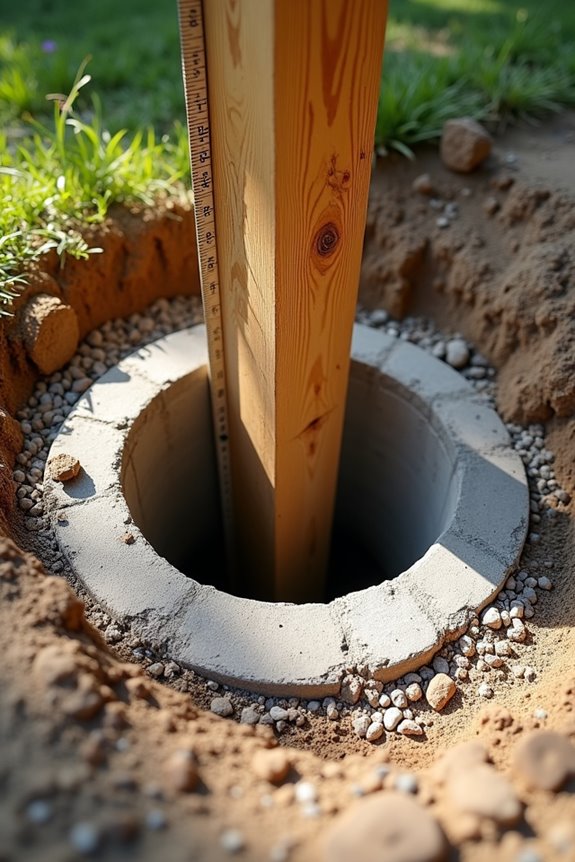
How Deep Should You Bury a Fence Post? The One-Third Rule
You want to bury roughly one-third of your post’s total length underground. This is the one-third rule, which provides the foundation for all subsequent fence installation steps.
| Post Height | Buried Depth | Above Ground |
|---|---|---|
| 6 feet | 2 feet | 4 feet |
| 8 feet | 2.5-3 feet | 5-5.5 feet |
| 4 feet | 1.5 feet | 2.5 feet |
This fence post depth calculation works with your frost line, not against it. Deeper burial prevents frost heave and increases wind resistance. The concrete volume you’ll need depends on your hole diameter, but apply this rule first. Posts shift and lean when proper burial depth is neglected. Following these calculations ensures your fence will remain straight for years.

Heavy-Duty Corner Solution: Designed to manage high-tension wires and polytape at corner posts in permanent fencing systems. UV-Resistant Construction: Made with durable...
Calculate Your Concrete Volume
Now I’ll walk you through the actual math: measuring your hole’s dimensions and figuring out how much space your post actually takes up. You need to know your hole’s diameter and depth, then subtract what the post itself displaces. That difference is your concrete volume. The calculation is straightforward, and I’ll break it down so you can complete the math before you mix a single bag.

QUICK SETTING: Sets in 20 minutes


SAVE YOUR BACK: Quick, lightweight patent pending technology replaces 80-100lbs of concrete with a lightweight bag that does not require messy mixing with water that requires cleanup & preparation for filling post holes
Hole Geometry and Dimensions
Getting the hole size right is where most folks stumble, and it’s the foundation of the whole project. Your hole diameter should be roughly three times your post diameter. So a 4″ post needs about a 12″ hole. For hole depth, aim for one-third to one-half of your post’s above-ground height.
| Post Diameter | Hole Diameter | Hole Depth Range |
|---|---|---|
| 4″ | 12″ | 2–3′ |
| 6″ | 18″ | 2–3′ |
| 8″ | 24″ | 2.5–4′ |
| 3″ | 9″ | 1.5–2′ |
| 5″ | 15″ | 2–3′ |
Include a 6″ gravel base at the bottom for drainage and to keep moisture away from your concrete. These measurements help you calculate the net concrete required accurately, especially when you account for frost line depth and soil conditions.
Post Displacement Calculations
Once that hole’s dug to the right depth, you’ll need to calculate exactly how much concrete you actually need to fill it. You can’t fill the entire hole volume with concrete because your fence post takes up space. This post displacement calculation is essential for accurate material estimates.
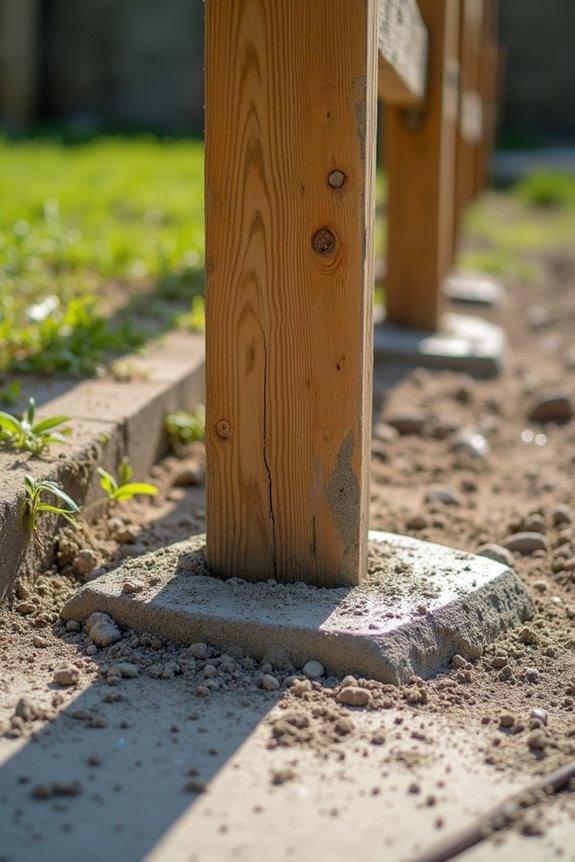
Subtract your post’s volume from the hole volume to get your net concrete volume. For a typical 4×4 post in a 30-inch deep hole, you’re looking at roughly 0.21 cubic feet of displacement. If you’ve added gravel to the bottom, subtract that depth too before doing your post hole calculation.
Once you’ve got your cubic feet per bag figured, usually about 0.375, you’ll know exactly how many bags you need for concrete per fence post.
How Many Concrete Bags Per 4×4 Post?
How much concrete do you actually need for a 4×4 post? I’d recommend starting with 1–2 bags per fence post for most residential setups. Your hole depth and frost line significantly affect the amount needed. Calculate the concrete volume first, then match it to bag sizes. A 50-lb bag gives you about 0.375 cubic feet, while 60-lb and 80-lb bags provide more coverage per bag. For gate posts or corner posts, increase the concrete by 50–100% for extra stability. Add a 10–15% buffer to cover waste, depth variations, and mixing inconsistencies. Running short on concrete mid-project is avoidable with adequate planning.

Designed for 5″×5″ vinyl or acrylic fence posts, compatible with 24″, 36″, and 48″ post heights — ideal for fencing, railing, and outdoor barrier projects.


Fast-Setting vs. Standard Concrete: Which Works Best?
It comes down to your timeline and budget. Here’s what I’ve learned from setting fence posts:
- Fast-setting concrete gains initial set in 20–40 minutes, letting you remove braces quickly
- Standard concrete takes 24–48 hours to cure fully, but costs 20–30% less
- Gate and corner posts benefit from fast-setting since they handle more stress
- Line posts work fine with standard concrete, keeping your overall concrete volume costs reasonable
My go-to strategy uses standard concrete for most fence posts, then reserves fast-setting concrete for challenging spots. This approach balances performance with cost, and it’s what most experienced DIYers do. You’ll water cure either type the same way.

4 Pack - 4x4 Black Powder-Coated Deck Post Connector Bracket

Material Of 4x4 Post Base: Made of Solid Steel, Black Powder Coated, Rustproof and Strong.

Material Of 4x4 Post Base: Made of Solid Steel, Black Powder Coated, Rustproof and Strong.
Wet or Dry Pour? Choose Your Method
I’ve got two solid methods for setting your fence post, and both work depending on what suits you best. The dry-pour approach is straightforward: center the post, fill the hole with dry mix, then water it down and let it cure, which takes longer but requires zero pre-mixing hassle. With wet-mix, you layer and consolidate the concrete in 4-6 inch increments to squeeze out air pockets, which takes more effort upfront but gives faster results, especially if you grab fast-setting concrete that hardens in 20-40 minutes so you can load light stuff within hours.

MAN-POWER SAVER: Sekcen fence post anchor supports your wood posts with no digging, concrete or mess while keep the post sturdy and long lasting; fits standard 4 x 4 (lumber size 3.5” x 3.5”) post. It truly is a time saver and man-power saver!

Easy Installation : Totel length: 36”, fit 3.5” x 3.5” wood posts without digging holes or pouring concrete. Take a scrap piece of wood to hammer the post anchor in the ground by using a mallet or a sledge hammer and it will drive the post anchor all the way in the ground.
FINISHED FENCE HOLE COVER: Give your fences a finished look with Weatherables Fence Post Hole Cover, made from white vinyl and designed to fit true 1.75in x 3.5in route holes to hide the hole from view for a finished and complete look.
Fast-Setting Concrete Advantages
When you’re racing against the clock on a fence project, fast-setting concrete accelerates your timeline. It performs best for demanding situations like gates or corners where speed is critical.
Here’s what makes it worth the extra cost, typically 20–30% more than standard concrete:
- Initial set in 20–40 minutes, letting you move forward faster
- Handling strength in about 4 hours, eliminating extended wait times
- Works with both wet-mix and dry-pour methods, giving you flexibility
- Perfect for challenging fence post holes where timing is critical
You can use the wet-mix approach by following bag instructions, or go dry-pour by saturating the mix after placement. Either method produces significant curing time savings. When you’re digging fence post holes and calculating concrete volume across multiple posts, that speed advantage compounds substantially.
Wet Mix Application Process
The wet-mix method, where you blend concrete in a mixer or wheelbarrow before pouring, gives you the most control over consistency and placement. This approach lets you center the post perfectly, then layer the concrete around it, eliminating air pockets as you go. You’ll want to check that your post holes meet frost line depth for stability and ensure proper water/soil drainage slopes away from your base.
| Step | Action | Result |
|---|---|---|
| Mix | Blend concrete per packaging | Perfect consistency |
| Pour | Layer around centered post | Even fill |
| Brace | Stabilize with temporary supports | Plumb alignment |
| Cure | Wait 24 hours minimum | Load-ready strength |
Use bracing throughout curing time to keep everything steady. The concrete volume you’ll need depends on hole diameter; bigger holes require more concrete. Waiting the full curing period ensures the concrete reaches adequate strength before bearing loads.
Dry Pour Technique Benefits
If you’re looking to skip the mixing step entirely, dry pour might be your answer. This technique is convenient, especially when working solo on a fence post hole without heavy equipment nearby.
What makes dry pour so appealing:
- Minimal prep work – Place dry-pour fast-setting concrete mix directly around the post and skip pre-mixing entirely
- Quick cleanup – No wet concrete mess means less time scrubbing tools afterward
- Better handling – The fast-setting formula allows faster work with lighter physical effort
- Precise control – Gradual water addition provides control over saturation levels
The key step is adding water slowly, ensuring the mix fully saturates throughout the fence post hole’s depth and diameter. This careful water addition keeps the post stable and plumb while the concrete cures in place. This method works well for DIY applications.
Concrete Installation Mistakes That Compromise Posts
How’s your fence looking these days – straight and solid, or starting to lean a bit?
I’ve seen too many folks mess up their concrete installation in ways that’ll cause problems later. First mistake? Skimping on concrete volume. You need enough around those posts to keep them stable against wind and ground shifts. And don’t underestimate hole depth – it’s gotta match your frost line to prevent heaving in winter.
I’ve watched people skip the gravel under slab entirely. That’s a costly error. That drainage layer’s essential for preventing water damage and deterioration. Under- or over-digging throws off your calculations too, compromising anchoring strength.
Corner and gate posts need extra concrete. Without it, gates bind and latches misalign. Get your hole depth and proper concrete mix right from the start, and your installation will be structurally sound.
Gravel Drainage and How It Affects Concrete Needs
Why’d I skip the gravel layer on my first fence project? I learned through experience that drainage matters significantly. Key findings about gravel’s impact on concrete needs:
I learned through experience that drainage matters significantly when setting fence posts in concrete.
- A 6-inch gravel base reduces concrete volume by roughly 20% in standard post holes
- Gravel aids drainage during curing, protecting your post from moisture damage
- You’ll calculate net concrete depth by subtracting gravel from total hole depth
- Benefits vary with soil conditions. Clay and high water tables need it most; sandy soils require it less.
That gravel layer extends post life substantially, adding years of extra durability. When you’re digging below the frost line anyway, dropping gravel in costs almost nothing but prevents concrete deterioration and extends post longevity. This is the approach worth implementing from the start.

SAVE YOUR BACK: Lightweight technology replaces 80lbs of concrete with a 2.5lb bag

EFFORTLESS FENCE POST REPAIR KIT: Upgrade your outdoor projects with our innovative expanding foam for fence posts. This concrete alternative helps solve the need for heavy lifting, messy water mixing, or extra tools. Simply mix and pour to secure your posts, making it the ultimate post hole foam solution for a clean and fast installation.
SAVE YOUR BACK: Lightweight technology replaces 80lbs of concrete with a 2.5lb bag
Cure Times and When to Add Panels
Once your concrete’s poured and you’re staring at that wet post, the waiting game begins. Standard concrete needs about 24–48 hours before you can safely hang panels, but a full week is recommended if possible. Fast-setting concrete handles light loads in just 4 hours, which is convenient. Gate and corner posts need extra time because they take significantly more stress than regular fence posts. Don’t rush this step. The concrete volume, post size, and gravel bottom all affect how quickly things set, plus frost line depth matters for long-term stability. Give it the full week for optimal results.