

I’d go with 4 inches for standard residential patios. This thickness handles foot traffic, furniture, and entertaining adequately.
If you’re adding heavy items like a hot tub or outdoor kitchen, bump it to 6 inches. Your soil matters too; clay soils need that extra thickness.
Don’t skimp on your gravel base. A 4 to 6 inch layer of compacted stone prevents settling and cracking. Your climate and local codes shape the ideal thickness for your specific situation.
What Is the Standard Thickness for a Concrete Patio?
I’ve poured concrete patios for years, and I can tell you that 4 inches is the sweet spot for most backyards. It will handle foot traffic, furniture, and typical outdoor living without breaking the bank. If you’re planning something heavier like an outdoor kitchen or hot tub, bump that up to 6 inches or even 8 inches to keep everything stable and crack-free long-term. Common thickness options are available to match your specific space requirements.

Large grinding segments with heat treated cup design.The wheel diameter 4 inch and the arbor diameter 0.86 inch.

3 Pieces 4 Inch Diamond Cup Grinding Wheel.

MULTIPURPOSE - designed for grinding, cleaning, leveling or coating removal for concrete and masonry
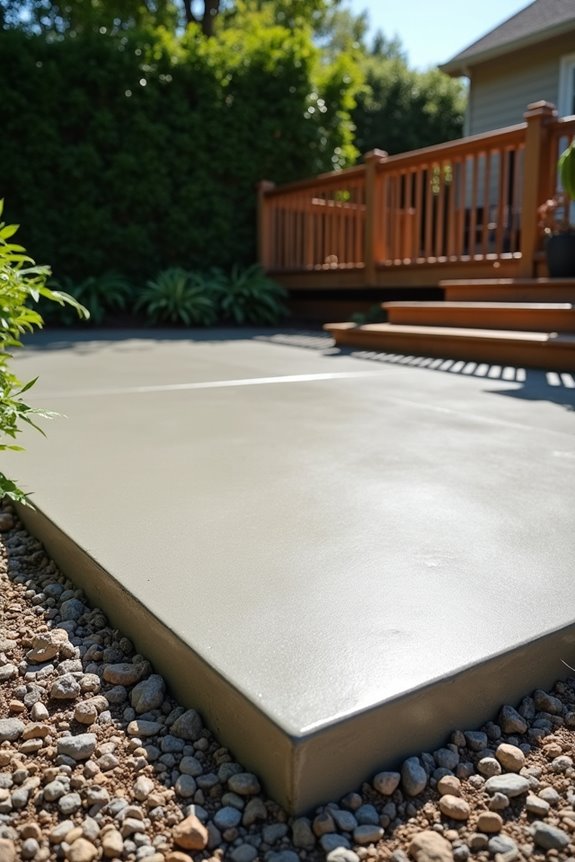
The Typical 4-Inch Slab
When you’re planning a backyard patio, the 4-inch slab is your go-to standard for solid reasons. This slab thickness works well for most residential patios, handling everyday foot traffic and typical outdoor furniture. The reliability comes from pouring it over solid base preparation, usually 4 to 6 inches of compacted gravel, which gives everything a stable foundation. This combination has been tested nationwide and aligns with building codes across the country. The simplicity is a major advantage. You don’t need to overthink it for casual backyard use. If you’re planning heavier loads, such as an outdoor kitchen or hot tub, that’s when you’d want to increase your slab thickness. For most patios, 4 inches meets the structural requirements.
When You Need a Thicker Patio
While 4 inches handles most backyard situations just fine, there’s a clear line where you’ll want to go thicker. If you’re planning an outdoor kitchen, fire pit, or hot tub, jump to 6 inches minimum. Load requirements matter significantly; heavy items need that extra depth.
Your soil conditions play a huge role too. Clay soils shift and crack thinner slabs, so if you’ve got questionable ground, going thicker with proper reinforcement is the smart choice. Hot tubs especially demand 8 inches because the weight’s concentrated and unforgiving.
Reinforcement alone won’t save a too-thin slab under heavy loads. Thickness and reinforcement work together. If you’re uncertain about your specific slab thickness needs, bumping up an inch or two prevents costly repairs later.
Common Patio Thickness Options
4 inches is your go-to standard for most residential patios and handles the job well for typical backyard use.
Slab thickness really depends on what you’re planning to do with your space. Here’s what works:
- 4-inch slabs – Perfect for foot traffic, patio furniture, and everyday entertaining. They’re economical and reliable when you’ve got solid base preparation underneath.
- 6-inch slabs – Go this route for outdoor kitchens, fire pits, or heavier loads. The extra thickness gives you better load capacity and long-term stability.
- 8+ inches – Reserved for driveways, hot tubs, or commercial patios where serious weight sits permanently.
Patio reinforcement like wire mesh or rebar, combined with proper base preparation, significantly extends durability regardless of the thickness you choose.
What Factors Decide the Right Patio Thickness?
Why does one patio need 4 inches while another demands 6 or more? The answer lies in several key factors working together.
Your load requirements matter most. Light foot traffic calls for 4 inches, but outdoor kitchens and hot tubs require 6 inches minimum. Climate plays a significant role too. If you’re dealing with freeze-thaw cycles, thicker slabs with stronger mixes prevent cracking.
Load requirements and climate are critical: light foot traffic needs 4 inches, while heavy features like hot tubs demand 6 inches minimum to prevent freeze-thaw cracking.
Base preparation is essential. A compacted 4 to 6 inch gravel base keeps everything stable and prevents settling. Your slab thickness decisions hinge on soil quality beneath. Soft or expansive soils need thicker concrete or deeper bases.
When in doubt, go thicker. Thicker slabs reduce the risk of future damage and costly repairs.

2 Pack of 6 inch diamond saw blade designed to provide fast, smooth cutting in a variety of materials, including brick/block, paves, concrete and stone.

[Durability]: Made of 14-gauge high durability steel with a black powder coating finish, it can prevent cracking, peeling, and rusting, ensuring a long-lasting service life.

Heavy Duty Metal Build for Daily Use:Made from solid iron with reinforced welded structure for reliable strength and long-term use. Supports up to 40 lb, ideal for hanging baskets, lanterns, feeders, and décor without bending easily.
How Soil Type Affects the Concrete Thickness You Need
Soil’s what’s lurking beneath your patio, and it’s the silent player that can make or break your whole project. I’ve seen great patios fail because nobody checked the ground first.
Clay soil is expansive. It shifts and moves with moisture, so bump your thickness up to 6 inches instead of the standard 4. Sandy soil compacts better, but you still need a solid foundation. A compacted gravel base is essential. I’m talking 3–6 inches of crushed stone that locks everything in place and improves drainage.
Weak or soft soil demands either thicker concrete or extra reinforcement like rebar. Test your soil before pouring. It’s the smartest move you’ll make.

Protect the underside of your hot tub or spa and speed up installation with these 6 pack of durable base pad mats; Eliminates need to pour costly concrete and time consuming...
Foot Traffic & Load Requirements
How much weight your patio actually has to carry makes all the difference in how thick you should pour it. Too many patios fail because someone underestimated what they’d be placing on that slab. Let me break down what I recommend based on your actual usage:
| Usage Type | Thickness | Reinforcement | Load Level |
|---|---|---|---|
| Light foot traffic | 4 inches | Wire mesh | Low |
| Standard entertaining | 4–5 inches | Wire mesh | Moderate |
| Outdoor kitchen area | 6 inches | Rebar + mesh | Heavy |
| Hot tubs or fire pits | 6 inches | Reinforced rebar | Heavy |
| Vehicles or equipment | 8+ inches | Engineered rebar | Extreme |
Your slab thickness directly impacts durability and safety. A standard 4-inch slab handles typical foot traffic well. Add an outdoor kitchen or hot tub, and you’ll need that 6-inch thickness with proper reinforcement. The heavier your load requirements, the thicker and more reinforced your concrete needs to be. Cutting corners on thickness creates structural failure risks down the line.

GEOCELLS GRID : Permeable graver is Made of an extremely thick-gauge high-density polyethylene (HDPE), light weight,giving it excellent resistance and stability to all common...
Freeze-Thaw Cycles and Climate Considerations
If you’re pouring concrete in a climate where temperatures swing between freezing and thawing, including places like San Antonio with its occasional cold snaps, you need to think differently about your patio thickness and mix design. Bump up to a 6-inch slab minimum, paired with reinforcement like rebar or welded wire mesh. Ice formation and frost heave can seriously damage thinner slabs.
Your concrete mix matters enormously. You’ll want air-entrained concrete with 4,000+ PSI strength to resist cracking under freeze-thaw stress. Don’t skip drainage. Slope your patio at least 1/4 inch per foot away from structures. Water management directly prevents water pooling and subsequent freeze damage.
Curing becomes critical in cold cycles. Keep that moisture locked in during early strength gain to prevent surface cracking when temperatures drop.


Moves with your concrete: Extremely elastic to move with your concrete through changes due to shifting soils, temperature, moisture, and traffic to create a weatherproof seal that banishes dandelions, anthills, and other unsightly crack dwellers.

【 Polyurethane Stamping Mat 】 The material that constitutes this concrete texture skin is high-strength polyurethane, which has resistance to wear resistance, elasticity, high tear resistance for long-term concrete imprinting.
Do You Need Reinforcement? Mesh, Rebar & More
Whether you need reinforcement depends on what your patio will handle. Most residential patios benefit from reinforcement even if not strictly required. Wire mesh works well for smaller, lighter-use patios since it helps distribute weight and keeps minor surface cracks from spreading. If you’re planning something heavier like an outdoor kitchen or hot tub, you’ll want rebar grids for real structural support. Reinforcement doesn’t replace thickness; it works alongside a proper base and adequate concrete depth to give you a patio that lasts without cracking and settling prematurely.

UNIVERSAL: Diamond blade for angle grinder is designed for domestic use and DIY. GRAFF turbo cutting disc is intended for working with concrete, artificial stone, paving flag and kerb.

【Complete 4-Piece Professional Concrete Finishing Set】 Includes a 16" x 3-1/2" magnesium float, 16" x 4" stainless steel flat trowel, 16" x 4" stainless steel pool trowel, and a 16.5" x 6.3" heavy-duty storage bag. Designed to cover the full finishing process from surface preparation to final smoothing, making it ideal for contractors and serious DIY users

Heavy Duty Contractor PRO Grade 4 Inch Grinding Wheel.
Does a Concrete Patio Need Wire Mesh?
So, do you actually need wire mesh in your concrete patio? It depends on your situation. For standard patios with light foot traffic, wire mesh helps with crack control and distributes weight effectively. It’s affordable reinforcement that works well alongside a solid base and subbase setup. However, mesh alone won’t stop major cracking if your soil shifts or you’re pouring on weak ground. If you’re planning heavier loads like an outdoor kitchen or hot tub, rebar is the better choice. Wire mesh serves as baseline protection for typical patios, but proper base preparation is essential. Check local codes first, as they may have specific reinforcement requirements you need to follow before pouring.
Rebar for Larger or Heavier Patios
When you’re planning a patio that will handle serious weight, such as an outdoor kitchen, hot tub, or a large stamped design, wire mesh alone won’t provide adequate support. Rebar becomes necessary for this application. I’d recommend #4 rebar spaced 12–18 inches on-center for heavy patio loads. Rebar adds significant structural strength that mesh cannot match, especially in high-stress zones near your outdoor kitchen or heavy equipment.
Wire mesh helps distribute weight and supports patterns, but reinforcement like rebar delivers superior durability and load-bearing capacity. When you pair thicker slab thickness, such as 6 inches, with proper rebar, you’re building a structure designed to last decades. For extreme loads or challenging soils, consult a structural engineer. They will confirm whether you need heavier reinforcement options to ensure your investment remains structurally sound.
Concrete Mix & Strength Considerations
Why does concrete strength matter as much as thickness? Higher PSI mixes (the concrete’s compressive strength) work with your patio thickness to create durability. For San Antonio patios, I recommend 3,000–3,500 PSI reinforced concrete as your baseline, but bumping it to 4,000 PSI is worthwhile, especially if you’re dealing with freeze-thaw cycles.
Stronger concrete can sometimes compensate for thinner slabs. However, you still need solid base preparation and proper reinforcement. Balancing higher strength with good thickness gives you the best results for a patio that lasts decades without cracking. The key is working smart by combining all three factors: mix strength, slab thickness, and proper installation.

TPSHKE post base made of 3mm thickness high-strength galvanized steel plate,package includes 4 post bases, 32 pcs M6x50mm hexagon self-tapping screws and 4 pcs M10x170mm screw nuts

[PROFESSIONAL GRADE DURABILITY] This concrete edger is expertly crafted from 6x6 inch blue stainless steel which resists rust and wear even in heavy use. The sturdy construction ensures long lasting performance on job sites and DIY projects alike giving you a reliable tool for years of concrete finishing work without bending or issues.

STURDY AND DURABLE STAINLESS STEEL: Heavy duty U-shaped guardrail post bracket is made of thickened 201 stainless steel plate and Φ5/8" rebar, Which is laser cut and welded in strict accordance with the engineering process specification, The bottom 0.3" thickened steel plate is stacked and processed, And 4 rebars are seamlessly welded through the steel plate, And the surface is sprayed with outdoor dark grey powder coating, Which is water-proof and rust-proof, And the overall fence post holder bracket is thick and stable
How to Prepare the Base for the Right Patio Thickness
I’m going to walk you through the foundation work that makes or breaks your patio thickness choice, because what’s underneath your concrete is as critical as how thick you pour it. You’ll need to establish your gravel base depth, get your drainage sloping right, and confirm that the ground is stable enough to support whatever thickness you’ve selected. This prep work ensures your patio remains solid for years instead of cracking and settling.
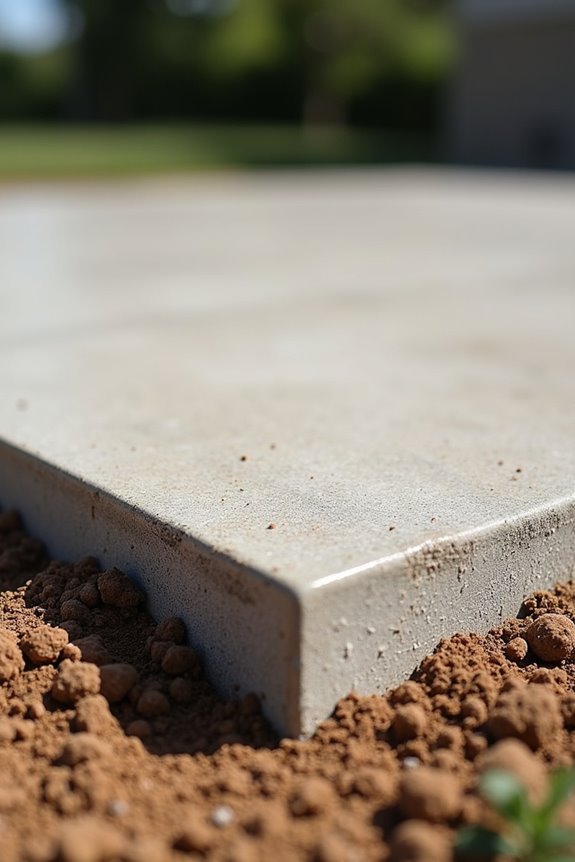
The Gravel Base
Everything rides on what’s underneath your concrete. A solid base is the difference between a patio that lasts 20 years and one that cracks and settles within five. This foundation is your gravel base, which is absolutely essential.
You’ll want 4–6 inches of compacted stone underneath that slab. You must compact it properly to at least 95% compaction so it doesn’t shift around later. A solid, compacted stone foundation distributes weight evenly and prevents your patio from settling unevenly.
Proper drainage matters as well. That gravel base lets water drain away from your concrete, protecting it from moisture damage and freeze-thaw cracking. Crushed stone outperforms sand because it compacts better and holds firm longer.
Establishing the Right Base Depth
How deep should that base actually go? I recommend 4–6 inches of compacted aggregate under your patio slab. This foundation is essential because it handles drainage and prevents settling that will crack your concrete later.
Soft or clay soils demand deeper bases, sometimes 6–8 inches. Patios fail when folks skip proper compaction, so aim for at least 95% compaction. Crushed stone or gravel bases protect against frost heave and water damage.
Ensure this aligns with your reinforcement plan and local codes. A solid base depth should match your slab thickness and drainage slope away from your home. Proper base installation extends patio lifespan to decades.
Proper Drainage Setup
Why does drainage matter so much when you’re prepping your patio base? Because water that pools beneath your slab causes freeze-thaw damage, settling, and cracks that’ll ruin your investment. Proper drainage is non-negotiable.
Here’s what I do: I slope the base beneath your patio at least 1/4 inch per foot, channeling water away from your home. I install 4–6 inches of compacted gravel or crushed stone for load distribution. This is your foundation’s lifeline.
For tougher situations, I add weep holes or trench drains to manage water actively. On weak, moisture-prone soils, I use geotextile fabric underneath to separate the subgrade from aggregate.
Get this right, and your patio lasts decades.
How Much Concrete Do You Need? (Cubic Yard Calculator Breakdown)
Once you’ve settled on your patio thickness, whether that’s a standard 4 inches or a beefier 6 inches for heavy loads, you need to figure out exactly how much concrete to order. This is where cubic yards come in.
Ordering too little concrete creates problems. You’ll end up short, which compromises load distribution and slab thickness. Order slightly more instead, as you can return excess bags. Here’s a quick reference for common patio sizes:
| Patio Size | 4-Inch Thickness | 6-Inch Thickness |
|---|---|---|
| 10×10 ft | 1.2 cubic yards | 1.8 cubic yards |
| 12×16 ft | 2.4 cubic yards | 3.6 cubic yards |
| 15×20 ft | 3.7 cubic yards | 5.6 cubic yards |
Factor in your base preparation depth too. The gravel base counts toward your overall material planning.
Construction Steps to Achieve the Proper Thickness
Once you’ve nailed down your thickness needs, the following construction steps will help you hit that target and keep your patio solid for decades. You’ve got five key moves here: laying forms, setting your base and reinforcement, mixing and pouring, screeding it level, and cutting control joints. Each one directly impacts whether your finished slab comes out the right thickness and stays that way. Here’s how to execute each step correctly.
【 Polyurethane Stamping Mat 】 The material that constitutes this concrete texture skin is high-strength polyurethane, which has resistance to wear resistance, elasticity, high tear resistance for long-term concrete imprinting.
【 Polyurethane Stamping Mat 】 The material that constitutes this concrete texture skin is high-strength polyurethane, which has resistance to wear resistance, elasticity, high tear resistance for long-term concrete imprinting.
【 Polyurethane Stamping Mat 】 The material that constitutes this concrete texture skin is high-strength polyurethane, which has resistance to wear resistance, elasticity, high tear resistance for long-term concrete imprinting.
Step 1: Lay Out the Forms
How you set up your forms is the foundation for getting that perfect 4-inch thickness. Your forms need to be level and rigid, so they’ll hold the concrete exactly where you want it. Excavate 8–12 inches below finished grade first, then set your forms to match that exact final depth. Sloppy forms result in uneven thickness, which creates problems over time.
Before pouring, double-check that everything’s aligned with your planned joints and transitions. Solid forms prevent bowing and leaking, which keeps your base prep and reinforcement exactly where they belong. Proper form setup determines whether your finished patio looks professional or requires costly repairs.
Step 2: Set Your Gravel Base & Reinforcement
With your forms locked in place, the critical work of prepping the base begins. You’ll need to lay down 8–12 inches of properly compacted crushed stone or gravel. This isn’t simply dumping material and moving on. You must compact that base to at least 95% density, which reduces deflection issues and creates a more stable slab overall.
Next, add your reinforcement, either wire mesh or rebar, right into the base. These control cracking without replacing the need for solid thickness. Drainage is essential and often overlooked. Slope your base at least 1/4 inch per foot away from structures. On soft or expansive soils, a geotextile layer underneath prevents unwanted movement and maintains proper performance.
Step 3: Mix & Pour the Concrete
You’re ready to mix and pour. Your prep work pays off here. I use a mudmixer to keep everything uniform, which means your concrete slab thickness stays consistent throughout.
Follow your mix instructions exactly. Don’t eyeball the water-to-cement ratio. Too much water weakens everything and ruins your project. Pour steadily into your forms, keeping reinforcing mesh positioned mid-slab for crack control.
Don’t overwork it. Screed the concrete level across your forms, maintaining that 4-inch depth you planned. Mark where your control joints go, roughly every 4 to 6 feet, and cut them about 1 inch deep.
Curing comes next. Keep everything moist for a week. Your patience now results in a patio that lasts for years.
Step 4: Screed for Even Thickness
Once that concrete’s in the forms and you’ve got it poured, screeding is where you make your slab flat and even. I drag a straight edge across the forms, striking off excess concrete and bringing everything to that uniform depth you’re after. Timing matters here; you want the concrete stiffened enough to support the board, but not so hard you’re fighting it. I use my forms as guides to keep consistent thickness throughout. Once I’ve screeded it level, that’s when joints and edges get prepped, and I can move into smoothing and troweling. This step determines whether your patio remains structurally sound or develops problems later, so I take my time getting it right.
Step 5: Add Control Joints
Control joints are essential for managing concrete cracks. Space them every 4–6 feet across your slab to direct cracks along planned weak lines rather than letting them form randomly. Saw these cuts as soon as the concrete can handle it without raveling, typically within 24–48 hours. Cut them about one-quarter of your slab thickness deep, so for a 4-inch pour, that’s roughly 1 inch down. Align control joints with garage jambs, transitions, and landscape features to minimize visible cracking. Proper jointing works with your thickness and base quality to manage shrinkage and maintain your patio’s appearance long-term.
Should You Go With a Thicker Concrete Slab?
Why settle for the bare minimum when a little extra thickness can save you thousands down the road. I’ve seen too many patios crack and crumble because owners skimped on slab thickness. Going from 4 inches to 6 inches isn’t just about durability; it’s smart planning. Thicker slabs improve load distribution, handle freeze-thaw cycles better, and work harder with your reinforcement to prevent damage. A stronger base drainage system paired with increased thickness creates a foundation for a patio lasting decades. Spending more upfront prevents costly repairs within five years. If you’re hosting gatherings, placing heavy items, or live somewhere with tough winters, thicker concrete provides measurable structural advantages and reduced risk of damage.
Building Codes and Local Requirements
Building codes exist for essential reasons: they protect your investment and ensure your patio’s long-term safety.
Your local jurisdiction sets specific requirements around thickness, reinforcement, drainage, and joint spacing. Before you pour a single bag of concrete, check what your area demands. Some regions mandate 4-inch minimums with certain PSI strength, while others require rebar or specific slope angles for drainage.
| Requirement | Why It Matters | Your Action |
|---|---|---|
| Thickness specs | Prevents settling | Verify local minimum |
| Reinforcement rules | Adds durability | Ask about rebar needs |
| Drainage slope | Protects your home | Confirm angle requirements |
| Control joints | Manages cracking | Note spacing rules |
| Isolation details | Prevents movement | Check near structures |
A professional assessment is recommended if your project is substantial or your soil presents challenges. This investment can prevent costly failures and ensure compliance with local standards.
Common Mistakes to Avoid When Pouring a Concrete Patio
Because you’re investing serious time and money into your patio, avoiding these common pitfalls will protect your investment. Many homeowners skimp on slab thickness to save money, then watch their patio crack within years. This becomes expensive to repair. Don’t underestimate your soil conditions, especially if you’ve got clay. A solid compacted gravel base matters just as much as thickness itself. Drainage is critical because water trapped beneath your slab causes settling and damage. You’ll want proper slope, too; at least a quarter-inch per foot away from your home. Don’t cheap out on reinforcement like rebar or wire mesh. These aren’t optional extras. They directly prevent costly repairs down the road.