

Gardening season always ignites a special kind of excitement. You might find yourself daydreaming about the perfect setup for your climbing plants or the best ways to create a cozy, private nook in your garden. That’s exactly why I put this post together—because I know many of you share this passion and want to enhance your outdoor spaces.
If you’re someone who loves gardening, especially vertical gardening solutions, you’re in for a treat! This article is tailored for garden enthusiasts, DIYers, and anyone looking to beautify their yard with functional designs. I’m sharing 15 unique wood trellis ideas that serve as ideal climbing plant support while also providing practical garden privacy solutions.
Get ready to discover some inspiring DIY trellis designs that can transform your garden into a stunning outdoor retreat. You’ll find ideas that are not only beautiful but also easy to implement, so you can enjoy your outdoor space to the fullest!
Key Takeaways
– Explore various wood trellis ideas that enhance vertical gardening and support climbing plants effectively.
– Learn how to create garden privacy solutions that help you enjoy your outdoor space without feeling exposed.
– Discover DIY trellis designs that allow you to put your personal touch on your garden while keeping costs low.
– Find vertical gardening ideas that maximize your space and add depth and interest to your garden landscape.
– Get inspired with outdoor decor inspiration that complements your overall garden aesthetic and showcases your creativity.
1. Rustic A-Frame Trellis
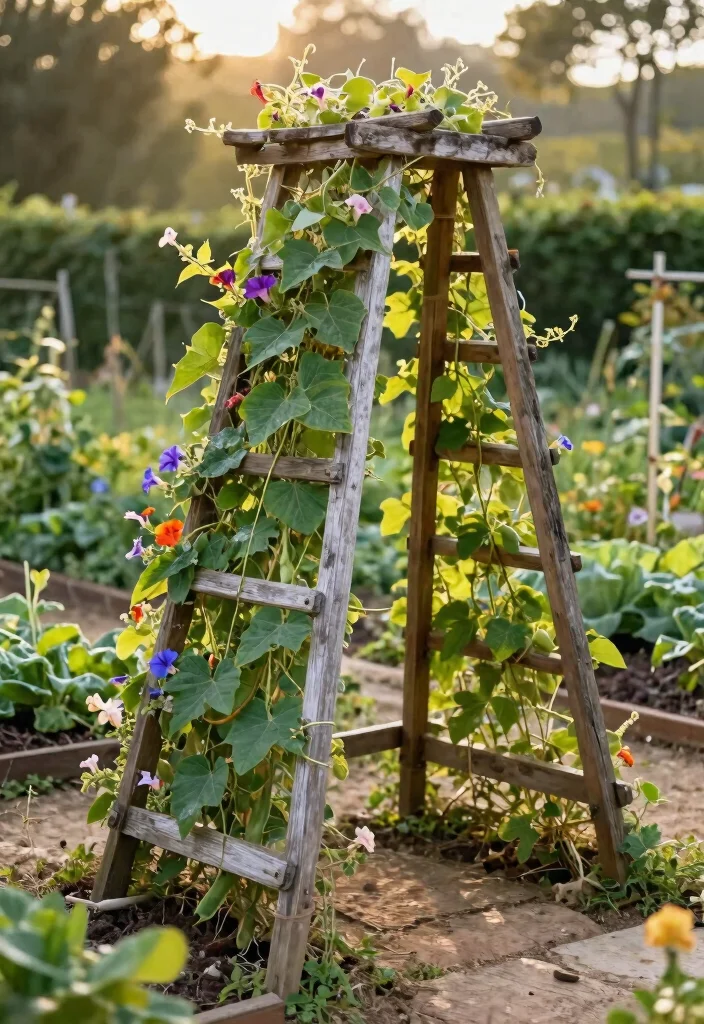
A rustic A-frame trellis not only serves a purpose but also infuses charm into your garden. This structure is ideal for supporting climbing plants like peas, beans, or vibrant morning glories. Its unique A-frame shape allows multiple plants to thrive, resulting in either a bountiful harvest or a beautiful floral display. With just some wooden planks and nails, you can easily create this delightful DIY project. Place it in a sunlit area, and enjoy watching your plants reach for the sky.
To get started on your rustic A-frame trellis, consider these tips. Focus on using reclaimed wood for a vintage feel. Ensure the base is sturdy enough to withstand strong winds. Adding twine or wire will provide extra support for your climbing plants. For a magical evening atmosphere, decorate the trellis with fairy lights.
Key tips for building your rustic A-frame trellis:
– Use reclaimed wood for a vintage aesthetic.
– Ensure the base is sturdy for wind resistance.
– Add twine or wire for climbing support.
– Decorate with lights for evening charm.
This trellis not only elevates your climbing plants but also enhances the rustic beauty of your garden.
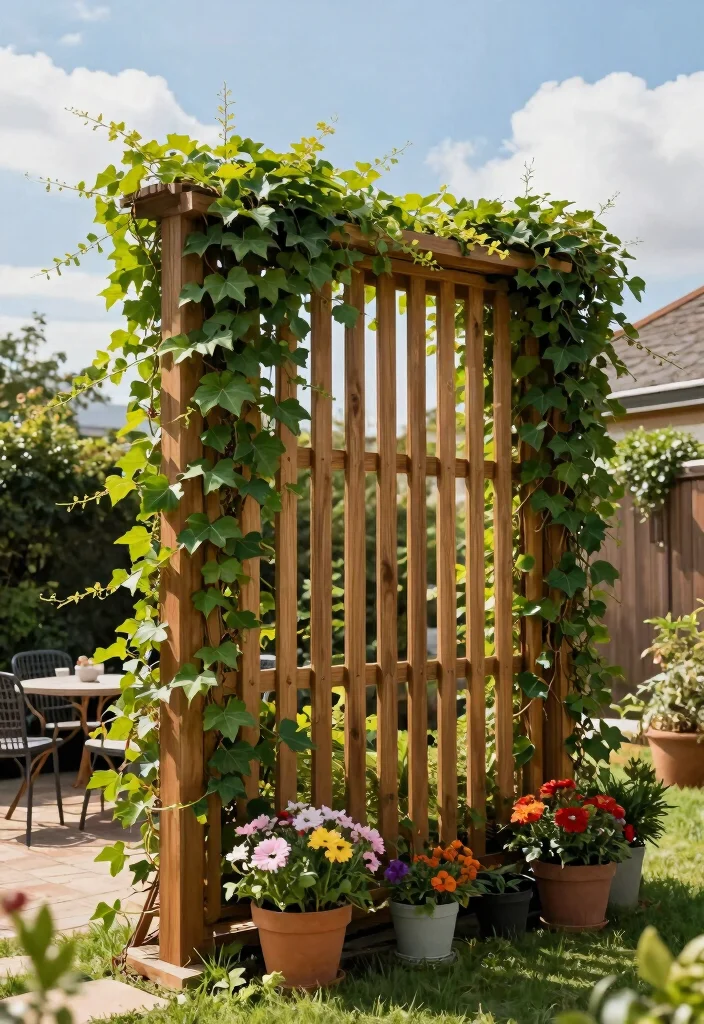
2. Vertical Lattice Trellis

Looking to add a sleek, modern flair to your garden? A vertical lattice trellis may just be the perfect fit. These structures not only offer a clean and stylish look but also provide ample support for climbing plants like clematis and hydrangeas. The vertical slats create a semi-private screen, making them an excellent choice for those seeking garden privacy while enhancing aesthetics.
When planning your vertical lattice trellis, keep these practical tips in mind. Opt for durable cedar or redwood to resist decay over time. Customize the color with paint or stain to match your outdoor decor. Position it near a seating area for a natural touch, and consider adding hooks for decorative items.
Essential tips for your vertical lattice trellis:
– Choose cedar or redwood for durability.
– Paint or stain to match your decor.
– Position it near seating for added nature.
– Incorporate hooks for hanging decor.
This design beautifully merges functionality with style, elevating your outdoor space while providing a perfect backdrop for gatherings.
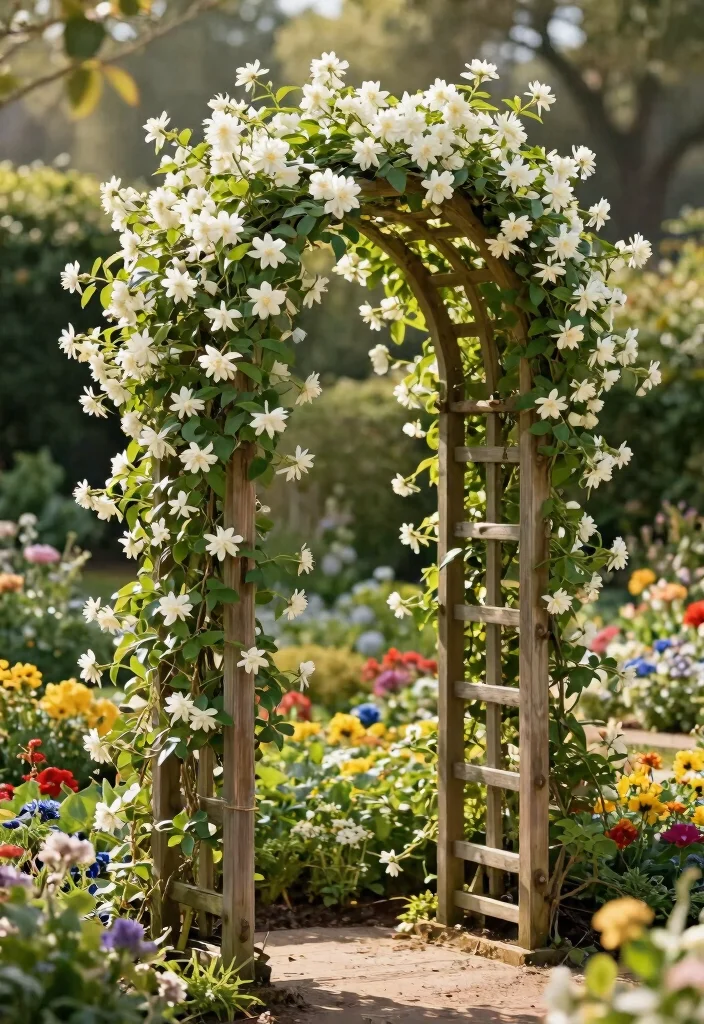
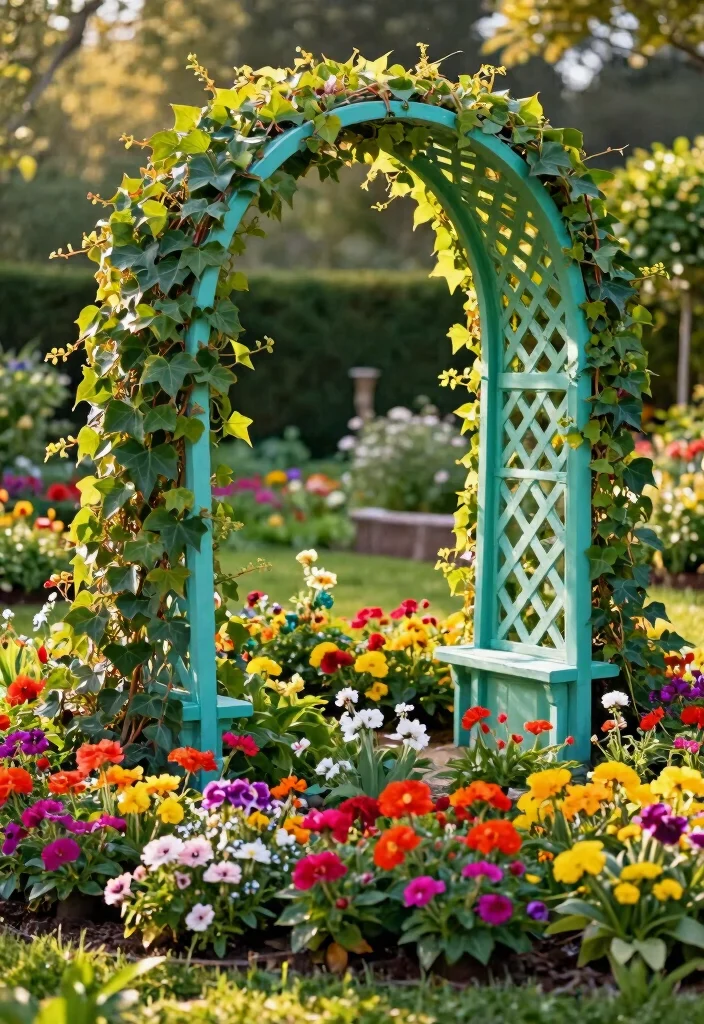
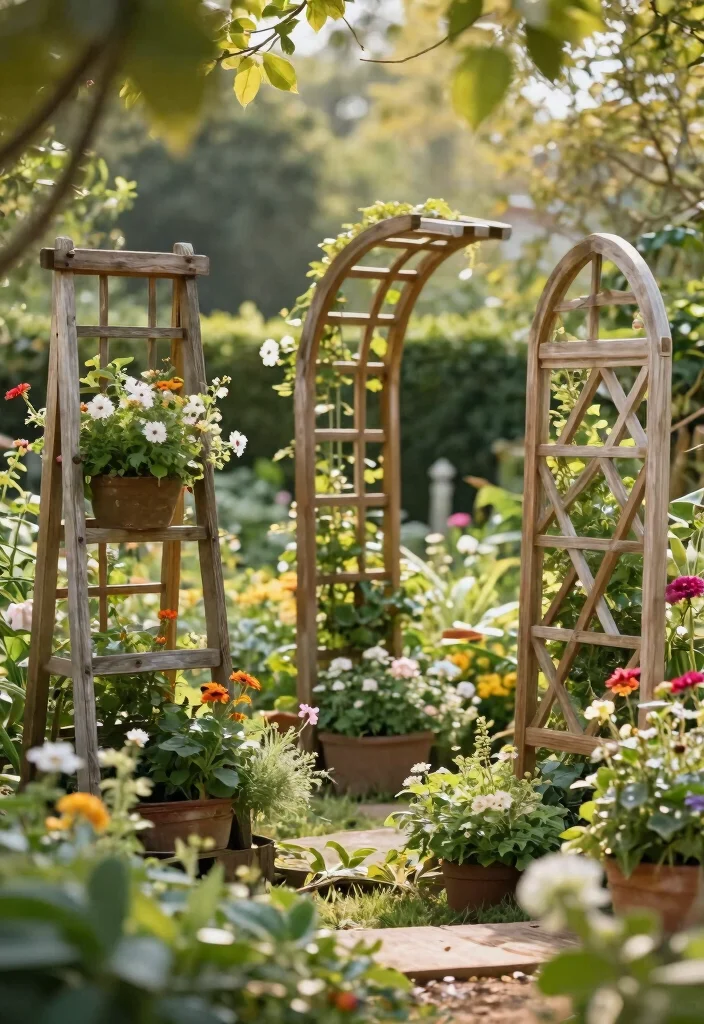
3. DIY Arched Trellis
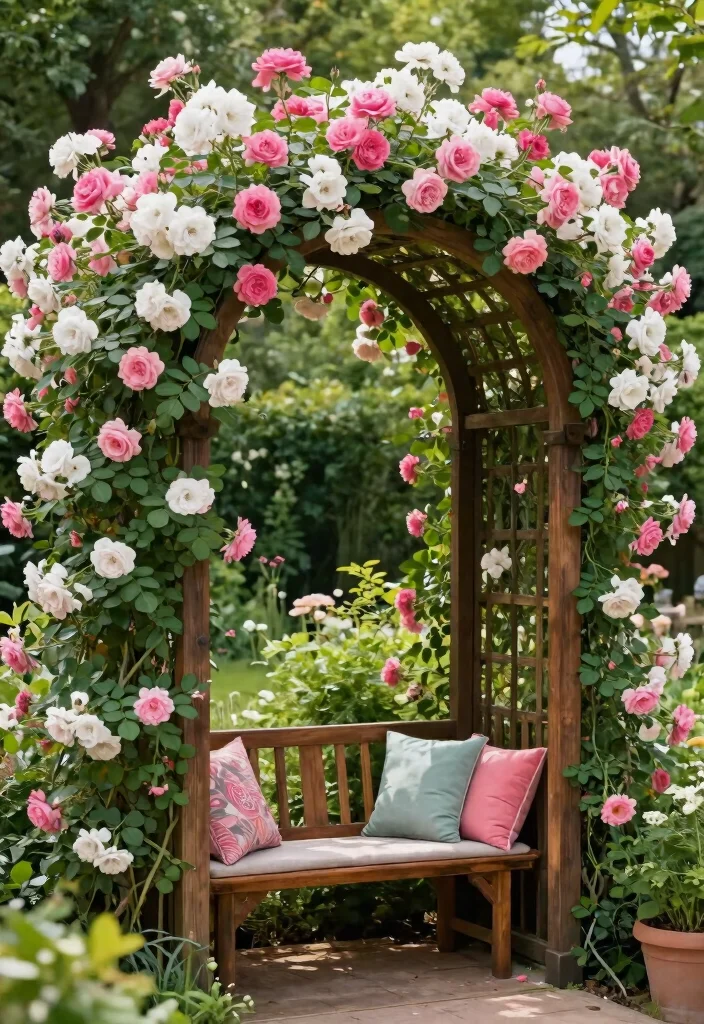
An arched trellis brings a sense of elegance and grandeur to your garden. This beautiful structure is perfect for climbing roses or wisteria, creating a stunning focal point as they wrap around the arch. Building a DIY arched trellis is an enjoyable weekend project; all you need are wooden arches, some stakes, and a spark of creativity. The arch not only supports your plants but also serves as a picturesque entryway or pathway.
To personalize your DIY arched trellis, consider these ideas. Add decorative lattice work or cross beams to enhance its style. Use galvanized nails for a refined finish and integrate lights or hanging ornaments for extra charm. Placing seating underneath can create a romantic nook in your garden.
Ideas for personalizing your arched trellis:
– Add decorative lattice work for style.
– Use galvanized nails for a polished look.
– Integrate lights for evening beauty.
– Place seating underneath for a cozy spot.
This arched trellis offers more than just structure; it invites beauty and wonder into your outdoor space.

Wooden Trellis: our modular plant trellis are crafted from sturdy native cedar wood offering superior rot and moisture resistance for year round support for your indoor climbing plants; Unlike fragile alternatives this sturdy wooden structure endures providing a naturally elegant growing base for your plants

ELEGANT DESIGN INSPIRED BY NATURE – Inspired by the graceful ZZ leaf, the Zella trellis doubles as décor. Its minimalist form makes it a striking statement piece while keeping your houseplants growing upright.

Elevate Your Outdoor Oasis: Crafted from premium Western Red Cedar, this 33"" x 84"" trellis panel adds natural charm and functionality to your garden, patio, or balcony
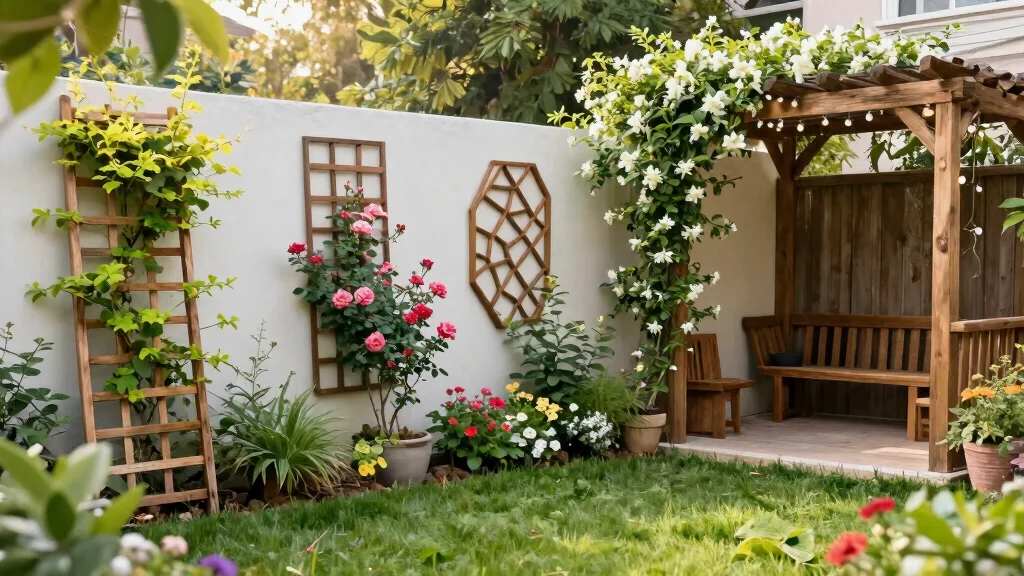
4. Privacy Screen Trellis
Seeking a garden privacy solution? A privacy screen trellis might be just what you need. This design allows you to block unwanted views while still letting light and air flow through. You can cultivate climbing plants like ivy or honeysuckle, forming a lush green wall that enhances your outdoor environment. Building one is straightforward; just ensure it’s tall enough for effective privacy.
When creating your privacy screen trellis, implement these tips for success. Choose fast-growing climbers for quick coverage and ensure the base is anchored firmly to withstand windy conditions. Lattice panels can minimize visual obstruction while adding style. Potted plants at the base can provide additional greenery.
Tips for an effective privacy screen trellis:
– Opt for fast-growing climbers for quick cover.
– Anchor the base firmly for stability.
– Use lattice panels for minimal obstruction.
– Incorporate pots for added greenery.
With a privacy screen trellis, you can craft a serene retreat while enjoying the beauty of climbing plants.
5. Fan-Shaped Trellis
The fan-shaped trellis offers a unique and artistic twist that can elevate any garden’s aesthetic. This design fans outward, providing ample space for climbing plants to flourish, making it ideal for decorative options like star jasmine or climbing roses. You can create a fan trellis with wooden dowels and string for support, turning it into an engaging DIY project.
Consider these tips for your fan-shaped trellis. Use weather-resistant wood to ensure durability. Stain or paint it to match your garden’s decor, and position it against a wall or fence for maximum support. Wrapping the trellis with fairy lights can add charm during the evening.
Tips for creating your fan-shaped trellis:
– Use weather-resistant wood for longevity.
– Stain or paint to match your decor.
– Position it against a wall for support.
– Wrap with fairy lights for evening charm.
This creative design will draw attention and make your garden a delightful conversation piece.
Fans transform tiny spaces—my favorite wood trellis ideas turn climbing plants into living art. Pro tip: use weather-resistant wood, space the dowels evenly, and seal with stain for durability. DIY tip: string supports help keep star jasmine and roses thriving.
Difficulty Rating & Requirements
Overall Difficulty Rating: Medium
Creating wood trellises for climbing plants and garden privacy offers a satisfying challenge. While many designs are manageable for those with some DIY experience, a few intricate styles may require advanced skills. If you’re comfortable using basic tools and following plans, this project is suitable for you.
Time Estimate:
⏱ Estimated time: 4-8 hours
The time you spend will depend on the complexity of your chosen trellis design. Here’s a breakdown of major phases:
– Planning and Design: 1-2 hours for sketching and gathering materials.
– Preparation and Cutting: 1-3 hours for cutting wood and prepping the structure.
– Assembly: 2-3 hours, depending on the design complexity.
Skill Requirements:
– Required skills: Basic woodworking skills, measuring, and the ability to follow instructions.
– Beginner-friendly: Yes! You can tackle simple designs like a vertical lattice trellis with minimal experience.
– Skills that can be learned include measuring and cutting wood, while advanced techniques like creating curves may require prior experience.
Tools & Materials Needed:
🧰 Essential items checklist:
– Wood boards (required): Choose rot-resistant wood like cedar or redwood.
– Nails or screws (required): For assembling the trellis.
– Hammer or drill (required): Essential for fastening pieces together.
– Saw (required): A handsaw or power saw for cutting wood to size.
– Measuring tape (required): Ensures accuracy in your dimensions.
– Sandpaper (optional): For smoothing edges and surfaces.
– Stain or sealant (optional): Protects your wood from the elements.
– Brackets or supports (optional): For added stability in larger trellises.
Step-by-Step Overview:
Here’s a brief overview of the main phases involved in building a wood trellis:
– Phase 1: Planning and Designing (1-2 hours)
Sketch your trellis ideas and decide on dimensions based on available space and climbing plants.
– Phase 2: Gathering Materials (1 hour)
Collect all required materials and tools. Consider getting extra wood in case of mistakes.
– Phase 3: Cutting and Preparing Wood (1-3 hours)
Measure and cut your wood pieces according to your design. Sand edges if necessary to prevent splinters.
– Phase 4: Assembling the Trellis (2-3 hours)
Follow your design closely to assemble the trellis using nails or screws. Ensure everything is level and secure.
– Phase 5: Finishing Touches (1 hour)
If desired, stain or seal the trellis to protect it from weather damage. Allow it to dry completely before placing it in your garden.
Professional vs DIY:
Hiring a professional to build a custom trellis can cost anywhere from $200 to $800, depending on size and complexity. Creating your own trellis often costs less than $100 in materials. If you enjoy hands-on projects and want to save money, this DIY approach is a great way to enhance your garden while earning a sense of accomplishment.
6. Wall-Mounted Trellis
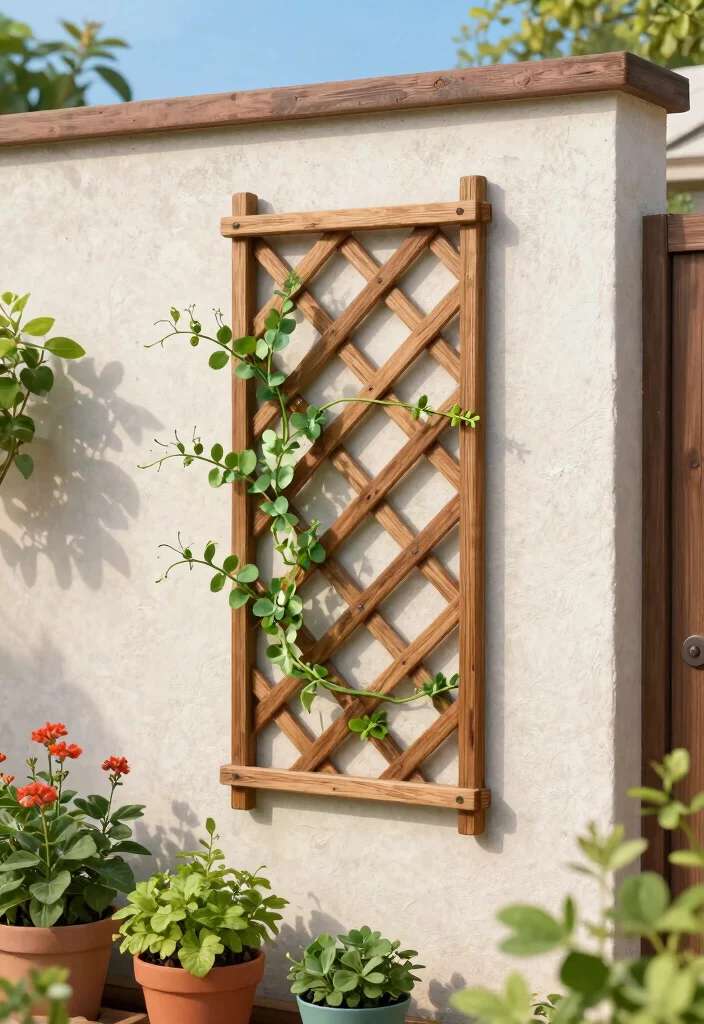
For smaller gardens or balconies, a wall-mounted trellis is an excellent solution for vertical gardening. This design attaches directly to a wall, providing climbing plant support without taking up precious ground space. Ideal for plants like climbing peas or ornamental vines, you can personalize a wall-mounted trellis with decorative elements or paint to match your outdoor theme.
Keep these tips in mind when installing your wall-mounted trellis. Use sturdy mounting hardware to ensure it remains stable, and choose lightweight materials for easier setup. Integrate multiple trellises for a layered effect, and include small shelves for potted plants or decorative items.
Key tips for your wall-mounted trellis:
– Use sturdy mounting hardware for stability.
– Choose lightweight materials for easy installation.
– Integrate multiple trellises for layering.
– Include shelves for plants or decor.
This wall-mounted trellis maximizes space while adding depth and visual interest to your vertical garden.
Wall-mounted trellises prove tiny spaces can bloom big. With sturdy hardware and a little paint, wood trellis ideas turn balconies into green privacy screens, supporting climbing peas and ornamental vines without sacrificing ground space.
7. Classic Pergola Trellis
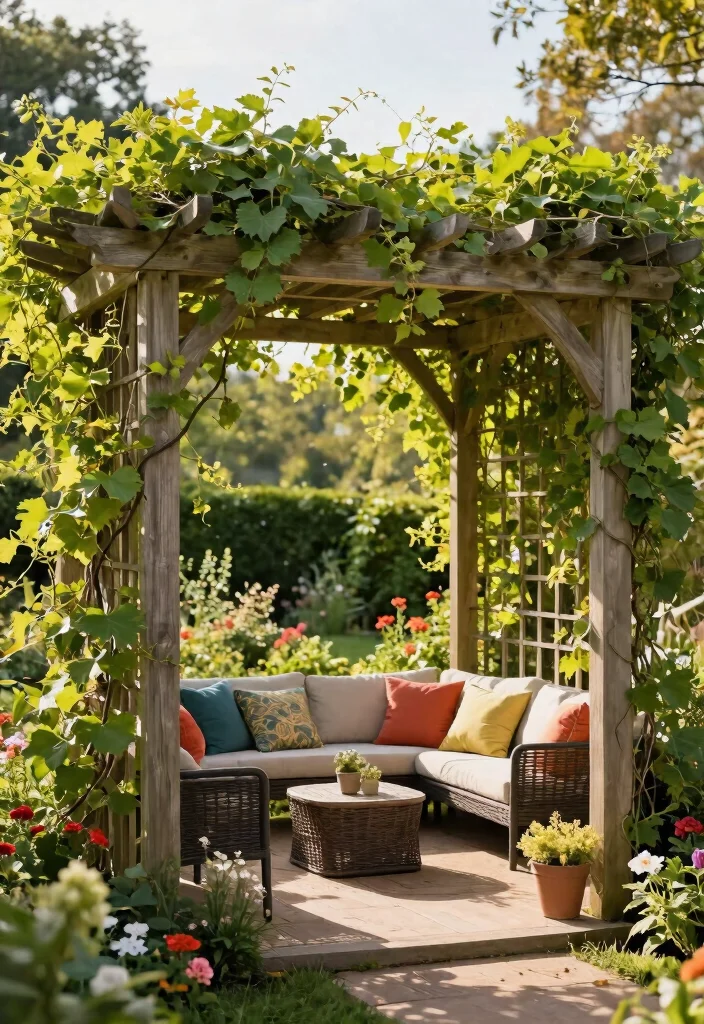
A classic pergola trellis adds structure and beauty to any backyard while offering support for climbing plants. This design can create a lovely shaded area perfect for relaxation and entertaining. Imagine vines like grapes or wisteria climbing up the beams, enveloping you in greenery as you enjoy the outdoors. Although building a pergola may require more effort, the end result is undoubtedly rewarding.
Here are some tips for constructing a pergola trellis. Choose sturdy wood like cedar for lasting durability. Cross beams enhance both stability and aesthetic appeal. Consider hanging lights or outdoor curtains for added charm, and add benches or seating underneath for a cozy gathering spot.
Important tips for building your pergola trellis:
– Use sturdy wood like cedar for longevity.
– Incorporate cross beams for stability and design.
– Hang lights or curtains for extra charm.
– Add seating underneath for a cozy hangout.
Creating a classic pergola trellis will transform your garden into an inviting retreat.
🌲【Natural Wooden Fence】 :Wooden lattice wall planter are perfect for climbing plant and provide them enough places to stretch branches. Besides, they can be used as wall-mounted flower pots shelf, garden fences, and home decorations that can hang family photos or string lights.

Package included : The height of bamboo trellis is 16 inch, each package includes 3pcs trellis. Three shapes are available for you to choose from

Extra-Thick 0.39in Solid Cedar Wood: Unlike many glued or thin wooden trellises, our plant trellis is crafted from one-piece solid cedar wood with a full 1cm thickness for exceptional durability and stability. The natural cedar grain complements modern home décor while providing reliable support for climbing houseplants.
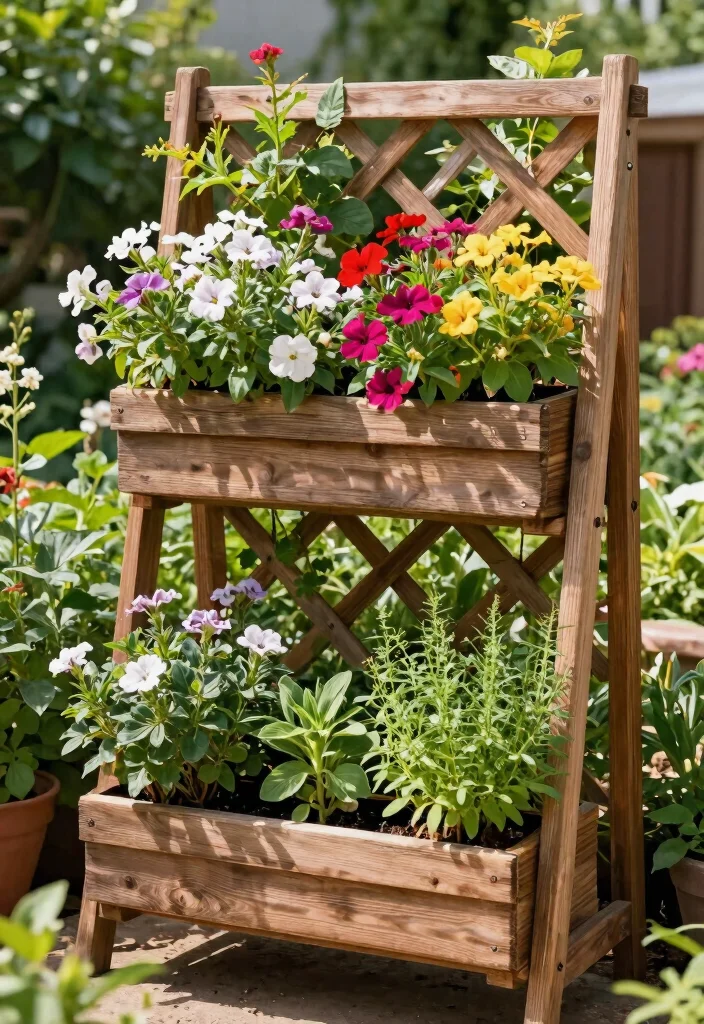
8. Trellis with Built-in Planters
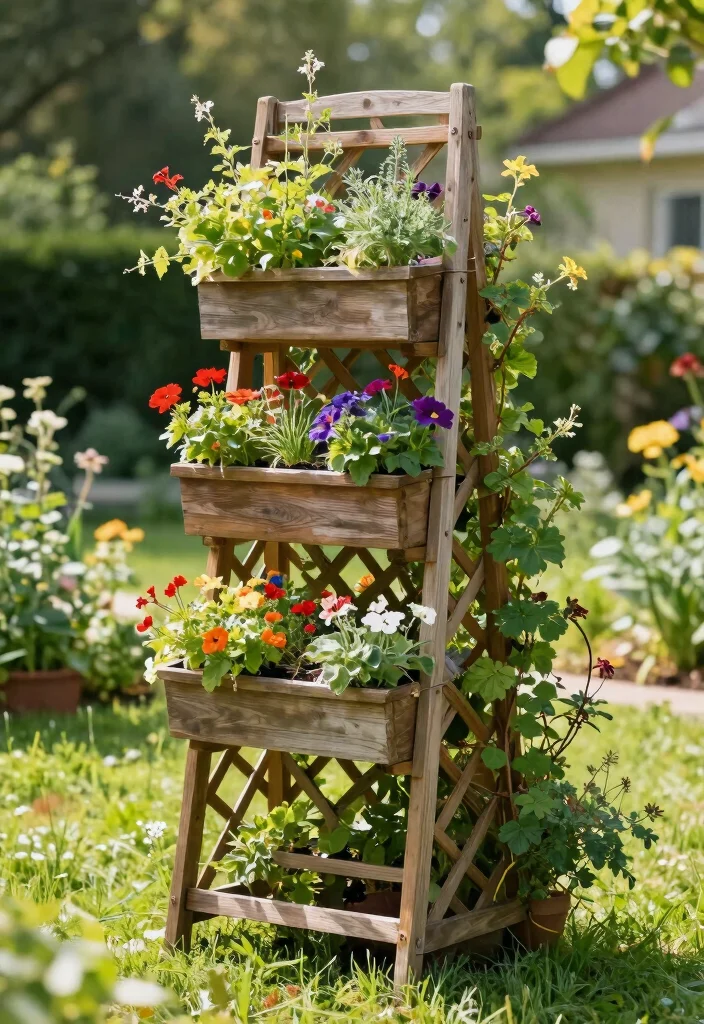
A trellis with built-in planters combines functionality with beauty, making it an excellent addition to any garden. This design allows you to grow climbing plants while showcasing colorful flowers or herbs at the base. Perfect for smaller gardens where space is limited, you can easily construct a trellis that incorporates planters for a stunning vertical garden effect.
When creating a trellis with built-in planters, consider these tips for success. Use treated wood for the planters to withstand moisture, and design them at varying heights for visual interest. Ensure good drainage to prevent waterlogging, and experiment with different plant combinations for a vibrant display.
Essential tips for your trellis with planters:
– Use treated wood for moisture resistance.
– Design planters at varying heights for interest.
– Ensure good drainage to avoid water issues.
– Experiment with plant combinations for vibrancy.
This trellis not only saves space but also creates a beautiful layered look in your garden.
9. Geometric Trellis Design
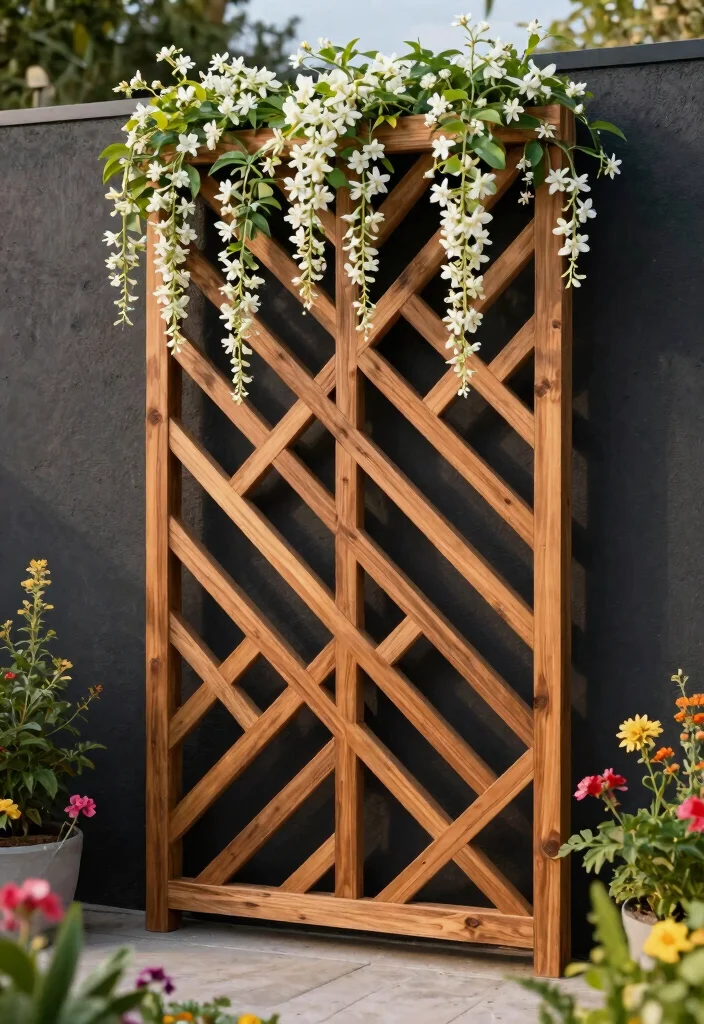
For a modern twist, consider a geometric trellis design that adds contemporary flair to your garden. These trellises often feature bold shapes and angles, making them perfect for supporting climbing plants like jasmine or ivy. They not only offer practical support but also serve as eye-catching art pieces in your garden. Creating a geometric trellis requires minimal materials and a touch of creativity.
Here are some tips to make a geometric trellis. Use thin wooden strips for a clean, modern appearance, and experiment with various shapes like triangles or hexagons. Painting the trellis in a bold color can make it stand out, especially when positioned against a contrasting wall.
Key tips for making a geometric trellis:
– Use thin wood strips for a modern look.
– Experiment with shapes like triangles or hexagons.
– Paint in a bold color for impact.
– Position against a contrasting backdrop for effect.
A geometric trellis can become a striking focal point, enhancing your garden’s overall design.
10. Vintage Pallet Trellis
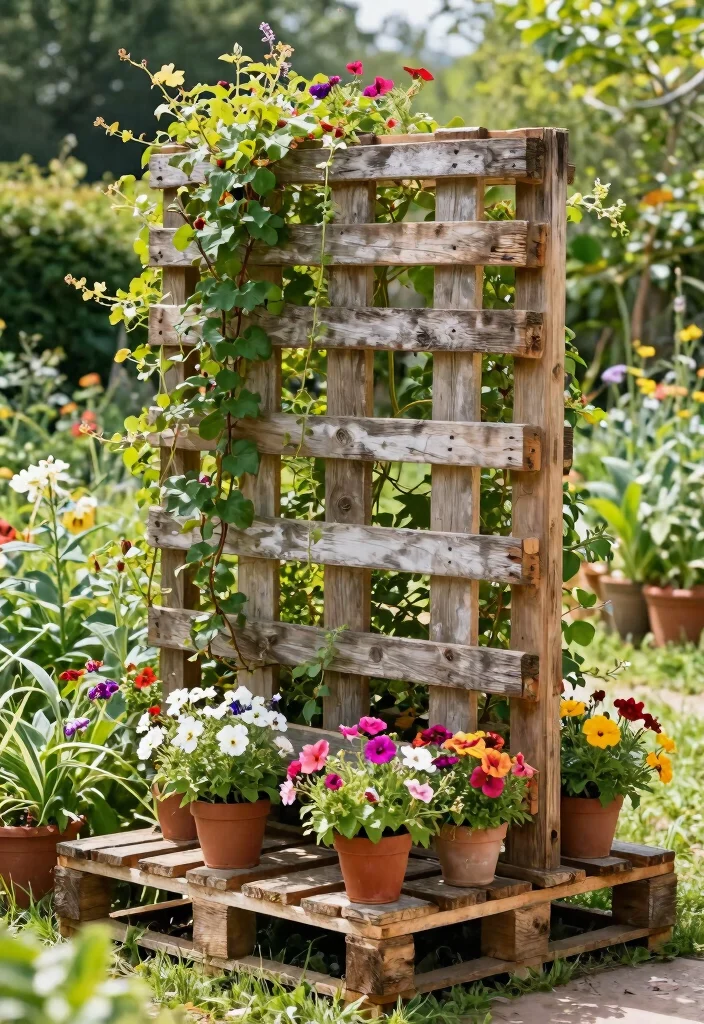
For a truly unique and eco-friendly option, a vintage pallet trellis is an excellent choice. Using repurposed wooden pallets, you can create a rustic trellis that supports climbing plants while being environmentally friendly. This DIY project is budget-friendly and allows for creative expression, as you can leave the pallets raw or paint them to fit your garden’s style.
When crafting a vintage pallet trellis, keep these tips in mind. Secure the pallet firmly to prevent tipping, and choose plants that won’t outgrow the pallet too quickly. Incorporate smaller planters at the bottom for a splash of color, and decorate the trellis with outdoor art or hanging items for a whimsical touch.
Essential tips for your vintage pallet trellis:
– Secure the pallet firmly to prevent tipping.
– Choose plants that won’t outgrow the pallet.
– Incorporate smaller planters for added color.
– Decorate with outdoor art for whimsy.
A vintage pallet trellis is not only cost-effective but also adds character and charm to your garden.
Did you know that upcycling pallets into a wood trellis counts as one of the simplest wood trellis ideas, cutting costs by up to 50%? It’s eco-friendly, rustic, and you can leave it raw or paint it to match your garden vibe.
11. Horizontal Slat Trellis
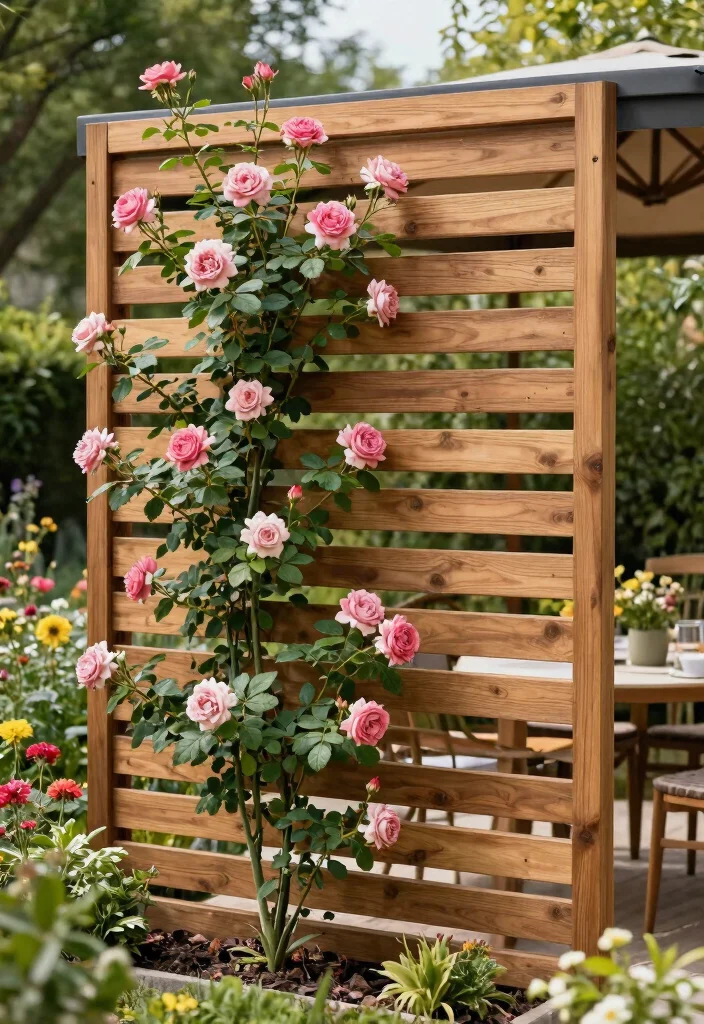
For a sleek, modern option, a horizontal slat trellis can elevate your garden’s aesthetic. This design allows climbing plants to spread out horizontally, creating a unique visual display. It’s perfect for supporting plants like climbing roses and ornamental vines. You can customize the spacing between slats to allow light through while still maintaining privacy.
When building your horizontal slat trellis, consider these tips. Use treated wood to resist weather damage, and incorporate different heights for dynamic visuals. Stainless steel screws can ensure durability, and positioning it as a backdrop for seating areas will enhance your outdoor experience.
Key tips for your horizontal slat trellis:
– Use treated wood for weather resistance.
– Incorporate varying heights for visual interest.
– Use stainless steel screws for durability.
– Position it as a backdrop for seating areas.
A horizontal slat trellis provides both support and style, making it a fantastic addition to contemporary gardens.
12. Spiral Trellis
A spiral trellis introduces a dynamic and whimsical touch to your garden. This design is perfect for supporting climbing plants like sweet peas or cucumbers in a vegetable garden. The spiral shape allows plants to wind around as they grow, creating a visually stunning effect. Building a spiral trellis can be a fun and engaging project that inspires creativity.
Here’s how to create your own spiral trellis. Use sturdy stakes or rods to form the spiral shape, securing it with wire or twine. Decorate it with colorful paint or natural finishes, and consider adding decorative touches like small lights for a magical ambiance.
Important tips for creating a spiral trellis:
– Use sturdy stakes to form the spiral.
– Secure the spiral with wire or twine.
– Decorate with colorful paint for flair.
– Incorporate lights for a magical touch.
The unique shape of a spiral trellis adds both functionality and artistic flair to your garden.
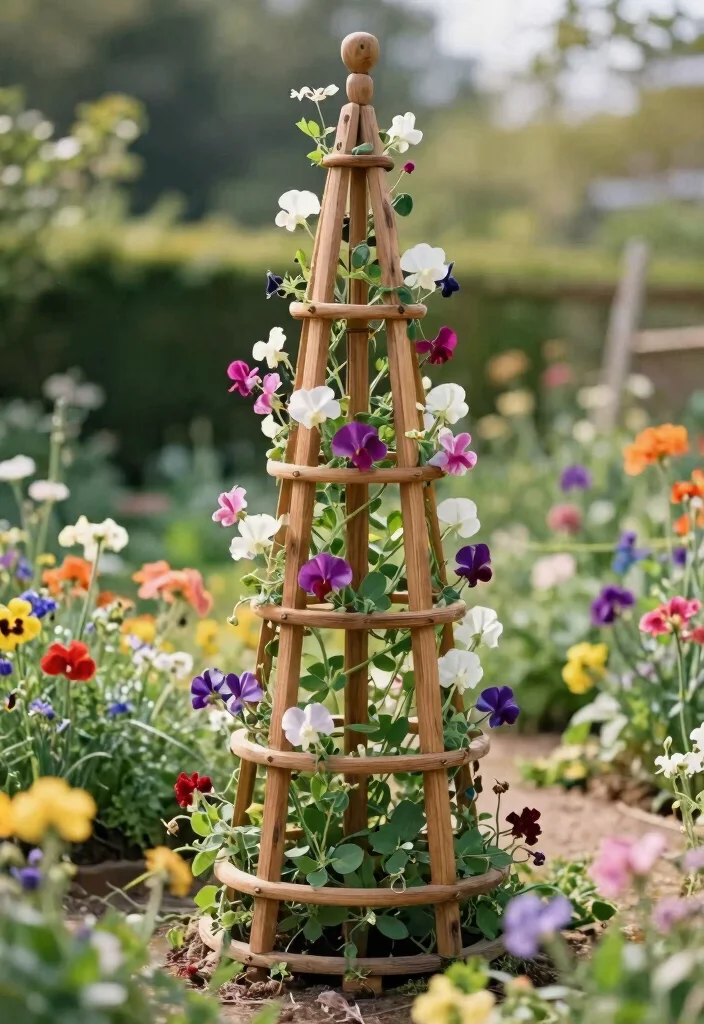
13. Decorative Circular Trellis
A decorative circular trellis serves as a stunning centerpiece while providing vital climbing plant support. This design can be featured in the center of a flower bed or used as a standalone piece. With its round shapes, it creates a soft, inviting look that complements a variety of climbing plants like ivy or passionflower. The curved lines add elegance and charm to any garden setting.
To make your decorative circular trellis, consider these tips. Use flexible wood to achieve the circular shape, and incorporate lattice details for added design elements. Painting it in a bright color can attract attention, while surrounding it with complementary flowers will create a cohesive look.
Key tips for your decorative circular trellis:
– Use flexible wood for the circular design.
– Add lattice details for extra style.
– Paint in a bright color for impact.
– Surround with flowers for cohesion.
A decorative circular trellis not only enhances your garden’s beauty but also encourages lush growth of climbing plants.
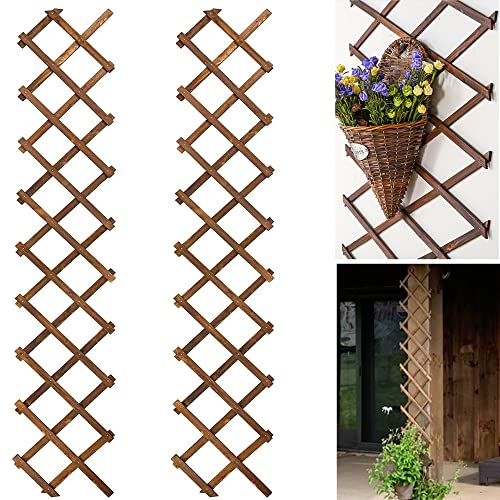
14. Freestanding Trellis Panels
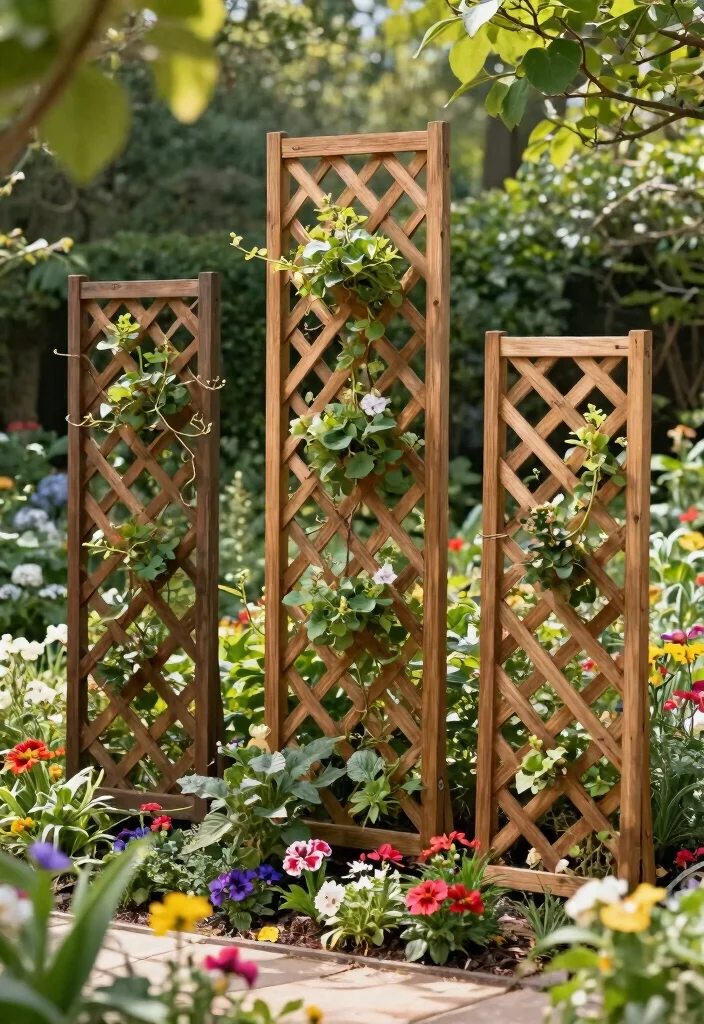
Freestanding trellis panels are a versatile option that can be placed anywhere in your garden. These panels can be arranged in various configurations, allowing climbing plants to thrive while creating visual interest. Whether you want to section off areas of your garden or create a decorative backdrop for outdoor seating, freestanding trellis panels provide endless possibilities. They’re easy to reposition, making it simple to refresh your garden layout.
When using freestanding trellis panels, keep these tips in mind. Opt for lightweight materials for easy movement, and add pots or planters at the base for stability. Arranging multiple panels can create an enclosed nook, and varying heights will add a dynamic look.
Tips for using freestanding trellis panels:
– Choose lightweight materials for easy repositioning.
– Add pots at the base for stability.
– Arrange multiple panels for an enclosed area.
– Vary heights for a dynamic appearance.
Freestanding trellis panels offer both functionality and flexibility, perfect for enhancing any garden design.
15. Two-Tiered Trellis
A two-tiered trellis design is not just functional but also incredibly stylish. This design maximizes vertical space, allowing you to grow multiple climbing plants at different heights. It’s ideal for those wanting to diversify their gardening without taking up additional ground area. Constructing this type of trellis with sturdy wood and creativity ensures both tiers can adequately support your climbing plants.
When building your two-tiered trellis, consider these tips for success. Use strong supports to bear the weight of plants, and create an interesting design with varying plant heights. Integrating planter boxes at the base can provide added greenery, while surrounding it with colorful flowers will create a lush backdrop.
Key tips for building your two-tiered trellis:
– Use strong supports for plant weight.
– Create varied heights for visual interest.
– Integrate planter boxes at the base.
– Surround with colorful flowers for a lush look.
A two-tiered trellis beautifully combines function and style, showcasing climbing plants in an impressive way.
Conclusion
Wood trellises are a fantastic addition to any garden, offering both functionality and beauty.
From rustic to modern designs, there’s a trellis idea for every gardener looking to support climbing plants and enhance privacy. With these 15 wood trellis ideas, you can transform your outdoor space into a lush and inviting retreat. Whether you choose to DIY or invest in a pre-made option, each trellis can become a stunning focal point in your garden.
Frequently Asked Questions
What are the best wood trellis ideas for supporting climbing plants and adding privacy in a small garden?
Great question—here are practical wood trellis ideas that blend function with style. Start with durable wood (cedar, redwood, or treated pine) and apply a weatherproof finish to create lasting wood trellis ideas.
Choose between freestanding trellises for corners or wall-mounted panels for fence lines to maximize climbing plant support while delivering garden privacy solutions and vertical gardening ideas.
Design options include a classic lattice panel, a curved arch, or a simple panel with integrated planters. Space the slats to balance light and shade, and secure trellises to posts or walls to withstand wind. Pair with climbing plants like morning glory, clematis, climbing roses, or ivy for instant greenery.
How can wooden trellises be used to create garden privacy solutions without sacrificing light?
Wooden trellises can create garden privacy solutions without blocking all light. Start with taller, open-frame designs and space the slats so plants provide coverage but air can pass. Position trellises along borders or as freestanding screens that face the sun to avoid heavy shade on seating areas. Use fast-growing climbers like jasmine, clematis, or honeysuckle to fill in privacy over time. Add planters or hanging pots to increase screen density. For style, finish with a natural stain or paint that complements your outdoor decor inspiration.
What are some easy DIY trellis designs for beginners?
Here are beginner-friendly DIY trellis designs you can build over a weekend.
1) Pallet trellis: take a shipping pallet, remove rough edges, treat wood, mount lattice strips on the back, seal with outdoor finish.
2) Lattice-panel trellis: repurpose an old lattice panel from a crate or fence, trim to size, attach to posts, stain or paint.
3) Teepee or obelisk: drive four stakes into the ground in a circle or square, lash lightweight slats or bamboo canes in a crisscross pattern, and let climbers wrap around.
Tips: choose cedar or pine, and finish with weatherproof sealant. This is a great beginner project that you can scale up later.
Which climbing plants work best with wood trellises and how do you train them?
Many climbers pair beautifully with wood trellises. Great options include clematis for spring blooms, climbing roses, grapevines for fruit and greenery, and jasmine or wisteria for fragrance. To train them: start by securing the main stems to the trellis with soft ties, train shoots along the slats in a zigzag, prune back after flowering according to species, and regularly check for congestion to keep air flow. Place tall climbers at the base for privacy, and edge with perennials to fill gaps. For success, select plants compatible with your climate and sun exposure.
What maintenance and weatherproofing steps keep wood trellises looking good for years?
To keep your wood trellis ideas looking great year after year, start with the right wood (cedar or redwood resists rot) and apply a durable exterior finish. Maintain by cleaning annually with a soft brush and mild soap, inspecting for loose screws or rot, and re-sealing every 2-3 years. If you notice cracking, replace compromised slats, and consider painting or staining to match your outdoor decor inspiration. In winter, cover or protect exposed sections and clear debris to prevent moisture buildup. Regular maintenance extends life and keeps climbing plants thriving.
Related Topics
wood trellis ideas
climbing plant support
garden privacy solutions
DIY trellis designs
vertical gardening ideas
outdoor decor inspiration
easy gardening
beginner friendly
seasonal gardening
rustic style
creative landscaping
space-saving solutions