
Yes, you can paint bathroom tile if you choose the right applications. Walls above the sink are suitable candidates. Shower floors with constant splashing are not. The key is using a bonding primer and tile-specific paint. Cheap products will peel within months. Proper preparation, quality materials, and regular maintenance can extend painted tile’s lifespan to five years. There is more to consider about when this approach actually makes sense.
Can You Paint Tile?
Yes, you absolutely can paint bathroom tile. Ceramic, porcelain, and natural stone tiles all work great for painting projects. Glossy quarry tile and glass mosaics should be skipped, as they won’t cooperate with paint.
Location matters significantly. Avoid painting tiles on bathroom floors or anywhere they’re constantly splashing with water, like around tubs and sinks. Paint also doesn’t stick well in high-traffic zones.
Focus instead on decorative wall tiles above shoulder height or anywhere relatively dry. These areas will show the best results and allow your painted tiles to last for years to come.

Transform dated countertops: Stone Coat Countertops Bonding Primer & Sealer creates a durable bond on slick surfaces like laminate, tile, granite, quartz, solid surface, and cultured marble, ensuring a strong foundation for epoxy applications.

Superior Adhesion - Ensures superior adhesion of Schluter thin-set mortars on demanding floor and wall surfaces, providing a reliable and lasting bond.
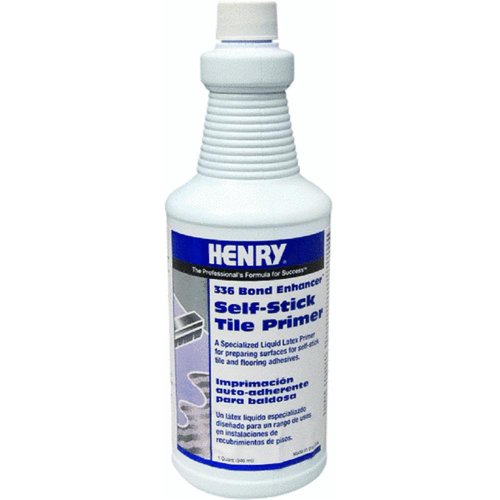
A specialized liquid latex primer designed for a wide range of uses in floor covering installations
Paint vs. Retiling: Budget, Lifespan & Sustainability
Painting costs $120 to $250 in supplies or $600 to $1,200 if I hire someone, whereas retiling runs thousands and tears up my bathroom for weeks. Paint wins on the wallet and timeline. The trade-off involves refreshing painted walls every 3 to 5 years and floors even sooner (1 to 3 years with foot traffic), while new tile lasts decades with minimal maintenance. Painting reuses existing tile instead of dumping it in a landfill, making it the greener choice in the short term. However, this approach requires ongoing touch-ups and eventual repainting, which accumulates environmental impact over time through repeated material use and labor.

Wide Application - This touch up paint pen adheres to a wide range of surfaces, including tile, tub, bathtub, sink, enamel, porcelain and refrigerators. It allows you to easily repair scratches, stains, chips, spots, yellowing, and other surface paint imperfections

【Wide Application】This touch up paint pen adheres to a wide range of surfaces, including tile, tub, bathtub, sink, enamel, porcelain and refrigerators. It allows you to easily repair scratches, stains, chips, spots, yellowing, and other surface paint imperfections

New formula of .5 ounces of high performance touch up paint with brush-in-lid
Cost & Time Face‑Off
When’s the right moment to paint instead of rip everything out and start fresh? Painting wins when your budget’s tight—you’re looking at $120 to $250 in supplies versus $600 to $1,200 for a pro retile job. Painting takes just days, not weeks of renovation chaos. The trade-off is durability: painted tile lasts 3 to 5 years on walls, maybe 1 to 3 on floors. Retiling is a 10-plus year investment. Paint makes sense when you’re renting, testing a color, or short on cash. You’re not making a forever choice; you’re buying time affordably. Keeping leftover paint handy for touch-ups extends the lifespan and maintains appearance longer.
Lifespan & Wear
The money you save upfront with paint tells only half the story. Painted walls hold up decently for 3 to 5 years before scuffs demand touch-ups. Floors need refreshing in 1 to 3 years from foot traffic alone. A wall that’s not constantly splashed can stay fresh for five-plus years, which represents the optimal duration.
| Location | Expected Lifespan | Best For |
|---|---|---|
| Walls (dry areas) | 5+ years | Decorative tile above shoulder height |
| Walls (wet areas) | 3-5 years | Around sinks and tubs |
| Floors | 1-3 years | Light-traffic bathrooms only |
You’ll keep leftover paint handy for spot repairs. This approach costs considerably less than full retiling projects.
Planet Points
How does your wallet and the planet fare when you choose paint over a full retiling project? Painting wins on both fronts. You’re spending $120 to $250 instead of thousands on removal, disposal, and new materials. Environmentally, you’re keeping old tile out of landfills while avoiding the carbon footprint of manufacturing and shipping replacement tiles.
Painted tile lasts 3 to 5 years on walls before needing touch-ups. It’s not permanent. Yet even with occasional refreshes, you’re still ahead financially and ecologically compared to a full retile. Painting is the sustainable middle ground, offering a quick bathroom refresh without the guilt or massive expense of full replacement. The smartest choice isn’t always the permanent one.
Tile Types: Who Gets Invited to the Paint Party?
Not all tiles are created equal when it comes to paint. Ceramic and porcelain tiles have smooth, non-porous surfaces that paint adheres to effectively. Glossy quarry tile and glass mosaics, however, resist paint application. Natural stone tiles are absorbent and will absorb primer quickly, requiring extensive prep work and special epoxy systems to achieve adequate paint adhesion.

【Acrylic Formula】Our tub paint boasts an advanced water-based acrylic formula designed for durability and longevity. The high-quality acrylic resin ensures a strong, resistant finish that combats flaking and wear, providing a lasting transformation for your tiles

LONG-LASTING SOLUTION FOR BATHROOM & KITCHEN – Refresh wall and floor tiles with a durable epoxy paint designed for bathrooms, kitchens, showers, and high-use areas. Ideal bathroom tile paint for ceramic tile paint applications, shower tile paint updates, and bathroom tile cover up projects. Creates a hard-wearing, waterproof surface for reliable everyday performance

【Broad Applicability】The tub paint is ideal for indoor and outdoor tiles, wood, glass,ceramics, acrylic, and marble surfaces like sinks, floors, bathtubs, walls.. Not suitable for artificial marble, metal, powdery or peeling substrates. Cast iron tubs (iron alloys with porcelain enamel) can be painted; regular iron tubs cannot
Ceramic & Porcelain—The Friendly Neighbors
Why do ceramic and porcelain tiles make such great candidates for painting? These tiles are non-porous, which means they won’t absorb your primer like a sponge. This keeps your prep work manageable.
Ceramic and porcelain have smooth surfaces that bond well with primer and paint when you sand them properly. You can expect decent adhesion without excessive coats. However, you should skip glossy quarry tiles, as they don’t adhere well to paint.
Ceramic responds beautifully to quality primers and tile-specific paints. Porcelain is equally forgiving. Both materials have proven track records among DIYers who’ve successfully transformed their bathrooms with these tile types.
Natural Stone & Unglazed Quarry—The Absorbent Cousins
Natural stone and unglazed quarry tiles are porous, meaning they soak up primer like a thirsty sponge, and that completely changes your game plan. You’re dealing with slate, marble, travertine. These tiles absorb everything you apply to them. That’s why you’ll need masonry-rated acrylic or epoxy systems instead of standard primers. Skipping this step leaves you with patchy, uneven coverage.
You’ll also need more coats than you’d use on ceramic or porcelain. Go heavier on prep as well, since these tiles require protection. When done correctly, your natural stone tile stays gorgeous and protected for years. This approach does require more work upfront, but the durability results justify the additional effort.
Glazed Quarry, Glass, Weird Metallic‑Sheen Tiles—The Party Poopers
While natural stone tiles are basically thirsty sponges that’ll drink up whatever you throw at them, I’ve got some bad news about the other end of the spectrum. There are tiles that won’t play ball with paint at all. Glossy quarry tile? Skip it. Glass mosaics? Absolutely not. And those weird metallic-sheen tiles you’re eyeing? They’re the party poopers of the tile world.
Here’s why: their slick surfaces are basically paint repellent. No primer will make paint grip these surfaces properly. You’ll end up with peeling disaster within weeks. They’re just too smooth, too shiny, and too resistant to adhesion. I know it’s frustrating when you’ve got your heart set on transforming those tiles, but fighting these surfaces isn’t worth the wasted time and money. Save yourself the headache and pick a different tile type instead.
Choosing the Right Products (a.k.a. No Paint‑Peel Horror Stories)
I’m going to walk you through the products that’ll actually stick around because nothing’s worse than watching your paint peel off like sunburned skin a few months later. You’ll need a bonding primer that grips slick tile surfaces (Sherwin-Williams Extreme Bond Primer is my top pick), a quality tile-specific paint like Emerald Interior Acrylic Latex or an epoxy for extra durability, and the right finish level depending on where you’re painting and how much abuse that tile’s going to take. Let me break down each one so you can grab the right stuff and avoid the disaster zone.

Prepare and paint surface the same day with a tough, with tub and tile’s 2-part epoxy acrylic formula that withstands moisture and resists corrosion

【Acrylic Formula】Our tub paint boasts an advanced acrylic formula designed for durability and longevity. The high-quality acrylic resin ensures a strong, resistant finish that combats flaking and wear, providing a lasting transformation for your tiles

【Complete Tub and Tile Refinishing Solution】 Our all-inclusive tub and tile refinishing kit offers everything necessary for a seamless renovation. Whether you're a DIY hobbyist or a professional, this kit simplifies the process with user-friendly tools and clear instructions, making it ideal for both residential and commercial spaces.
Bonding Primers That Actually Stick to Glaze
Why do so many DIYers end up with paint peeling like sunburned skin. They skip the primer, that’s why. Bonding primer is non-negotiable on glossy tile. Think of it as the glue holding everything together.
I recommend Sherwin-Williams Extreme Bond Primer, which is specifically designed to grip slick surfaces where regular primer just slides off. You apply it thin and even, watching carefully for drips in those grout valleys. One coat does it, though you’ll need about an hour drying time.
That primer is your insurance policy. It dramatically improves your topcoat’s adhesion and durability. Skip it, and you’re basically guaranteeing failure. I’ve seen it happen, and it’s not pretty. Invest in quality primer now, avoid peeling disaster later.
Paint Options in Plain English
So you’ve prepped thoroughly and primed properly. Next, you need to select the actual paint. This choice significantly affects your results. Sherwin-Williams Emerald Interior Acrylic Latex is the recommended option because it provides excellent adhesion and handles moisture effectively. If you’re budget-conscious, Zinsser Bullseye 1-2-3 performs well, and cleanup is easier with water. For high-moisture areas like showers and floors, consider two-part epoxy kits. They’re more durable and longer-lasting, though they require mixing. For finish, satin is the optimal choice: it cleans easily, conceals grout lines effectively, and won’t become slippery. Avoid glossy finishes on floors unless you add anti-skid treatment.
Finish Levels & Anti‑Slip Tricks
Most people get tripped up—literally—because they pick the wrong finish and end up with either paint that peels or bathroom floors that turn into ice rinks. When selecting finish levels, matte and eggshell hide grout lines beautifully but show every scuff mark. Satin works as a crowd-pleaser; it has just enough sheen to look polished while staying easy to clean. Gloss gives you that high-shine look, but skip it on floors unless you add anti-skid additives, because wet tile becomes dangerously slippery. For floors specifically, use a Porch & Floor enamel instead of standard tile paint. It’s tougher and handles foot traffic better, which prevents accidents and floor damage.
Tools & Materials Checklist (Print It, Stick It on the Fridge)
Before you crack open a paint can, you’ll want to gather the right stuff because skimping on materials leads to peeling paint and costly repairs. I’ve learned this through experience, and doing it correctly the first time saves money.
| Item | Why It Matters | My Pick |
|---|---|---|
| Bonding Primer | Sticks to slick surfaces | Sherwin-Williams Extreme Bond |
| Tile Paint | Resists moisture | Emerald Interior Acrylic Latex |
| Sandpaper (120-grit) | Removes glossy sheen | Standard variety pack |
| TSP Cleaner | Cuts stubborn grease | Any brand works fine |
Don’t cheap out on primer. It’s the difference between paint that lasts five years and paint that peels in months.
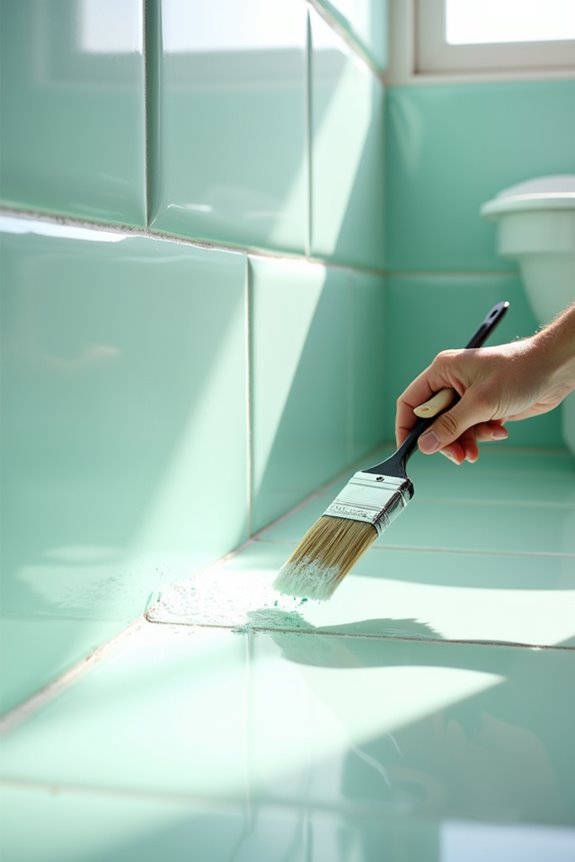
Step-by-Step Guide: How to Prepare and Paint Bathroom Tile
I’ve learned that success with painted tile comes down to five critical moves: deep cleaning to strip away grease, sanding to rough up that glossy surface, fixing any damage, priming with a bonding product, and then rolling on your base coat. Most people skip or rush these steps and wonder why their paint peels like a sunburn. Preparation takes longer than the actual painting, but it’s what separates a job that lasts from one that fails. Let me walk you through each one, because doing this right transforms bathroom tile into a fresh, polished look without needing to repaint in six months.

Premium Material: Made of glass; mosaic glass pieces suitable for mosaic art and crafts works

4 shapes of mosaic - These mosaic tiles come with 4 shapes, Diamond+Triangle+ Square+Rectangle

Premium Material: Made of glass; mosaic glass pieces suitable for mosaic art and crafts works, tiles for mosaic art
Deep Cleaning & Degreasing
The foundation of any successful tile paint job starts with getting that surface absolutely clean. Grab warm water, dish soap, and a scrub brush. Work through dirt, grime, and grease buildup, really getting into those grout lines where gunk loves to hide. For stubborn grease that won’t budge, TSP (trisodium phosphate) is effective. Mix it up and apply it to those stubborn spots. Once satisfied, rinse twice; don’t skip that second rinse. Then let everything dry completely. This step requires patience, but it delivers results. A clean surface allows the primer and paint to adhere properly.
Sanding: Creating That Mechanical “Key”
Why does sanding matter so much when you’ve already cleaned everything? Because glossy tile is basically paint’s enemy, and I’m not exaggerating. That shiny surface will make your paint peel like a sunburn once moisture hits it. I use 120-grit sandpaper with light pressure to rough things up, creating what we call a mechanical “key”; basically tiny tooth marks that paint can actually grip. This step separates successful projects from frustrating failures. After sanding, I vacuum away dust, then wipe everything with a damp microfiber cloth until it feels slightly chalky rather than glassy. It’s tedious, but skipping this means watching your hard work bubble and flake away.
Repairing Chips & Grout
Before you prime and paint, you need to address any damage on the tile itself. Most bathrooms have at least a few chips or cracks hiding somewhere. Use caulk for tiny chips, which fills small imperfections without overdoing it. For bigger damage, waterproof spackle is your friend because it’s tougher and won’t shrink back down. If your grout looks crumbly or separated, dig it out with a grout saw and re-grout, or grab a premixed tube for quick fixes. Let everything cure according to the label instructions before moving forward. Skipping repairs now means watching them peek through your fresh paint later. Taking those few extra minutes prevents costly rework.
Prime Like You Mean It
How you primer matters just as much as what primer you choose. This step makes or breaks your whole project. I always grab a bonding primer like Sherwin-Williams Extreme Bond Primer because it sticks to slick surfaces better than regular stuff. I roll or wipe one thin, even coat across the tile, watching carefully for drips pooling in grout valleys. Taking time here pays off. Most primers dry in about an hour, which gives you breathing room before paint goes on. Skipping primer means your topcoat peels off like sunburned skin. This is where the adhesion difference becomes visible in the final result.
Base Coat: Cut, Roll, Repeat
Now that your primer’s dry and you’ve got solid adhesion, it’s time to actually paint. Technique matters significantly at this stage. Start by cutting in edges with an angled brush to get those corners and trim lines crisp before they dry. While your brush lines are still wet, roll the field with light, overlapping strokes. Reload your roller constantly to avoid streaky patches. The first coat needs four to six hours to dry, so don’t rush it. After that initial dry time, apply coat number two. For floors or bold color changes, even do a third coat to prevent ghosting. The repetitive process delivers measurable results in coverage and color consistency.
Drying vs. Curing—Bathroom Blackout Period
Once that second coat goes on, you’re not done. Drying and curing are totally different, and I learned this the hard way by jumping the gun. Drying means the paint feels dry to touch, but curing means it’s actually hardened all the way through.
| Timeline | Walls | Floors |
|---|---|---|
| Light use | 48 hours | 72 hours |
| Full cure | 30 days | 30 days |
| Shower steam | Avoid completely | Avoid completely |
| Foot traffic | Wait minimum | Wait minimum |
| Splashing | Extra caution needed | Extra caution needed |
Avoid steamy showers during that full month. Run a fan on low and grab a dehumidifier if you’ve got one. A newly painted bathroom requires proper moisture control to cure correctly.
Sealing High‑Moisture Zones
Where water loves to hang out, think shower walls, tub surrounds, and sink backsplashes, you’ve got to go the extra mile. After your paint fully cures (yes, the whole 30 days), grab a non-yellowing water-based polyurethane and apply it in thin coats. This protects your painted tile against constant moisture and splashing.
Skip bleach sprays and abrasive powders when cleaning. They’ll damage your painted surface. Instead, use mild dish soap or pH-neutral stone cleaner. Keep some leftover paint handy because touch-ups happen. Feather those edges with a cotton swab to blend seamlessly. High-moisture zones require regular maintenance and attention to preserve your work.
Tips to Clean and Maintain Painted Bathroom Tile
I’ve learned that keeping your painted tile looking fresh really comes down to three things: using the right cleaners, fixing small damage fast, and accepting that your results won’t last forever. You’ll want to skip bleach sprays and abrasive powders, as they’ll damage your finish, and stick with mild dish soap or pH-neutral stone cleaner instead. Chips happen, so keep leftover paint handy for quick touch-ups with a cotton swab, feathering the edges to blend them in seamlessly.

Chic Marble Look: Give your home a bold, modern update with our Charcoal Gray 11.8" x 11.8" Peel and Stick Marble Wall Tiles. Featuring a deep gray base with subtle, natural marble veins, these tiles create a sophisticated, contemporary look that enhances any bathroom, kitchen, or living room. Perfect for shower walls, backsplashes, and accent areas, the soft veining adds a touch of elegance and contrast.
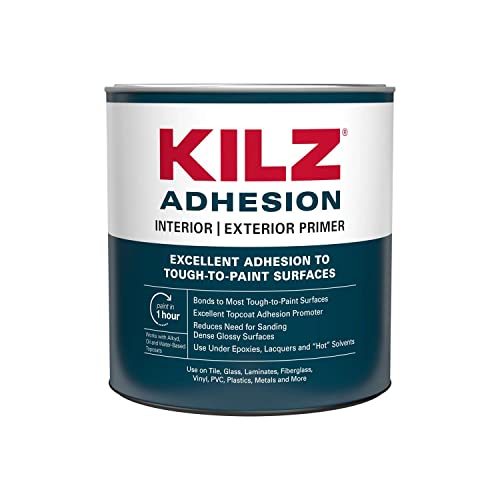
BONDING PRIMER: A high adhesion primer that bonds to a wide range of difficult to adhere to surfaces. It is formulated for situations where a secure bond is critical and use of a traditional water or oil base primer might be questionnable. It increases the possibilities for paintable surfaces.

Ardex P 4 multi-purpose primer is designed for use before installing tile and stone systems, including porcelain tile, ceramic tile, marble, granite and natural stone.
Safe Cleaning Products
How do you keep painted tile looking fresh without destroying all that hard work you just did? Choosing the right cleaning products is essential. Skip the bleach sprays and abrasive powders, because they’ll wreck your finish faster than you’d expect. Instead, grab mild dish soap mixed with water, and it works effectively. You can also use pH-neutral stone cleaner if you want something specifically formulated for painted surfaces. Gentle cleaning methods work better here. Keep a soft cloth handy, never scrub aggressively, and rinse thoroughly afterward. It sounds simple, but protecting your painted tile means respecting what it actually needs. This approach keeps bathrooms looking great for years.
Fast Fixes for Chips
Even with the gentlest cleaning routine, painted tile takes hits. Chips happen, and the best way to handle them keeps your bathroom looking fresh without a total repaint job.
What works:
- Spot repairs with a cotton swab: Keep leftover paint handy and dab it directly onto tiny damage, feathering the edges so it blends seamlessly
- Sand lightly between coats: A quick pass with fine-grit sandpaper prevents visible buildup and keeps new paint adhering properly
- Use pH-neutral cleaners only: Bleach and abrasive powders wreck painted tile fast, so stick with mild dish soap instead
- Tackle chips early: Waiting lets moisture seep under paint, causing bigger problems down the road
Catching damage early protects your investment. Regular touch-ups prevent the need for complete refinishing and extend the life of your painted tile surfaces.
Real‑World Expectations
Painted tile is tougher than you might think, but it’s not indestructible. Skip bleach sprays and abrasive powders, which damage your finish quickly. Instead, use mild dish soap or pH-neutral stone cleaner. That’s all you need.
Walls hold up beautifully for five-plus years if you keep them dry. Floors require refreshing every one to three years depending on foot traffic. Keep leftover paint handy for quick touch-ups using a cotton swab, feathering edges so repairs blend seamlessly. This maintenance is simple and manageable.
When Paint Isn’t Enough—Know the Red Flags

I’ve noticed that paint works great for cosmetic updates, but there are situations where it’s just a temporary fix on bigger problems, like when you’ve got structural damage underneath, heavy moisture in shower zones, or you’re thinking about selling your home soon. Buyers tend to see painted tile as a temporary fix rather than a real renovation, which can actually hurt your resale value instead of helping it. Before you grab that primer, ask yourself whether paint will truly solve what’s bothering you, or if you’re just delaying the real fix you’ll need down the road.

✅️【One Bottle Repair Your Tile】Tile scratches and cracks look unsightly and collect grime.FURRELOR 2-in-1 touch-up paint is ideal for small repairs. Low odor makes it safe for kitchens and humid bathrooms. Its fast-drying, tough coating is waterproof and scrub-proof, resisting peeling during daily cleaning. Simply repair tile chips, scratches and gaps to regain a smooth,new-like surface.

Apply Tub and Tile Spray Paint to ceramic, porcelain or fiberglass including tiles, sinks and tubs

Efficiently Repairs Imperfections:Our touch up paint is specifically formulated to address scratches, stains, cracks, spots, and yellowing on bathroom tiles and enamel surfaces. Extensively tested, it delivers exceptional adhesion and sealing properties, effectively resisting fading, peeling, and wear. For deeper cracks or scratches, we recommend applying multiple coats to achieve optimal results and lasting coverage.Note: This tile paint formulation incorporates a curing agent to ensure long-term adhesion without flaking.
Structural Damage
Before you grab a roller and primer, the real problem often isn’t the tile itself, but what’s lurking behind it. Structural damage is the stuff paint can’t fix, and ignoring it leads to bigger, costlier problems down the line.
Watch for these issues:
- Soft or spongy drywall behind tiles signals water damage; paint won’t stop rot from spreading
- Crumbling grout that crumbles easily means moisture is sneaking behind tiles and compromising the wall
- Mold or mildew growth underneath tiles indicates ongoing moisture problems requiring ventilation fixes first
- Tiles that sound hollow when you tap them mean they’re separating; they’ll fail regardless of paint
If you spot these red flags, painting over them will only delay necessary repairs. Get a professional assessment before touching that primer.
Heavy Wear Showers
Now that we’ve ruled out hidden structural issues, let’s address heavy wear showers. Painted tile in high-moisture zones faces significant durability challenges. Showers create constant steam, splashing, and humidity that test even premium paint. Here’s what works and what doesn’t.
| Shower Area | Paint Longevity |
|---|---|
| Shower walls (frequent contact) | 1-2 years |
| Tub surround | 2-3 years |
| Above shoulder (decorative) | 4-5 years |
| Outside shower enclosure | 5+ years |
Two-part epoxy tub-and-tile kits are your best option here. They’re formulated specifically for high-moisture environments. For heavily used daily showers, replacing tile instead of painting makes more sense. Paint provides temporary coverage; tile provides permanent protection.
Future Resale
When you’re thinking about selling down the road, painted bathroom tile can actually work against you. Buyers often see painted tile as a red flag.
- Peeling or chipping paint signals neglect to potential buyers, making them question what else you’ve skipped on
- Moisture damage underneath worries people. They’ll wonder if you’re hiding bigger problems with that fresh coat
- Dated finishes can cheapen your whole bathroom vibe, especially if the color’s trendy rather than timeless
- Repair costs loom in buyers’ minds, making them lowball offers to account for eventual re-tiling
Consider full tile replacement before listing instead. It’s an investment, but it increases home value and buyer confidence significantly more than paint will.