
Most of these take an afternoon to build from scrap or leftover materials.
Pick based on what slows you down most: if you lose time hunting for tools mid-project, start with French cleats or pegboard; if boards lean against the wall and warp, build a lumber rack first; if you work in a single-car garage, a folding workbench clears the floor when you need it.
A miter saw station with fold-down wings lets you cut long boards without a helper, and drill storage keeps batteries from falling out.
1. Scrap Wood Storage
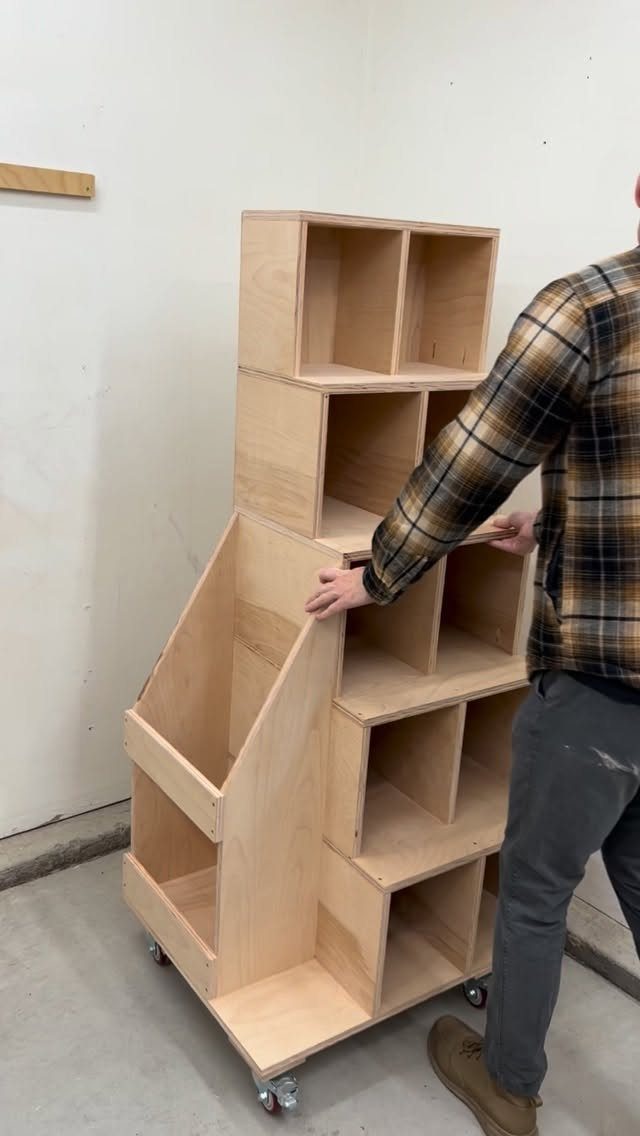
A storage rack with cubbies keeps offcuts sorted by size instead of piling them in a corner or leaning against the wall.
You can build one from scrap plywood and add casters so it rolls out of the way when you need floor space.
Sort pieces by length or thickness so you can see what you have before starting a project. Bins work well for shorter scraps, and open slots hold longer boards upright.
This works in a small shop because it takes up less room than a stack on the floor and keeps pieces from warping or getting buried.
2. French Cleat Storage
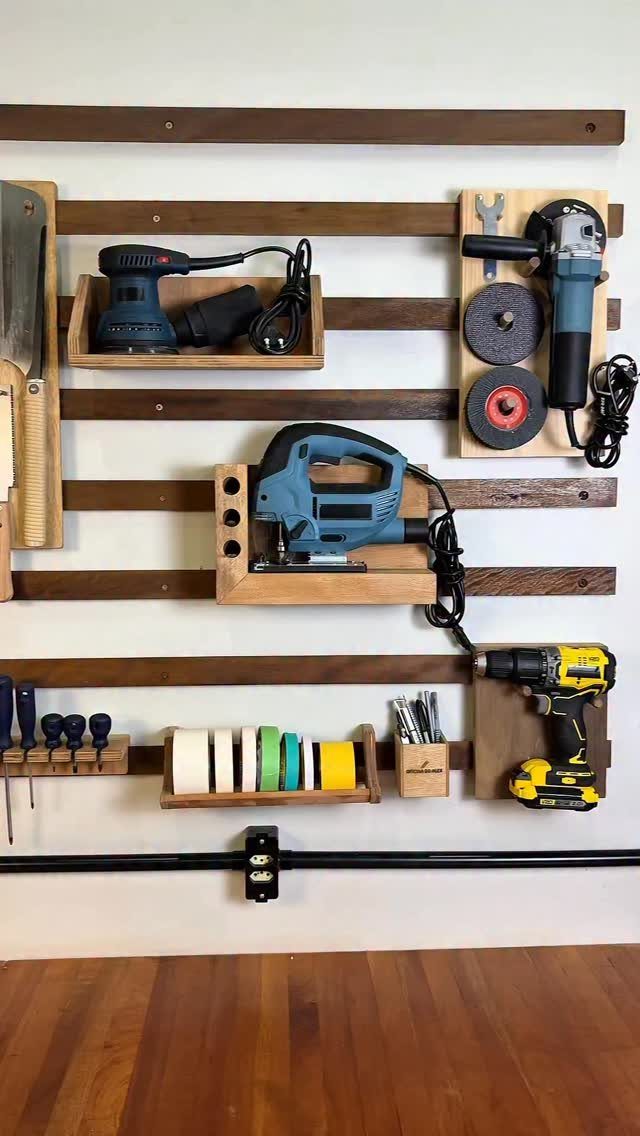
French cleats let you hang tool holders on a wall and move them around without drilling new holes every time. You cut matching bevels on two strips of wood, screw one to the wall, and hang holders from the other.
The angle locks everything in place but still lets you slide holders left or right or swap them out when your storage needs change. Build custom holders for drills, sanders, tape measures, whatever you reach for most.
This system costs almost nothing if you have scrap plywood, and it keeps tools visible instead of buried in drawers.
3. Folding Workbench
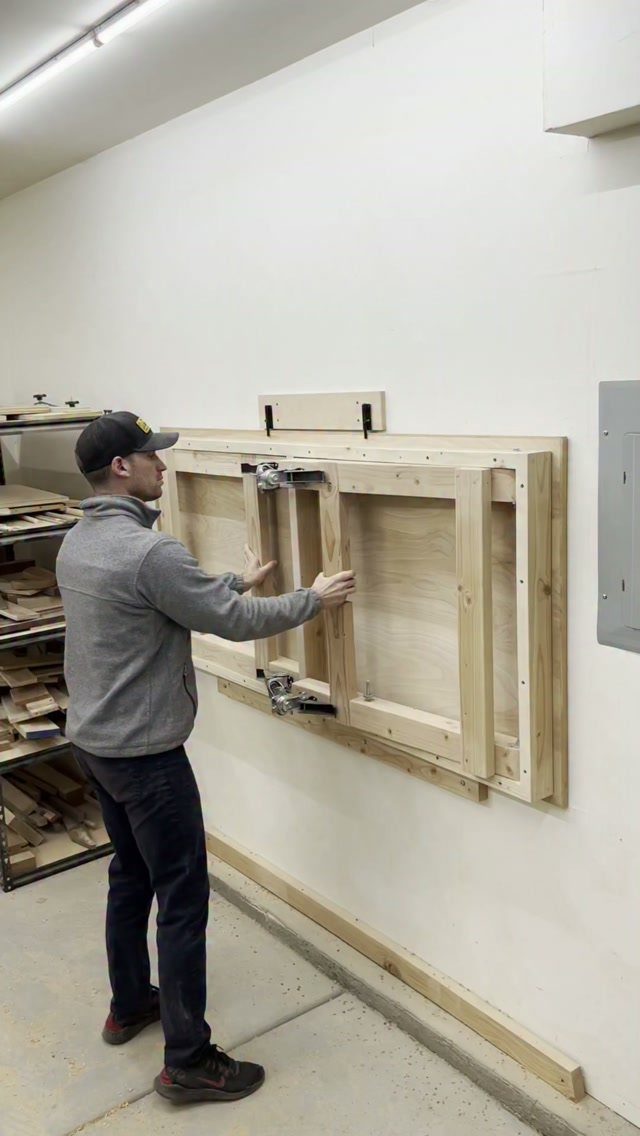
A folding workbench mounts to the wall and drops down when you need a surface, then folds flat when you are done. Hinges and a latch or leg support hold it steady while you work.
This saves floor space in a single-car garage or basement corner where a permanent bench would block the path. You can size it to fit the wall and still park a car or store bins underneath.
Build it from 2x4s and plywood, or buy a folding bracket kit and add your own top. It will not replace a full workbench for heavy assembly, but it handles most daily tasks.
4. Clamp Storage
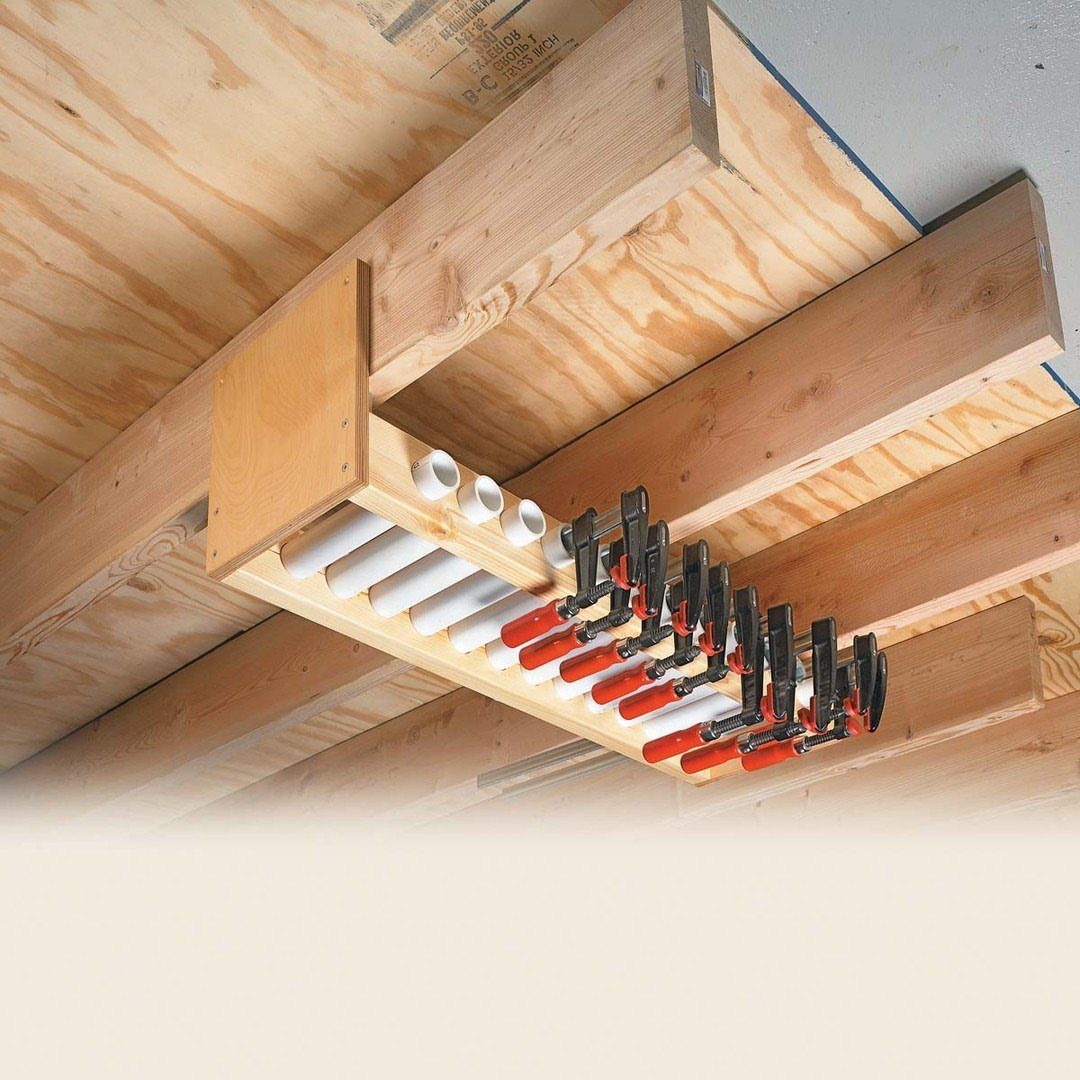
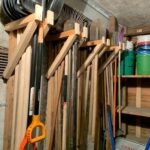
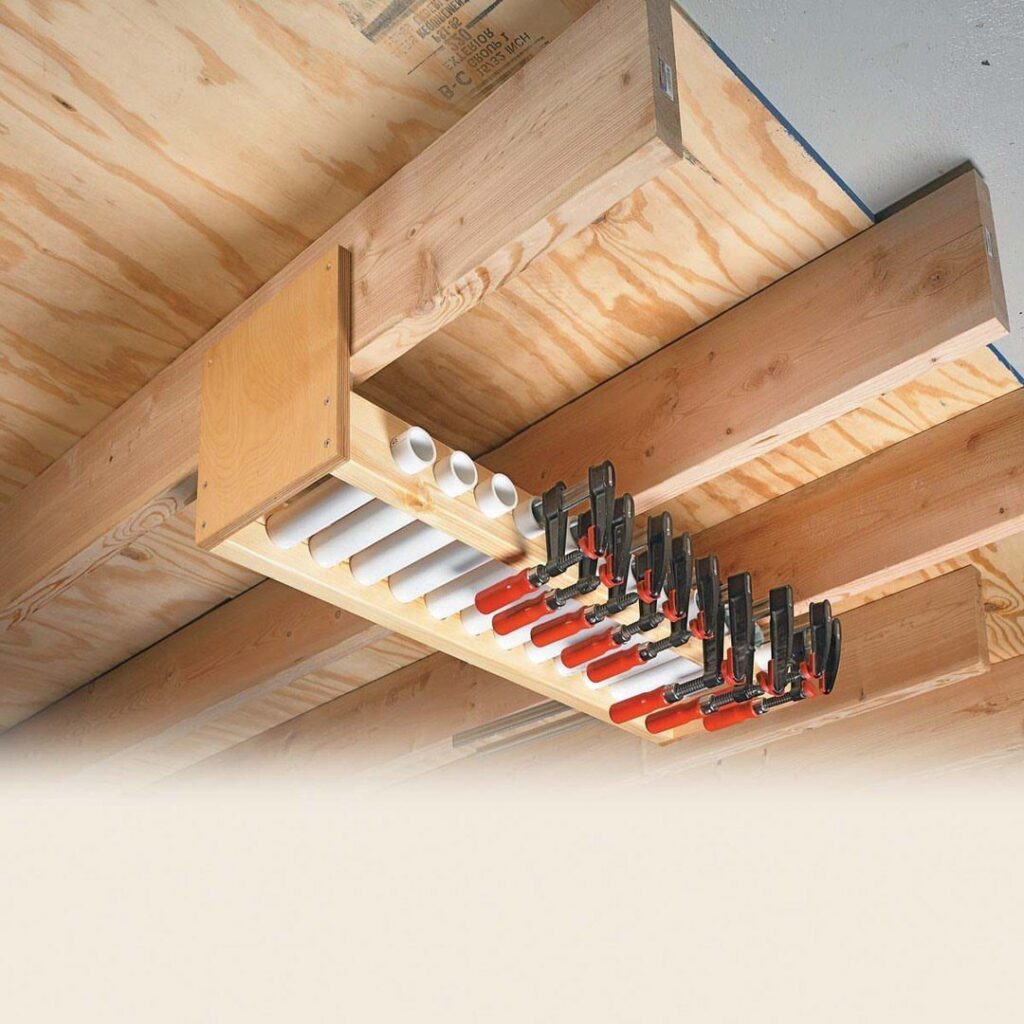
A rack made from PVC pipe or wood scraps gives clamps a spot where you can grab them fast and put them back just as easily.
Short sections of pipe or dowel hold clamps upright or hang them from a ceiling joist.
Clamps left on a bench or tossed in a bin tangle and slow you down mid-project. Storing them on a rack keeps handles visible and sorted by size.
Mount the rack to a wall, under a shelf, or between joists if you have exposed ceiling structure. PVC costs a few dollars and cuts with a handsaw.
5. Workbench
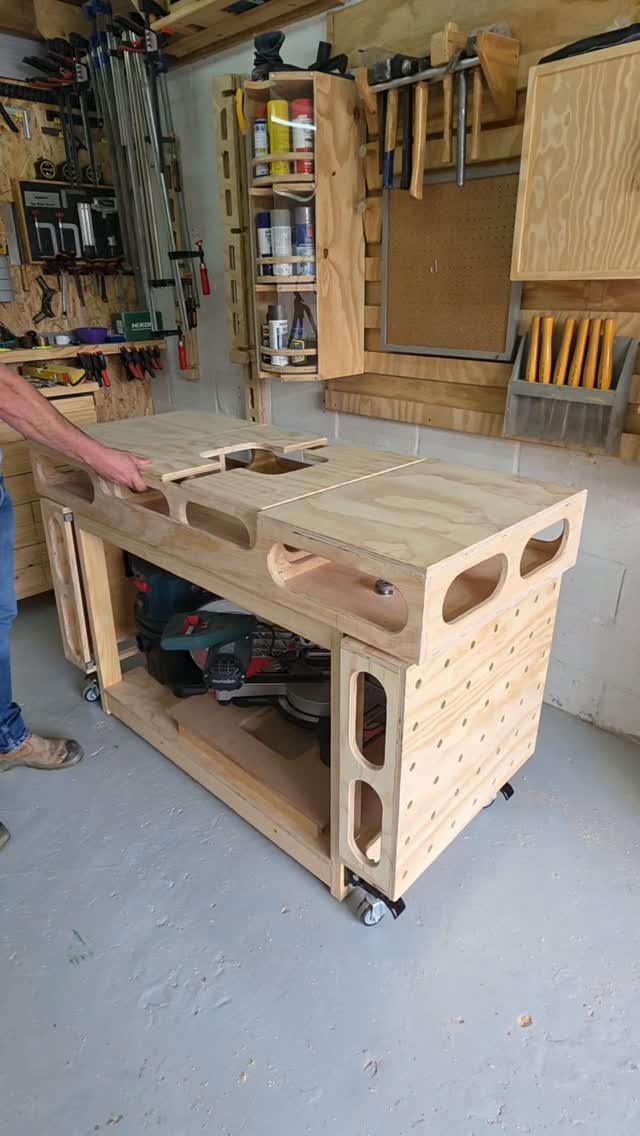
A workbench with a thick plywood or MDF top and a lower shelf gives you a flat surface for cutting, sanding, and assembly. Add casters if you need to move it around or tuck it against the wall between projects.
Size the bench to fit your space. A 4×2-foot top works in most garages and gives you room to clamp boards without overhanging too far.
Build the frame from 2x4s, bolt or screw the joints, and leave the lower shelf open for a miter saw or storage bins.
A mobile bench lets you roll it outside for messy work, then push it back when you are done.
6. Drill Storage
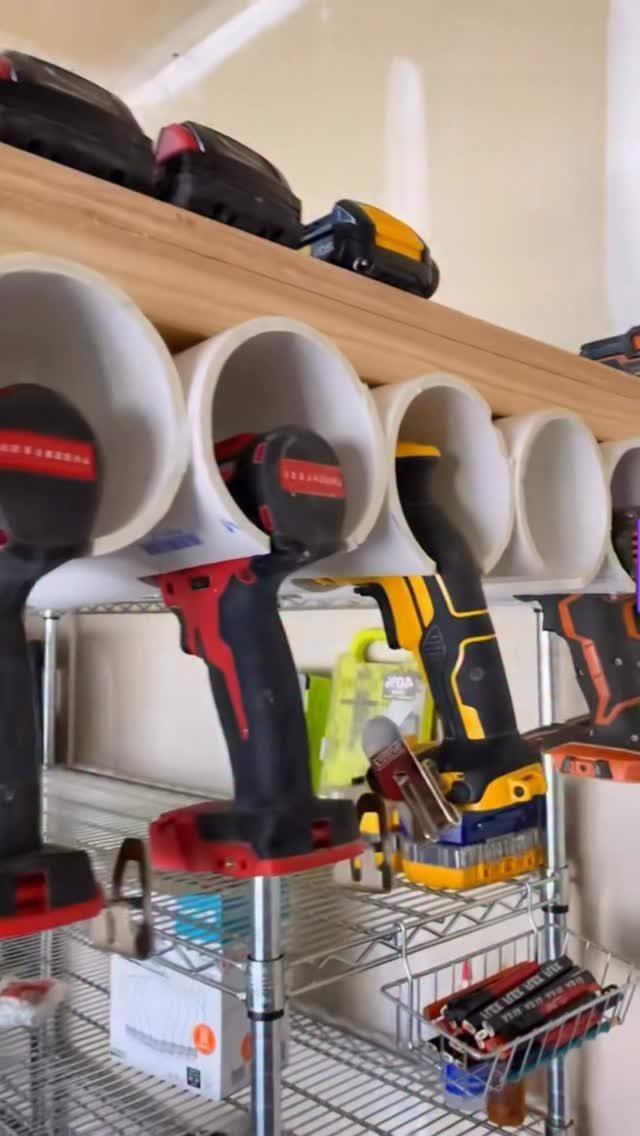
PVC pipe sections mounted under a shelf hold cordless drills upside down so the batteries stay in place and the handles point up.
You cut pipe to match the drill barrel, sand the edge smooth, and screw it to a board or directly to the underside of a shelf.
This keeps drills off the bench and easier to grab than digging through a drawer. Mount a power strip nearby so you can charge batteries without unplugging other tools.
You can add small bins or hooks on the same shelf for drill bits, driver bits, and chargers. The whole setup costs very little if you buy a short length of PVC.
7. Lumber Storage
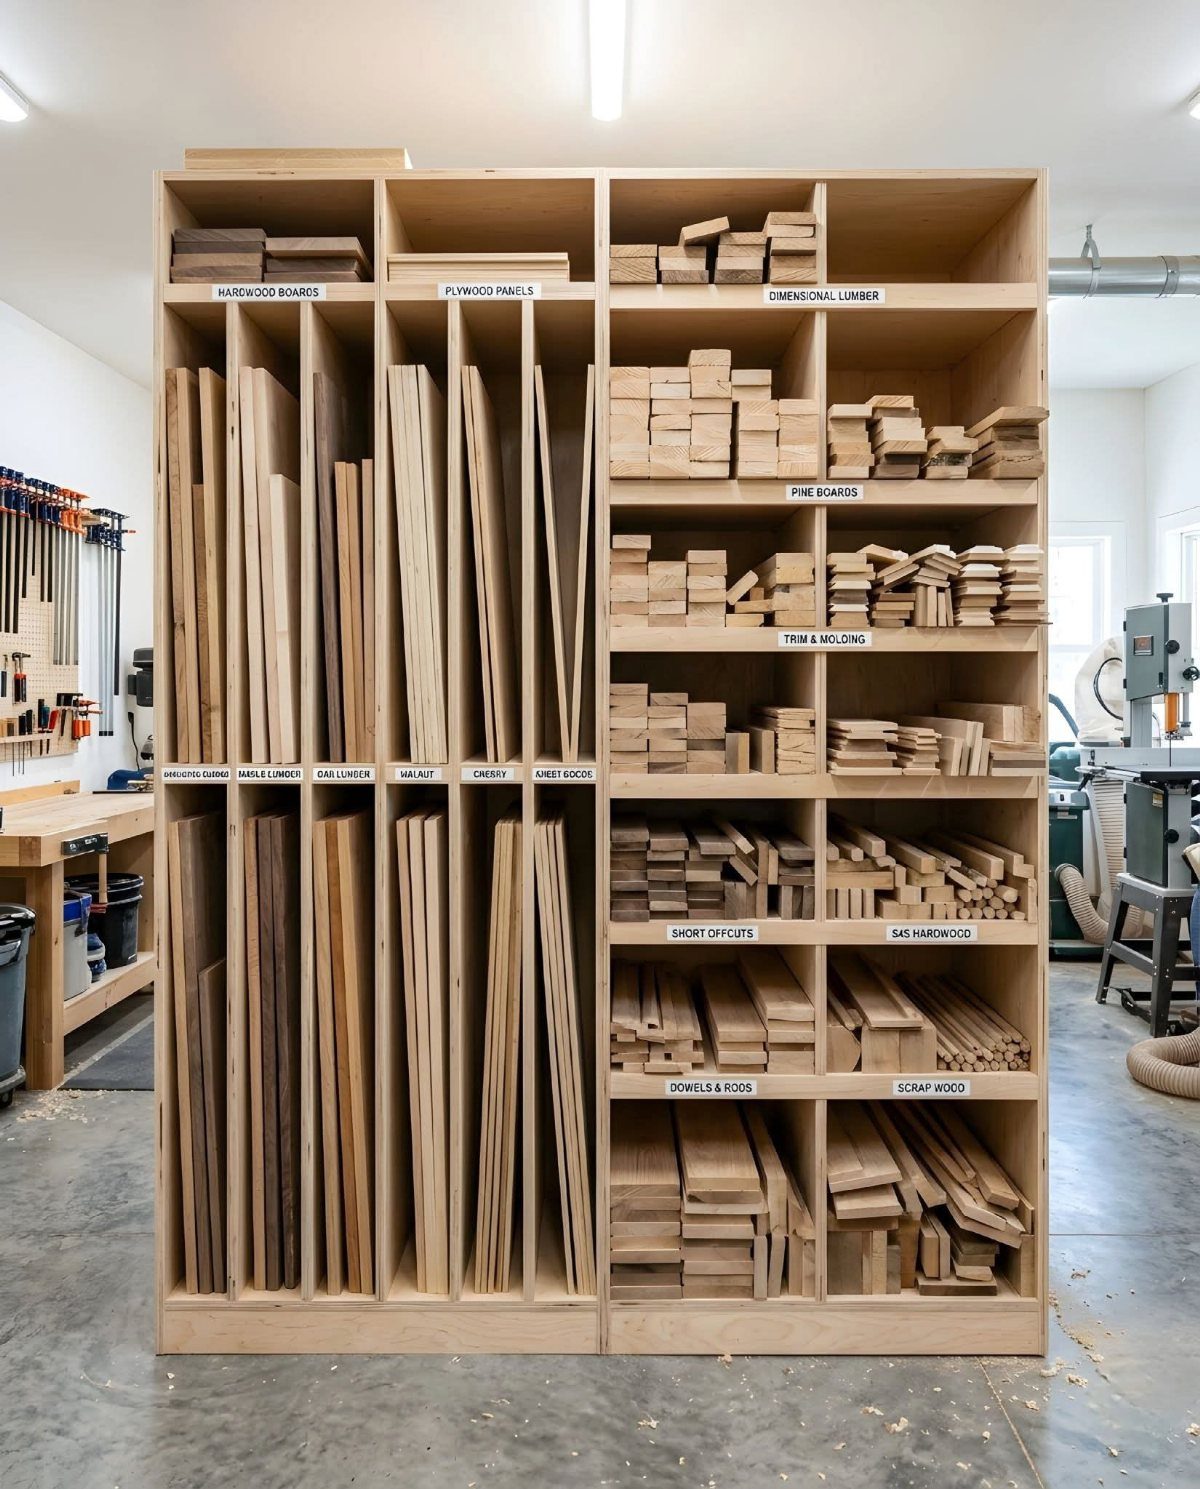
A rack mounted to the wall or ceiling keeps long boards flat and out of the way until you need them.
Brackets or horizontal supports hold lumber by length, so you can slide a piece out without moving the whole stack.
Overhead storage works when you have ceiling height and can lift boards safely. Wall-mounted racks fit tighter spaces and keep everything at eye level.
Build brackets from 2x4s screwed into studs, or buy metal shelf brackets and space them 16 inches apart. This clears the floor and keeps boards from warping against a wall.
8. Organize the Workshop
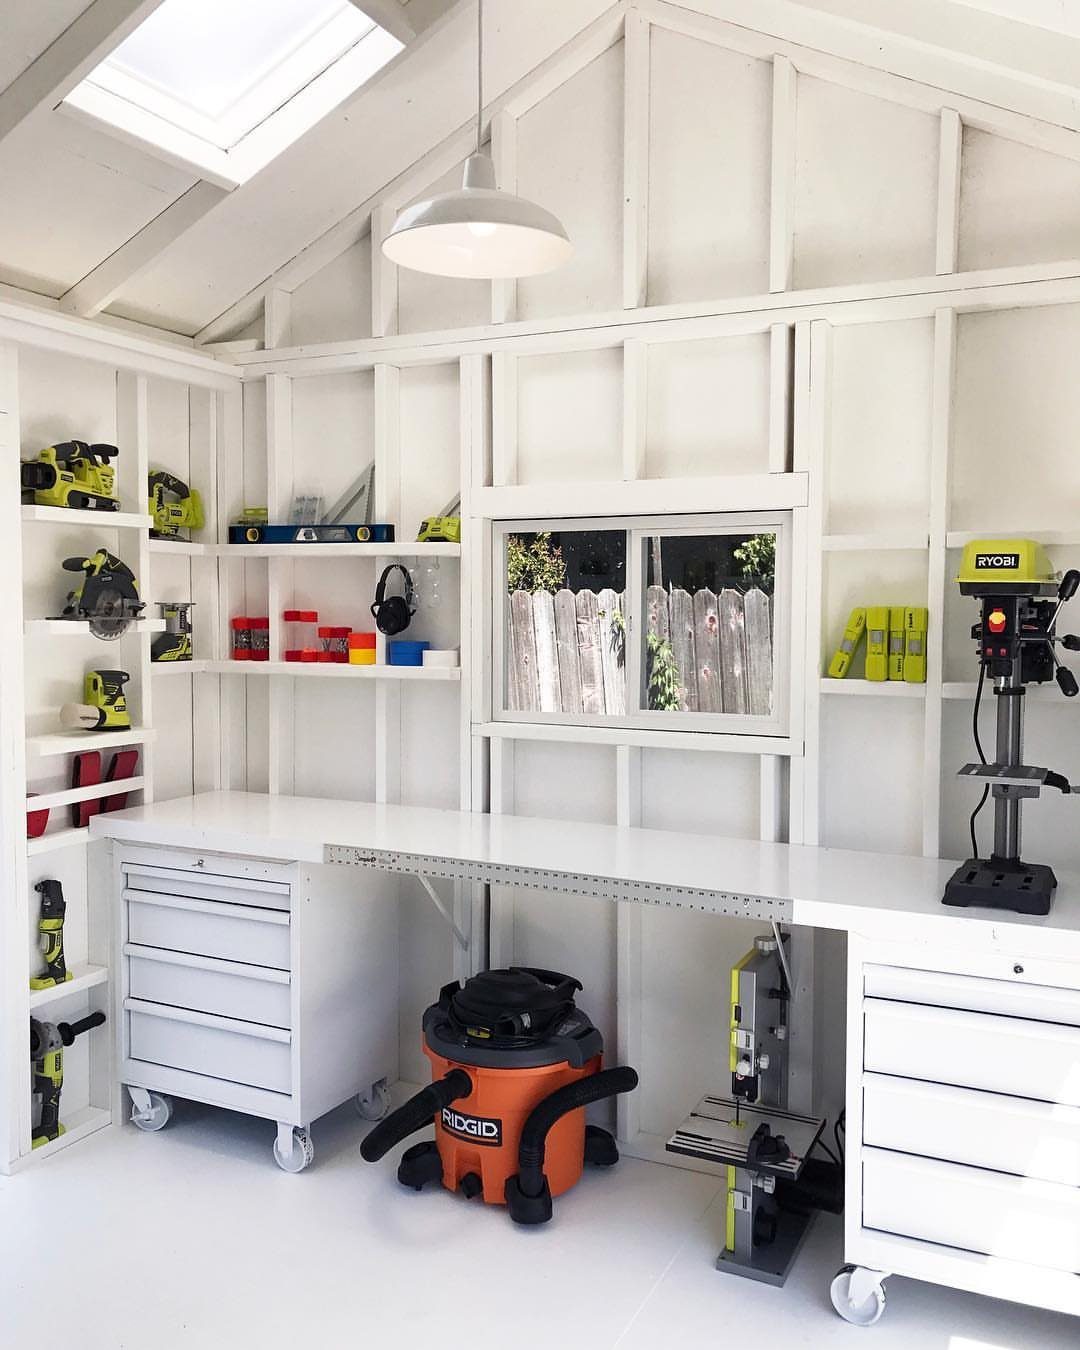
Give every tool and supply a fixed spot so you can find it mid-project and put it back without thinking. Label bins, dedicate drawers to specific categories, and mount frequently used tools where you can reach them from the bench.
Clearing the bench after each project keeps the workspace usable. Store materials on shelves or in labeled containers, and hang extension cords on hooks instead of coiling them in a drawer.
This takes an afternoon to set up but saves time every day after. You spend less time searching and more time working.
9. Miter Saw Station
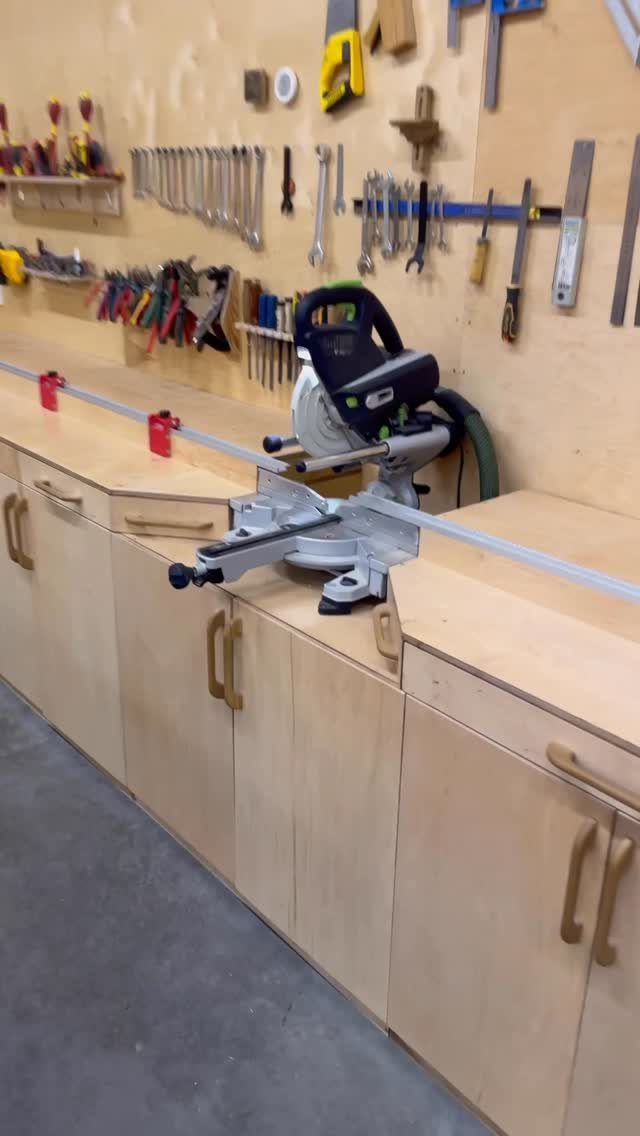
Mount the saw into a bench and add wing supports on both sides so long boards stay level through the cut. The wings can fold down or slide out when you need them, then tuck away to save space.
Build the station to match your saw’s height and leave room underneath for a shop vac or scrap bin. Attach a stop block to the fence for repeat cuts.
This setup costs less than buying a commercial stand and fits the exact dimensions of your shop. Mount tool storage above the saw or build in a drawer for blades and measuring tools.
10. Pegboard Storage
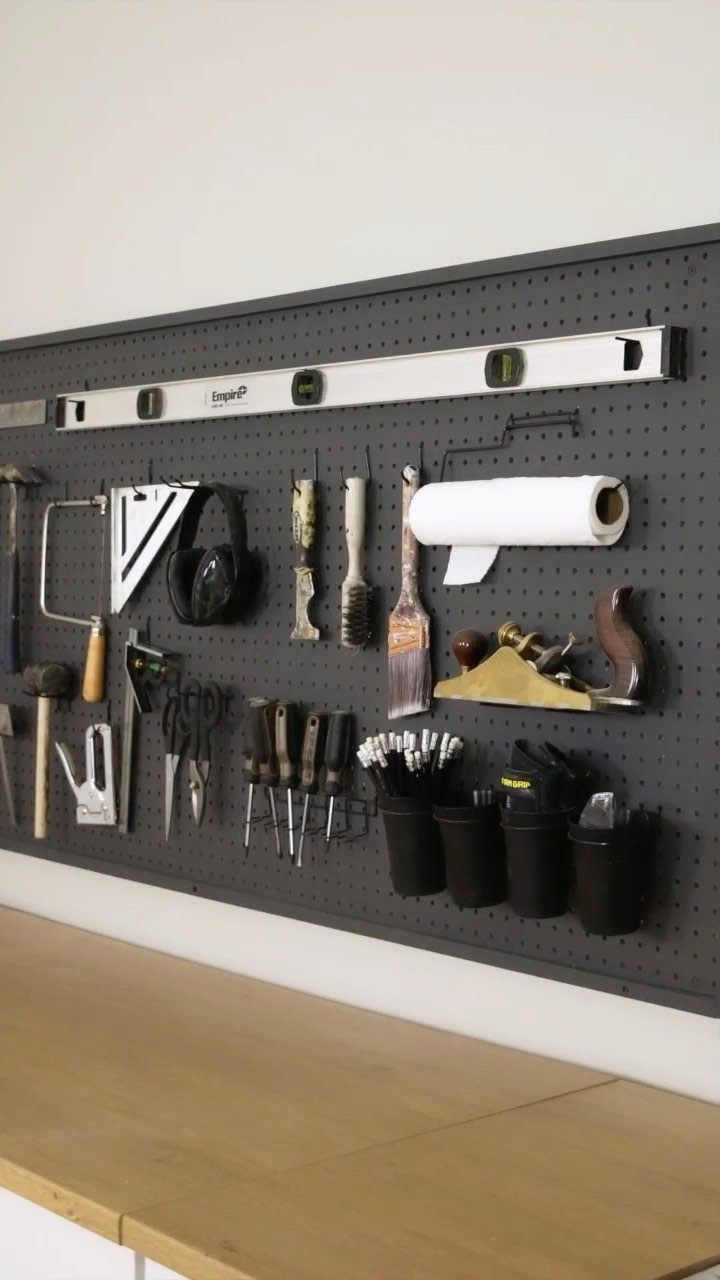
The holes let you rearrange storage as your needs change without drilling new holes.
Pair pegboard with a cabinet or drawer unit below it to hide less-used supplies and keep the workspace looking clean. Paint the pegboard to match the wall or leave it natural.
This system costs very little and installs in an hour. You can buy pegboard hooks at any hardware store or 3D print custom holders if you have access to a printer.
The result is a large workspace that folds up and takes little room to store. You’ll have the whole thing set up in about 60 seconds!
11. Table Saw Station
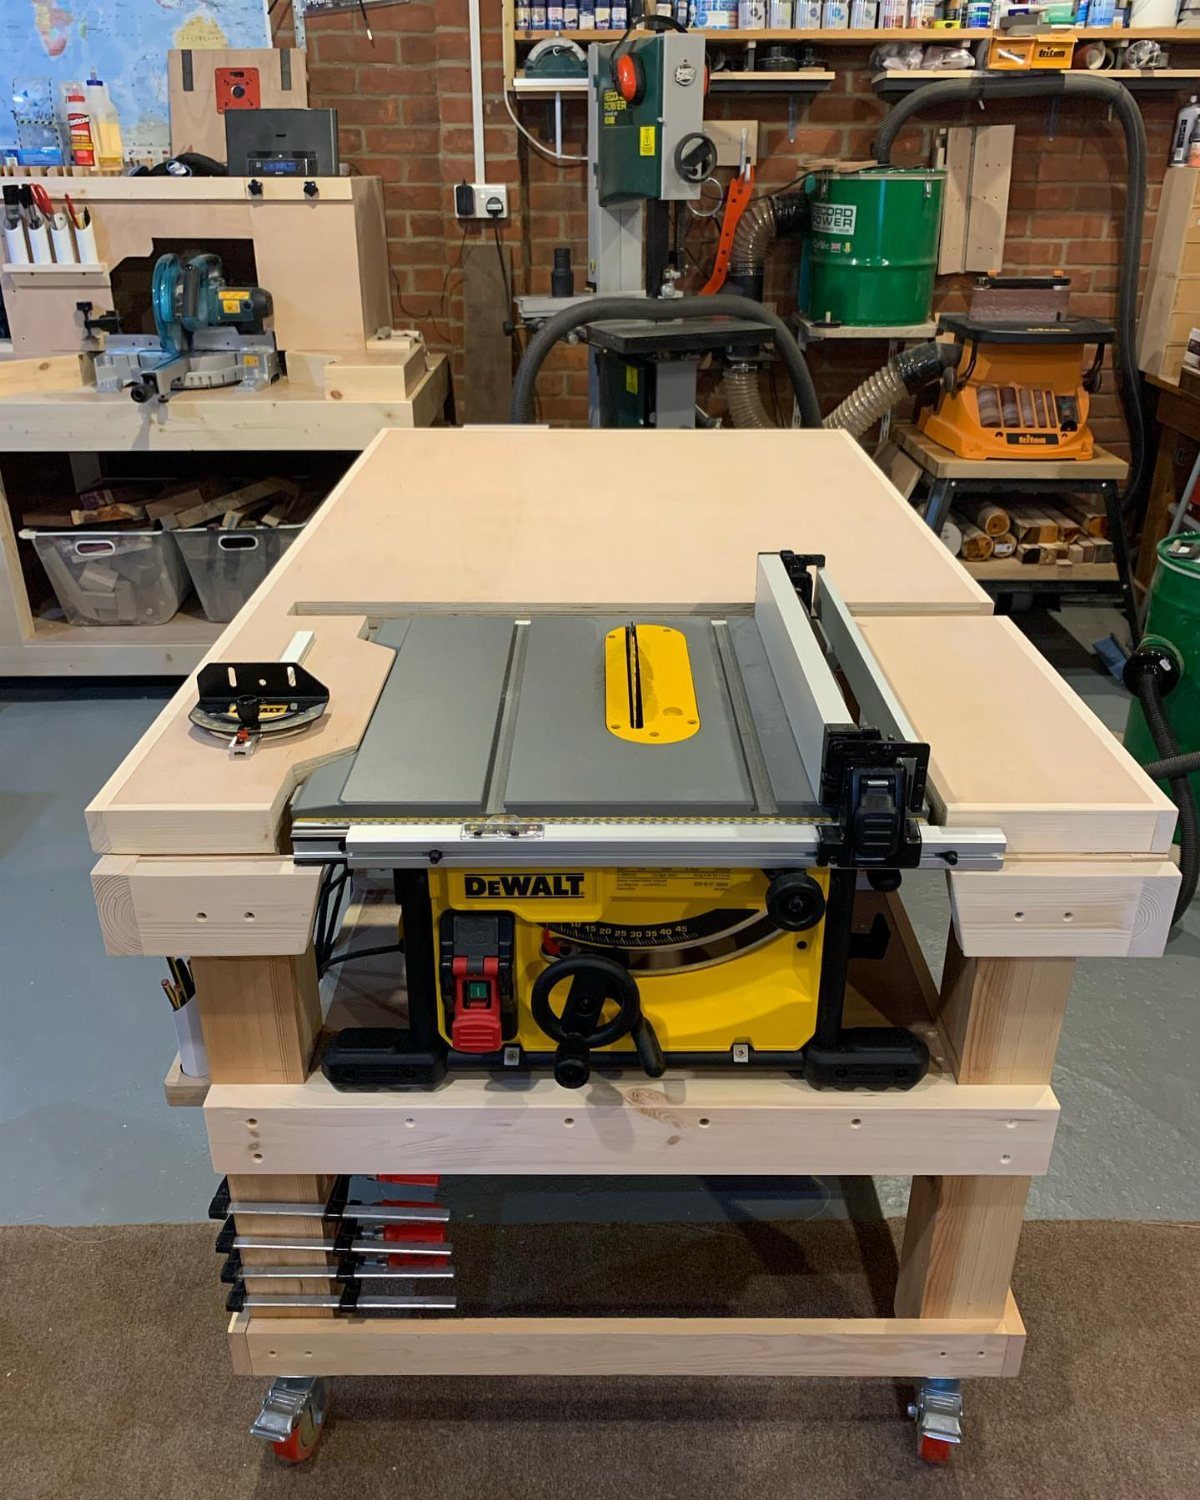
Add outfeed support that folds or detaches, and leave the lower shelf open for storing push sticks, blades, and a miter gauge.
Size the top so the saw sits with clearance on all sides.
Bolt the saw down so it stays put during cuts, and add a power strip inside the frame so you can plug in a vacuum at the same time.
Make Small Spaces Feel Bigger
White walls or any pale shade bounce light back into the room instead of swallowing it. Dark walls soak up light and shrink the feel of the room.
Switch to LED shop lights with higher lumens if the current fixtures leave shadows in corners or over the bench. Mount lights overhead and add a task light above the main work surface.
Keep the workbench and storage sized to the room. A bench that takes up half the floor or cabinets that block the path make it harder to move and see what you have.
Clear the floor between projects. Tools and materials left out shrink the usable space and make the shop feel more cramped than it is.
Mobile tool stands let you roll equipment out of the way when you are not using it, so you have room to assemble things or apply finish.
Frequently Asked Questions
What is the cheapest way to build a workshop?
Build storage and benches from scrap plywood and 2x4s instead of buying pre-made furniture.
A folding workbench mounted to the wall, PVC pipe tool holders, and French cleat storage cost almost nothing if you have leftover materials. Adding casters to mobile stands lets you work in a garage or basement without a dedicated room.
What are some DIY ideas for a workshop?
A miter saw station with fold-down wing supports, a French cleat wall for hanging tool holders you can rearrange, and a rack for clamps made from PVC or scrap wood all save space and cost very little.
A wall-mounted workbench folds up flat when you are done and drops down the second you need surface area. Cubbies for scrap lumber keep each length separate so you can see what you have instead of digging through a heap.
How do I keep my small workshop clutter-free?
Hang or rack each tool where you will grab it automatically, so putting it back takes no thought at all.
Organize scrap lumber by length in open cubbies so you can see every piece instead of leaving it in piles. Wipe down the bench and return materials to labeled bins after each session so you start clean every time.
What storage solutions work best for small parts and hardware?
Small bins mounted on pegboard or under shelves keep screws, nails, and fittings sorted and visible.
Label each bin by size or type so you can find what you need mid-project. Dedicate drawers to specific categories instead of tossing everything into one spot.
How can I make a small workshop feel bigger?
White or pale paint on the walls reflects light instead of soaking it up, which makes a small space feel less closed in.
Bright LED overhead lights plus a dedicated task light at the bench give you even coverage and focused visibility where you work.
Size your bench and shelving to leave walking space, and keep the floor clear between sessions. Casters on tool stands let you roll them aside when the project is finished and free up floor space.