
Replacing a bedroom door yourself takes about half a day and runs under $40 if the frame is sound. The mistake most people make is skipping the backset measurement; buy the wrong one and you are boring fresh holes through a slab you already paid for. Standard backsets are 2 3/8 inches or 2 3/4 inches, and you need to match whatever your new hardware specifies before the drill comes out.
1. Measure the Existing Door and Frame
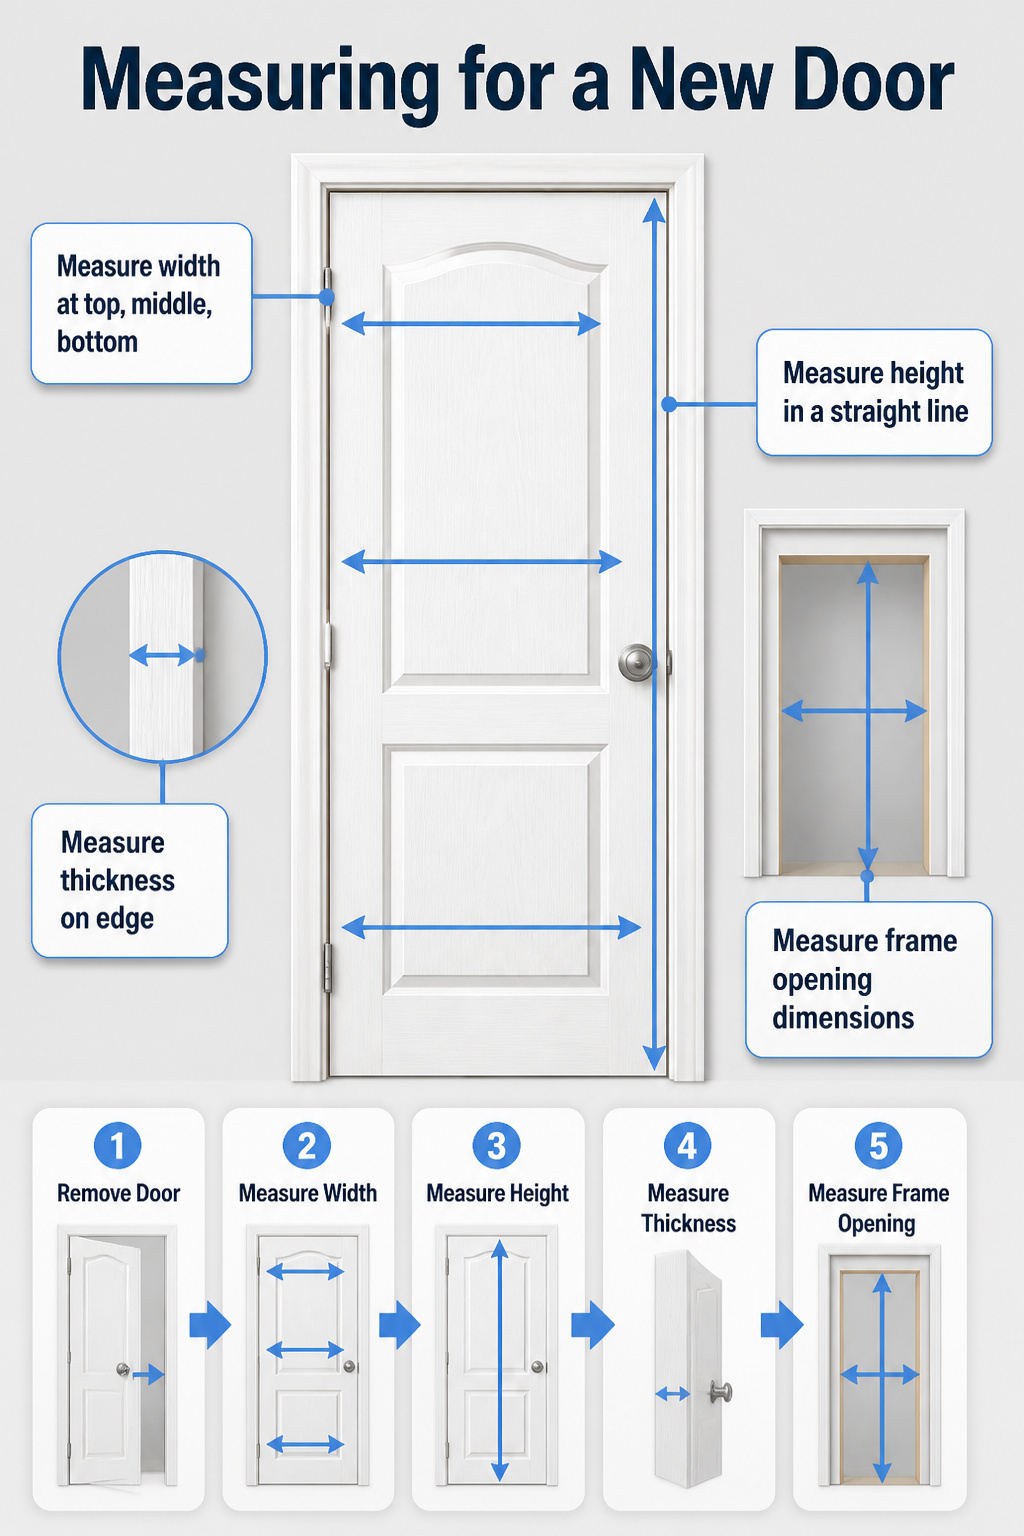
A replacement door has to fit both the old slab and the frame it sat in, so I measure both before I buy anything.
- Width. I run the tape across the door at the top, middle, and bottom. Old doors warp, and the middle often reads differently from the ends. The narrowest number is what matters.
- Height. Top to bottom in one straight shot. Most interior doors are 80 inches tall, but a low ceiling or thick flooring might have shortened the original.
- Thickness. Edge-on, through the door itself. Standard thickness is 1 3/8 inches and this is the measurement that causes the most headaches if it is off by even a fraction. The new door has to sit flush with the jamb or the strike plate and hinges will never line up.
- The frame opening. With the door off, I measure the height and width of the bare opening. A slab replacement needs to match the old door, but it also needs to clear the frame with room for paint and seasonal swelling.
"Remember to account for proper clearance: 1/8 inch on the sides and top, and 5/8 inch at the bottom for flooring or carpet."
That gap at the bottom is non-negotiable if you have carpet or a threshold, and the side clearance keeps the door from binding in humid months.
Write all three door dimensions down. The lumber yard will want height first, then width, then thickness, and "80 by 32 by 1 3/8" is easier to say with the numbers in front of you.
2. Check Swing Direction and Hardware Placement

Before a new door can be prepped, its hardware layout has to match how it will actually open. Stand on the side where the door swings toward you. If the hinge pin sits on your left, it’s a left-hand swing; on your right, it’s right-hand. This matters because big-box doors often come bored for standard placement, and you’ll need to know whether to flip the slab or order one reversed.
The hinge side and knob side have to be noted separately. A door can hinge on the left with the knob on the right, or both on the same side. I sketch a quick floor plan: hinge edge marked with an H, bore hole marked with a K. From the top of the door down to the center of that bore hole, most bedroom hardware lands around 44 inches, though your old door is the only reference that counts.
Backset distance is the same deal. Check whether your latch sits 2 3/8 inches or 2 3/4 inches from the door edge before ordering anything new. If the new hardware specs a different backset, you’ll bore fresh holes rather than try to adapt the old ones.
3. Remove the Old Door
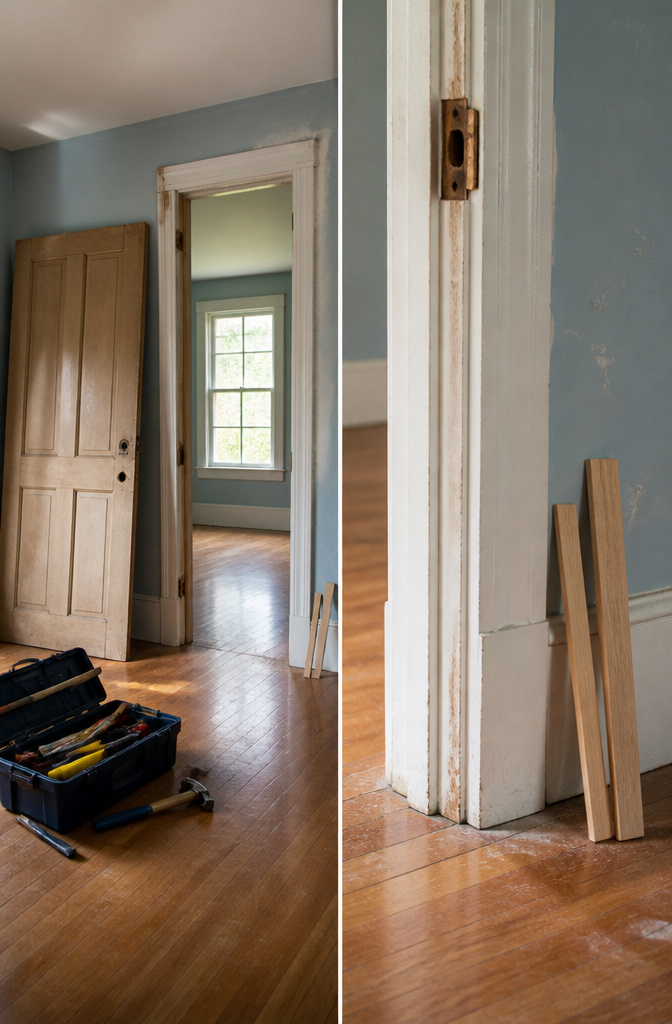
Take the old door off before you mess with anything else. I start at the bottom hinge and work upward, tapping the butt end of a screwdriver up through the hinge pin with a hammer until the pin loosens enough to pull. A helper holding the door keeps it from twisting once the last pin is halfway out.
With the door free and set aside, unscrew the doorknob from both sides, then pull the latch mechanism out of the door edge. Keep the hinges if the screws still bite tight and the leaves sit flat; there is no reason to buy new hardware when the old set works fine. The doorknob can be reused too.
4. Cut the New Door to Size
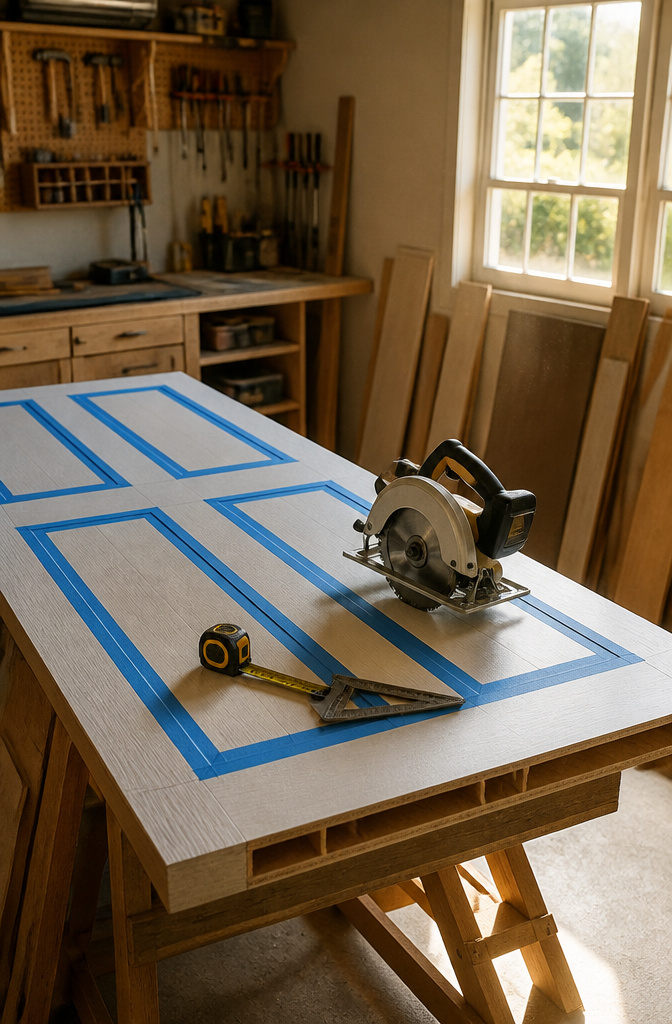
Hollow core doors need a little extra care when you cut them down. The veneer on each face is thin, and the particleboard core inside will fray if the saw blade catches the edge wrong. A strip of painter’s tape laid right over your pencil line keeps the bottom edge clean when you run it through a circular saw with a straightedge guide.
If the door is off by more than an inch, split the difference: take half from the top and half from the bottom so the rail proportions stay balanced. The clearance you’re aiming for is 1/8 inch on the sides and top, and 5/8 inch at the bottom to clear flooring or carpet without dragging.
For width, a hand plane is the cleaner tool if you only need to shave a little. A sander works too, but it is slower and the dust travels. Either way, trim the hinge side; the latch side already has the bevel and the bore hole spaced where you need them.
5. Mark and Cut Hinge Mortises

- Set the new door on sawhorses and lay the old one on top, edges flush, to transfer hinge locations with a combination square — a utility knife gives a cleaner cut line than pencil for the mortise outline.
- Stand the door on edge with hinge layouts facing up. The hinge leaf must sit flush with the door edge; anything proud or recessed will bind or gap.
- For speed, a door hinge template and router cut cleaner mortises with less guesswork. Clamp the jig, set router depth to match hinge thickness, and check the swing direction before powering on — it does matter which way the barrel faces.
- No router? A sharp one-inch chisel works fine. Score the outline with a hammer tap, then make close relief cuts the depth of the hinge. Skew the chisel low to pop out waste wood and test-fit as you go.
- If you overshoot the depth, shim behind the leaf with thin cardboard or veneer. Better to creep up on flush than dig too deep and fight a sagging door later.
6. Install the Doorknob and Latch

The door slab probably arrives without any hardware holes, so you will need to drill them yourself. A door latch installation kit, basically a metal template that clamps to the door edge, saves a lot of guesswork. Most kits come with the hole saws you need and a guide for the backset, which is the distance from the door edge to the center of the knob. Standard backset is either 2 3/8 inches or 2 3/4 inches; match whatever your new hardware specifies, or transfer the measurement from the old door if you are reusing it.
A 2 1/8-inch hole saw cuts the doorknob hole, and a 7/8-inch spade bit handles the latch bore. Drill the knob hole from both faces to keep the wood from blowing out where the saw exits. The latch hole goes into the door edge, then you chisel a shallow mortise so the latch plate sits flush. Screw the latch in place, fit the knobs through from each side, and tighten.
The strike plate on the frame is last. Hold it up to the closed door so the latch tongue meets it square, mark the edges, chisel a shallow seat, and screw it down. If the new backset does not match the old one, you will end up with a ghost hole in the jamb; filling it with wood putty before you paint is easier than staring at it for the next five years.
7. Hang the New Door

Set the door into the opening with a couple of shims underneath to hold it at working height. The gap along the top and sides should look roughly even, about an eighth of an inch. If the frame is out of plumb, shim behind the hinges before you screw them in so the door hangs true and does not swing open or shut on its own.
- Hold the door against the frame so the hinge leaves on the door line up with where they will sit on the jamb.
- Ask someone to keep the door steady while you mark the hinge locations.
- Drill pilot holes for each hinge on the frame side first so you know the door is positioned correctly.
- Fasten the hinges to the jamb, then adjust the shims until the door swings freely.
Check the reveal around the whole door as you go. Tighten everything once it looks right.
8. Test and Adjust
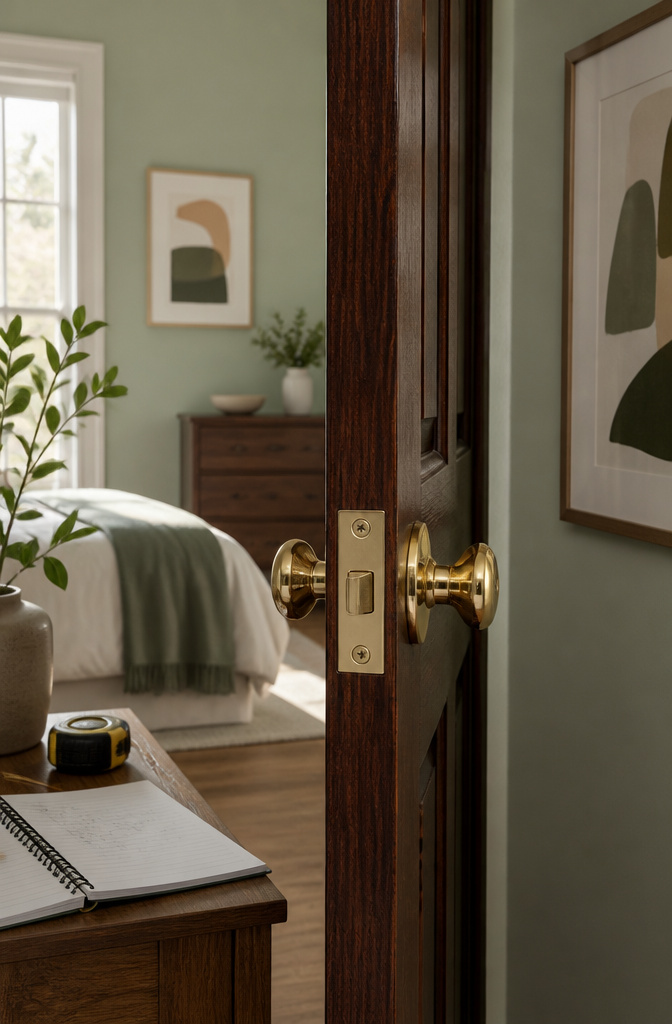
A door that looks straight but fights you every time you use it is worse than the old one was. I learned that the hard way after painting a slab before I tested it, then finding out the latch missed the strike by a quarter inch. Now I swing every new door twenty times before the brush comes out.
Here is what to check and the quick fixes that save a reinstall:
- Swing the door through its full arc. It should drift closed on its own from halfway with no squeak or catch. If the edge rubs the jamb, mark the high spot in pencil, then remove the door and plane or sand that edge. Go slow — an eighth inch too much becomes a draft gap.
- Test the latch engagement. The dead bolt or latch should drop into the strike plate without pushing or rattling the knob. If it hits high or low, loosen the strike plate screws and shift the plate where it needs to be, then retighten. For tiny misalignments, you can bend the strike plate tab slightly with pliers instead of moving the whole plate.
- Check hinge depth if the door binds at the top or bottom corner opposite the hinges. A hinge set too shallow pinches that corner; too deep and the door scrapes the jamb on the hinge side. Unscrew the offending hinge, add a strip of thin cardboard behind it for more depth, or chisel the mortise a hair deeper if it sits proud. Test after each tweak.
- Step back and look at the reveal. The gap between door and jamb should run even up both sides and across the top. A tapering gap means the frame itself is out of square, and you’ll need to adjust hinges or plane to compensate. Catching this before hardware holes are drilled saves filling and redrilling later.
Tools and Materials

Having the right tools on hand keeps a door swap from turning into a weekend-long hardware-store marathon. Here’s what gets the job done:
- Drill/driver — for pilot holes, driving screws, and whatever surprises the old frame holds
- Circular saw — when the new slab needs trimming to fit an existing frame
- Router or chisel — hinge mortises come out cleaner with a router, but a sharp chisel works fine if you’re patient
- Screwdrivers — both Phillips and flathead, for latch plates and old hardware that fights back
- Tape measure — measure three times, curse zero times
- Chisel set — aside from hinges, you’ll want these for strike-plate fitting
- Safety glasses — sawdust in your eye at 9 p.m. ruins the whole project
- Door latch installation kit — the template and hole saws save you from freehanding the doorknob holes, which is where most first-timers end up with a splintered door face
Materials to grab: hinges that match your old screw pattern (or be ready to move the frame-side location), a doorknob and latch set, wood shims for plumb, and wood filler if the old hardware leaves you with visible holes.
Hollow Core vs. Solid Core

Most interior doors in hardware stores are hollow-core, built from thin wood or fiberboard panels over a cardboard honeycomb. They run $50–$75 and weigh almost nothing, which makes them easy to hang solo. The downside is sound: voices, TVs, and hallway footsteps travel straight through.
Solid-core doors cost more, typically $100–$500, and feel twice as heavy because they sandwich MDF around a dense foam or composite center. That mass is what blocks noise, and for a bedroom, that matters more than it does for a closet or pantry.
| Hollow-core | Solid-core | |
|---|---|---|
| Price per door | $50–$75 | $100–$500 |
| Weight | Light, easy to hang alone | Heavy; extra set of hands helps |
| Sound blocking | Minimal | Noticeably better |
I went with hollow-core for my linen closet and solid-core for the bedroom door we use every night. The visual difference is zero once they are painted.
Pre-Hung vs. Slab Door
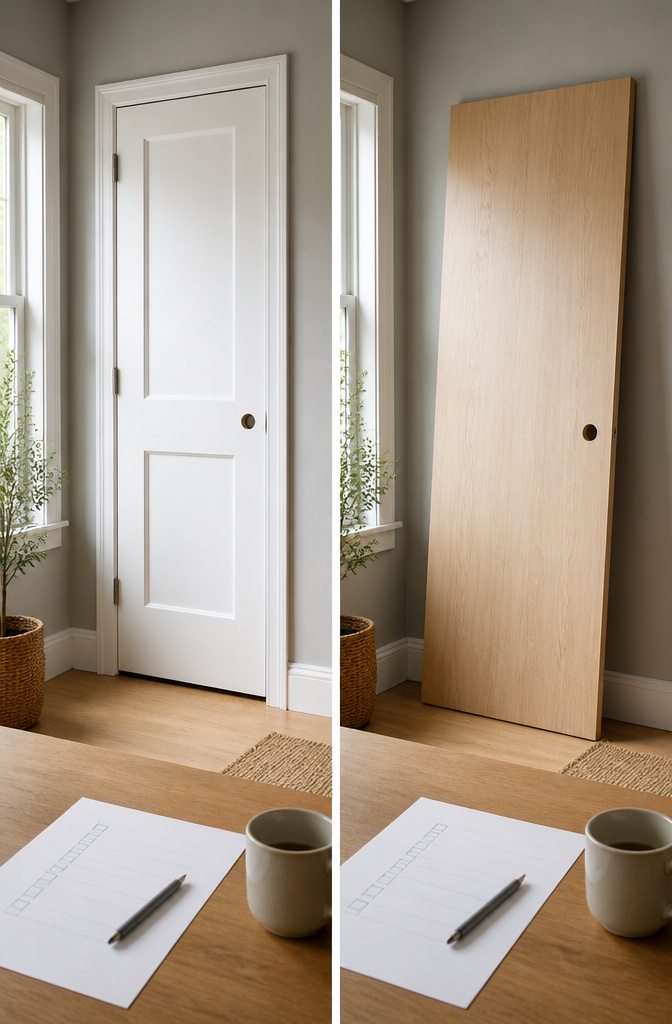
Your first decision is pre-hung or slab, and it decides how much weekend this project eats.
A pre-hung door arrives as a complete unit: the door, hinges, and frame all assembled. It is the right choice when your existing jamb is cracked, crooked, or water-damaged, or when you are flipping the door to swing the opposite way. The tradeoff is time. You will pull trim from both sides, wrestle the whole frame into place, shim it plumb, then reinstall and paint trim.
A slab door is just the door itself. It assumes your frame and hinges are sound, which they often are in a house built after the 1970s. You only have to align the hinge locations and bore for the knob. The door itself runs under $40 at most home improvement stores. The catch is the hardware prep: no hinge mortises, no latch hole, no strike plate cutout. You are measuring and cutting those yourself, or finding a ready-to-hang slab that has them pre-routed for your specific swing direction.
I would not bother with pre-hung unless the frame is actually damaged. Ripping out a working jamb just to replace a door is extra work for no gain. For a standard bedroom swap on a Saturday, slab wins.
| Pre-Hung | Slab | |
|---|---|---|
| What you get | Door + frame + hinges | Door only |
| Best when frame is | Damaged or wrong swing | In good shape |
| Hardware prep | Done | You bore and mortise |
| Trim work | Remove and replace both sides | None |
| Typical cost | Higher | Under $40 |
Door Styles and Hardware
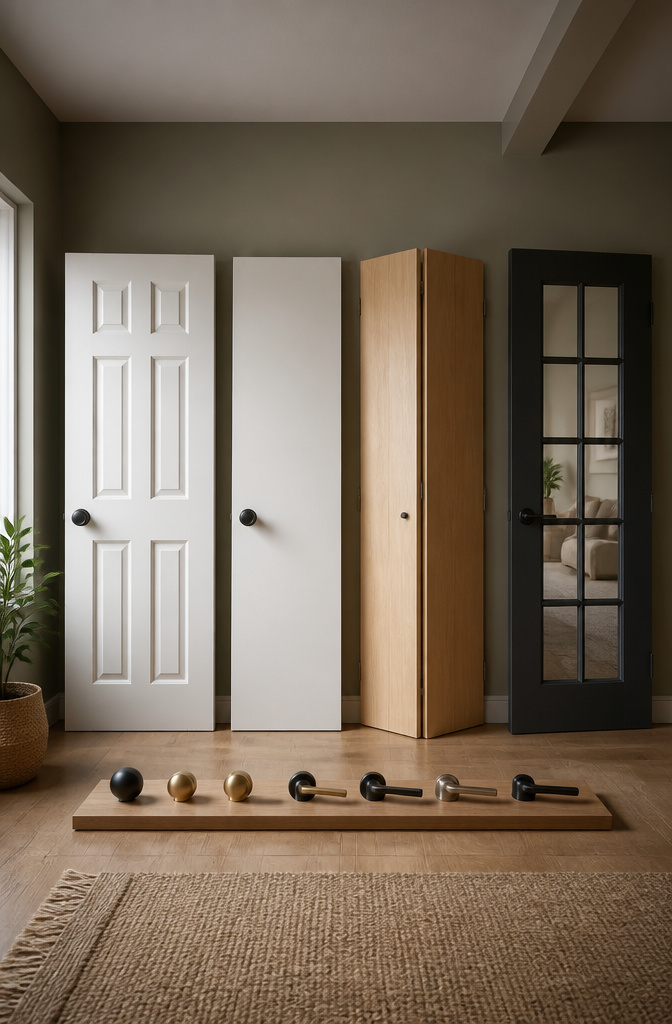
Four basic styles tend to show up for bedrooms, and each handles the job a little differently.
- Panel doors (the ones with raised or recessed rectangles) are the default most people picture. They hide sound better than a flush door, and they pair easily with older houses or rentals where the trim already has some detail.
- Flush doors read as modern and flat, and they are usually the cheapest option. The tradeoff is noise; there is nothing inside a hollow-core flush door except a thin veneer over cardboard or fiber filler, so footsteps and hallway talk travel straight through.
- French doors work only where you have wall space for two swinging slabs. They are lovely for main bedrooms that open to a bathroom or a view, but they eat floor space you might need for a dresser.
- Bifold doors fold back on a track. They save swing space for a closet inside the bedroom, though they rattle more over time and the hardware wears faster than standard hinges.
For hardware, levers are easier on your wrists if your hands are full of laundry, and they look a touch more current. Knobs are cheaper and harder to snag a sleeve on in a narrow hallway. Hinge finish should match your knob or lever; satin nickel with satin nickel, oil-rubbed bronze with oil-rubbed bronze. Mixing metals in a small room looks accidental, not eclectic.
A solid-core panel door with halfway-decent hardware adds weight and quiets a room far more than a hollow-core slab with premium knobs ever will.
Frequently Asked Questions
How much does it cost to replace an interior door?
A hollow-core slab runs about $50–$75, while a solid-core door costs $100–$500. Pre-hung units cost more than slabs because they include the frame and hinges already installed. Reusing your old hinges and doorknob keeps the price at the low end of the range.
Can I replace an interior door myself?
Yes. Hanging a slab door takes two to six hours and requires only basic tools like a drill, chisel, and tape measure. The article walks through each step from measuring the old door to adjusting the final fit, and a helper mainly comes in handy for holding the door steady while you mark hinge locations.
What type of door should I choose?
Pick hollow-core for closets and tight budgets, or solid-core for bedrooms where you want less noise coming through. Panel doors match traditional trim, flush doors read more modern, and French or bifold styles work only when you have the floor space for them. The door should also match your existing frame’s swing direction and backset measurement.
How do I measure for a new door?
Record the width at top, middle, and bottom, then use the narrowest figure. Height goes top to bottom in one shot, and thickness should hit 1 3/8 inches for a standard interior door. Write the numbers in height-width-thickness order, and remember to leave 1/8 inch clearance on the sides and top plus 5/8 inch at the bottom for carpet or flooring.